May 272011
 

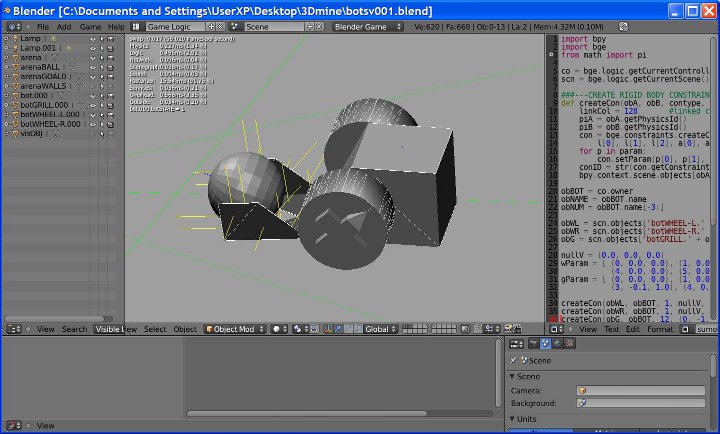
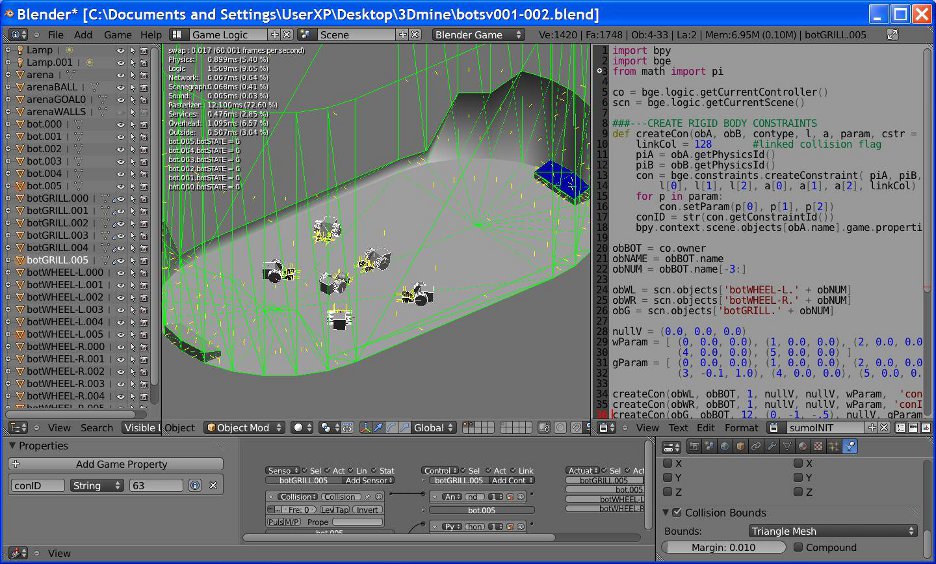
Trying to learn more about making controllers for actual robots, but the bge is cheaper than buying components. Thought I’d start simple so I made a little differential drive robot and some control stuff. Wanted to spice it up so I gave him a little scoop so he could pitch a ball up.

For now the drive control is completely retarded and the target (ball) sensor is arbitrary so it doesn’t mimic a real sensor like I meant it to. Working on the motor controls more right now.

.blend file (b2.57b)

The bot gets the ball, then goes to the ‘goal’, then pitches the ball up. No aiming yet, doesn’t even work real hard to point in the right direction. Sort of a spaz shot.

Actually this was an offshoot of some problems I was having while trying to make a 0G ‘satellite’ type bot. So I thought I’d limit myself to 2D for now.

May 102011
 

I don’t even know…

Okay, I guess I do know, I made it.
Why?
I don’t even know.
How?
bge and a simple gravity script of course.
wanna hear it? here is go!

import bge
from mathutils import Vector
co = bge.logic.getCurrentController()
scene = bge.logic.getCurrentScene()

obList = []
for o in scene.objects:
    if o.__class__ == bge.types.KX_GameObject:
        obList.append(o)

def calcGrav(obA, obB, G):
    m1 = obA.mass; m2 = obB.mass
    m = m1*m2
    loc1 = obA.worldPosition
    loc2 = obB.worldPosition
    v = loc1 - loc2
    r = v.length
    F = G * ( (m) / (r*r) )
    return -v * F

def loopGrav(obs, G):
    for obA in obs:
        fV = Vector((0,0,0))
        for obB in obs:
            if obA != obB:
                fV += calcGrav(obA, obB, G)
        obA.applyForce(fV, False)

loopGrav(obList, 1)

keyb = bge.logic.keyboard
if keyb.events[bge.events.ZKEY]>0:
    for ob in obList:
        ob.applyTorque(Vector((0,0,50)), False)

if keyb.events[bge.events.XKEY]>0:
    loopGrav(obList, -2.5)

if keyb.events[bge.events.CKEY]>0:
    loopGrav(obList, 15)


HOW TO:
– copy/paste script into blender text editor.
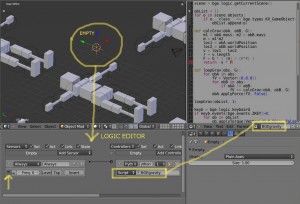
– setup an EMPTY object with logic nodes as shown.
– change ‘Engine’ from ‘Blender Render’ to ‘Blender Game’
– set World>Physics>Gravity to 0.0 (under Bullet)
– create some objects.
– hit ‘p’

This script will (should/might) make all meshes in the scene obey Newton.

Apr 132011
 

Blender.org Tracker –  BA Thread –  BlenderNation Article

UPDATE – 01.05.13 – v0.2.7
FIXES:
-Fixed the issue that prevented the addon from loading in Blender 2.63+. Also fixed a problem with the makeMeshCubes function.

UPDATE – 02.14.13 – v0.2.6
ISSUES:
-An API change has made the addon not load. It has something to do bpy.scene.context. I’ll look into it when I have a chance. Fortunately the script will still run as a regular script. If you want to use it, just use the .blend file below or just load it in the text editor and hit run.

UPDATE – 06.20.11 – v0.2.6
FIXES:
-Moderate speedup.
-Cubes output scale/loc corrected.
-Tooltips added.
NEW FEATURES:
-Container insulators: Arbitrary mesh shapes can be used as insulator/cloud objects. Still quite imperfect though. May slow down generation. Best for simple containers; bowl, cup, bottle. A spiral pipe would not work well. Must have rot=0, scale=1, and origin set to geometry.
-Mesh origin objects:. If the origin obj is a mesh, vert locations will be used as initial charges. However this will disable multi-mesh output. May slow down generation.

UPDATE – 05.08.11 – v.0.2.5
NEW STUFF:
-added ‘single mesh’ output option. use this mesh with build modifier to ‘grow’ lightning in animation.


This is a partial implementation of the algorithm presented in the paper ‘Fast Simulation of Laplacian Growth’
and some concepts borrowed from Fast Animation of Lightning Using an Adaptive Mesh

It currently uses simplified spherical boundary conditions and calculates potential at candidate growth sites using FSLG-Eqn. 9
To be properly influenced by an environment map of charges and
allow artistic manipulation of growth patterns I will need to
implement FSLG-Eqn. 15, which I don’t fully understand yet.

As compared to the simulation times reported in the paper, there is no comparison. This is not fast. They report 2000 particles in 6 seconds. So far 1000 particles will take a few minutes.

A good chunk of the reason for the slowness is the weighted random choice function. Another big reason is it’s python not c. Probably the biggest reason is that I’m a hack and I barely cobbled this together so it’ll take time to get it optimized.

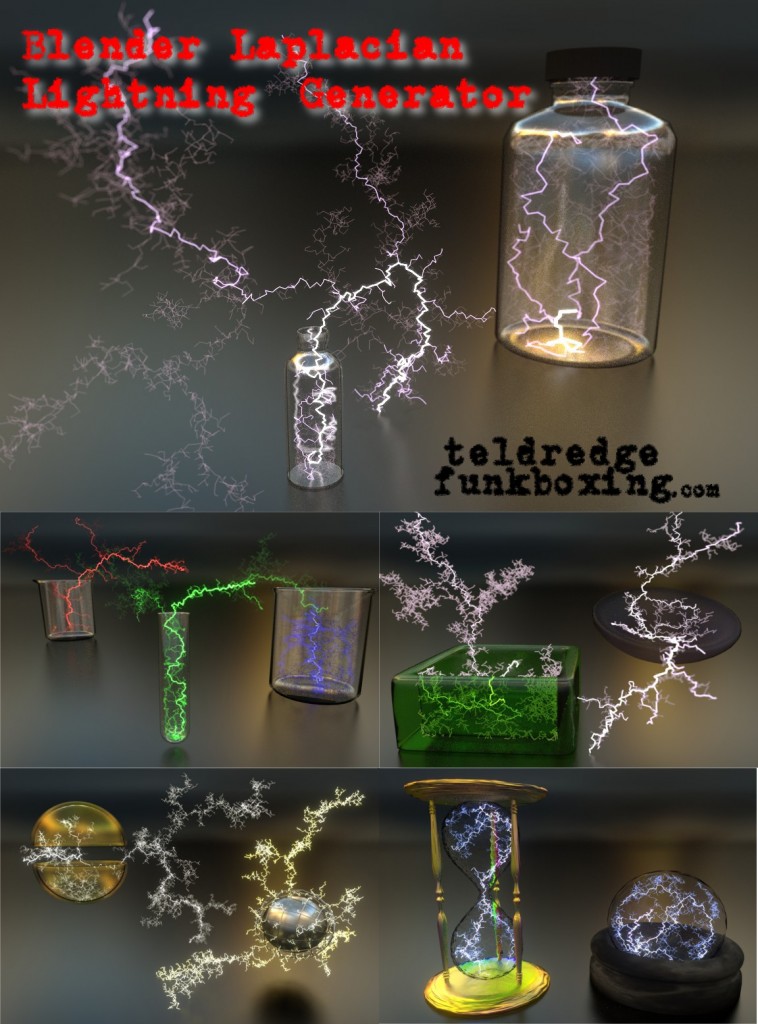
Anyway I think it’s better than making lightning by hand, or at least might give you a good base mesh to mess with. So it might be useful to someone. I’ll keep working on it.

DIRECTIONS:
you can use the example .blend file or load as an addon.

BLEND FILE:
-Download .blend* file, instructions in file. *right-click, save-as [works with Blender 2.5 – 2.62]
-Download .blend* file, instructions in file. *right-click, save-as [works with Blender 2.63+]

ADDON:
-Download script (object_laplace_lightningv026.rar) [this version of the addon only works with Blender 2.5 – 2.62]
-Download script (object_laplace_lightningv027.zip) [this version of the addon works with Blender 2.63+]
-Uncompress, Place in in Blender ‘addons’ folder:
Blender install folder/2.6x/scripts/addons/
-Enable addon
UI will be in >View3D>Tool Shelf>Laplacian Lightning (object mode)

-Hit ‘generate’ – try w/ defaults

-Play with the settings, try again.

iterations – how many times to run loop (number of particles) grid unit size – size of a ‘cell’ in BU
straighness – user variable to control branchiness/straighness
start charge – origin point
use ground charge plane – hacky method of simulating lightning strike. Terminate loop if lightning hits ‘ground’.
ground Z co – z coordinate of ground plane
ground charge – charge of ground plane
mesh, cube, voxel – visualization outputs
mesh – creates vert/edge mesh from data
cube – creates cube objects from data
voxel – creates a 64x64x64 voxel data file from data outputs to ‘FSLGvoxels.raw’ (experimental)

Hope you enjoy. Send me a link to some renders if you use it! Especially if you get >10,000 particles.

Apr 122011
 

I started on a script to allow real time mocap in Blender via. a socket connection to Brekel Kinect

I got it about 60% working. The problem is bizarre. Legs, torso, and head track fine, but shoulder and elbow rotations are completely out of whack.

I posted asking for help on Blender Artists and didn’t get any responses.

Got side-tracked on some other things but I thought I’d stay up-to-date and post what I have here in case it’s just what you’re looking for, or close enough to get you on the right track. If so- let me know how it goes!

Here’s the .blend file.

Just run Brekel-Kinect (I use v.40) and turn NITE tracking on. Then load this .blend and run the game (‘P’) (make sure GAMEempty BOOL game property is ‘FALSE’ or server will not start)

Mar 312011
 

[FILES UPDATED TO WORK WITH 2.57b]

.blend files (2.57b – r36339) right-click, save-as
Uno/Deuce/Pogo
Rigid Body Walking Machines
Extras

link to BA thread

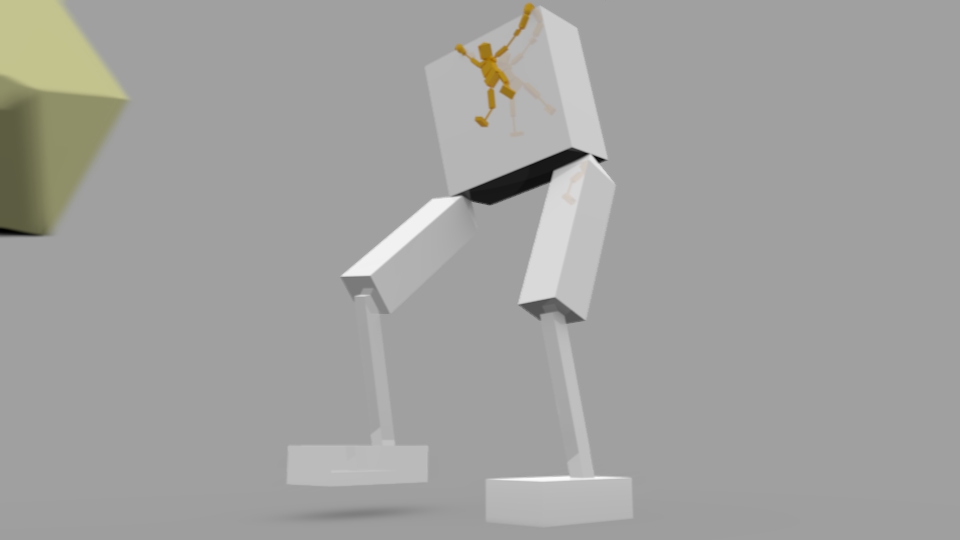
This is a collection of studies and experiments in rigid body dynamics and pose control using Blenders game engine and python API. All the animation data was generated in real-time simulations (with the exception of the camera which was keyframed and the cloth which was not real-time)

———NON-BLENDER/3D NERD BRIEF———
These animations are essentially of 3d games. The games have gravity, inertia, object collisions, joints connecting objects and ranges for those joints. Each scene was created by setting up a game, and running it several times (sometimes with simple keyboard interaction which pushed or propelled a projectile). The animation data (the rotation and location of each object) was recorded during each game. The most amusing or interesting results were saved, one was selected to be rendered later.
Camera moves were keyframed (traditional/manual 3d animation) for more interesting views. Hours and hours of painful rendering, and voila.

The rectangular biped and monopod characters are seperate programs within each game. Each has the ‘joints’ and ‘muscles’ of a simplified human. The joints are functions that limit the location and rotation of an object (such as a hip) with respect to another object (such as a torso)

The muscles are ‘PD’ functions (proportional-derivative). At each frame the functions return the torque value that must be applied at a given joint to attempt to reach a given ‘pose’. These actually behave more like damped-springs than muscles.

The poses are defined by a ‘finite state machine’. This is a set of inputs and instructions that tell the robot (or a part of the robot) what state, or pose, it should try to be in. For example, the robots current ‘state’ is its left leg is down (‘stance’ state) and its right leg is swinging (‘swing’ state). The robot detects that its swing leg is now ahead of the stance leg and has made contact with the ground. The state machine will now instruct the stance leg to change to the swing state, and vice-versa.

There are other states that determine what to do when the robot is off-balance (center-of-mass outside of center-of feet) and when the legs become crossed. The monopod has other sensors and states that determine if it in at a safe position to flip or if it should just hop (sometimes comes up wrong), and compensates for linear velocity (tries to slow forward momentum after each jump)

The weird glowing red walking machines are another thing entirely.

These are not programs, they are structures ‘built’ in a game that work pretty much like they look like they work. The only ‘animation’ that is done is that their ‘motor’, red glowing thing is rotated by magical hogwarts force. Everything else is a result of that motion. Axles, cranks, rods, levers, etc, do what you’d expect them to do (though with infinite strength and sometimes invisible and/or impossible connections)

The designs are more or less lifted. The hexapod and ‘toothpicks’ are the only ones I didn’t actually look at internal blueprints of something for, and those are clearly not original mechanisms either.

There are a few other tests and experiments that worked their way into this collection but I won’t go into detail about those. If you’re curious- ask. Better yet, look it up. Better still, figure it out yourself.

———FOR THE BLENDER/3D INCLINED———

—POSE CONTROLLERS—
Simple pose controlled ‘robots’ were created in Python after studying the work of Ari Shapiro (DANCE Dynamic Animation and Control Environment) and Philippe Beaudoin (SIMBICON/Cartwheel-3d). Primarily
-Generalized Biped Walking Control. Siggraph 2010
-Composable Controllers. – Siggraph 2001
-Controller Development. – Siggraph 2007

Not surprisingly, most of the brilliant methods put forth in these papers are absent in these programs. These are just ‘steps’ towards gaining a better understanding of dynamic character control concepts.

These robots are finite state machines with proportional derivative controller ‘muscles’. They also respond to feedback provided by center-of-mass, foot contact with ground, swing/stance foot positions relative to center of mass and torso heading. Uno knows the ‘uprightness’ vector between the feet and torso. Deuce can also detect if his feet are crossed, and will attempt to correct by standing on one leg and swinging the front leg outwards. They also have threshold ‘KO velocities’ beyond which they will go limp. This should be from acceleration but this works for now.

These robots run independent copies of their controllers so they can be copied for rudimentary crowd simulation. Their individual ‘heading goal’ is controlled by a ‘game property’ string in the robots ‘torso’ object. The goal can be another objects name, or use the prefix ‘a:’ then an angle (in degrees). Do not change the object names or numeration after copying, the program depends on these.

DEUCE – v.0001a of my ultimate goal of creating a real-time interactive break-dancing/kung-fu-master/soccer-playing/gymnast pose controller. What the heck- let’s throw in piano and chess-playing too. 15 DOF: Torso-XYZ, Hips-XYZ, Knees-X, Ankles-XY. Next version I will probably add 1-DOF toes and change Ankles from Pitch/Roll to Pitch/Yaw. I plan to utilize more of the SIMBICON methods and I am also looking at work on ‘genetic algorithms’ for evolving different controller params.

UNO – Created as a study for balance feedback. Eventually learned to hop, then to flip (sort of). Uno also alters his hip angle to compensate for linear velocity to try to stabilize his momentum after each jump. 9 DOF: Same configuration as Deuce

POGO – First study of proportional derivative controller. Just a collision sensor that triggers an upward force. Uses PD to angle the peg to compensate for linear velocity on the next bounce.

—RIGID BODY CONSTRAINT WALKING MACHINES—
Obviously a ‘dumber’ approach to walking animation, though strangely visually appealing. It started with a goofy thought, and ended with hours and hours of trial-and-error learning how bge handles various constraint configuations. There is a lot more that could be done with this technique. These are just a few setups.

THEO – based on Theo Jansen’s ‘Jansen Mechanism’
GOODWIN – based on W.F. Goodwin’s – ‘Automatic Toy’
NOGOODWIN – based on W.F. Goodwin’s – ‘Horse Toy’.
HEX – a semi-original design derived from observations of several 6-legged robot designs.
LE STECCHINI – based on those ubiquitous wind up walking toys we all know and love.

—OTHER—
MORTIMER/RINGO – Extremely simple self-firing ‘mortar’ objects. Created to test uno/deuce reaction to perturbation. Actually these should serve as a warning to anyone who thinks Algebra isn’t important. I got tired of trying to learn all the stuff I avoided learning in high school so I ended up finding the midpoint between the mortar and target, choosing an arbitrary height and firing on that vector. Amazingly, it’s a functional targeting system but it’s an insult to mathematics.

DRAWN-AND-QUARTERED RAGDOLL – Joint constraints had to be created programmatically (as opposed to using Blender UI constraints) so joints could be removed in the simulation. Keyboard events trigger joint ‘breaks’. I could probably figure out a way to calculate limb tension and trigger breaks based on a threshhold- but the whole thing was kind of a lark anyway.

TAD – Failed attempt to create a stable unpowered ‘passive walker’ based on Tad McGeers work. Has never taken more than three steps. Unpowered passive walkers are pretty sensitive to begin with and I’m not sure if a game engine simulation is enough to create one that works anything like in real-life. I’ll give it another go at some point.

H.M.S. STUPID – Another early test. A board that keeps level by using 4 ‘thrusters’. Each fires only if it is below the thruster on the opposite side.

—FILES—
All the models/rigs/programs in this .blend file are free to use for any non-machines-destroying-humanity related purposes as far as I’m concerned. Though keep in mind, though this work is original, some of the concepts and designs utilized and referenced are not. The Jansen Mechanism for instance; I have no idea what kind of intellectual property that is.

If you do use these for anything I’d appreciate a nod.

Word to your matrix.

Mar 042011
 

I got a little done on the OSC implementation for Cartwheel-3D but I probably wont be able to go much further for awhile so I thought I’d post what I had.

In the cartwheel source there is a file
\PythonAppSNMApp.py that runs the main animation loop. I edited it to send OSC messages for each joint. To do this I used the pyOSC module and parked it in the same directory for convenience.
The whole thing runs super slow through the py-interpreter. I tried to compile it with py2exe but ran into some trouble. However, I found that I could cheat and use the provided binaries.
Take the modified SNMApp.pyc (and OSC.pyc) and copy them into the \binlibrary.zip file in the binaries. It just works.

Here’s my modified SNMApp.py – the pyOSC module can be found here

Blender uses Python 3 so I had to use a different OSC module here. I just parked it in the same directory as blender.exe – also for convenience.

and here is a .blend file with my OSC listener code in it. I got it to work with the bge and the animation system, but not cleanly.

If you have any success with this let me know.

Mar 022011
 

This is a simple script I wrote that generates meshes using DLA.

I made a little demo animation where I ran the mesh as a cloth sim.

print("-----GO-----")
import bpy
import random
from math import sin, cos, pi, sqrt
from mathutils import Vector

HardRadius = 2
RandWalkRange = .15
StickThresh = .15	   #distance threshold to accrete
MaxVerts = 100		#stop when this many verts have been added
seedLOC = Vector((0.0,0.0,0.0))

D3 = True

mname = "DLAtest"

def brownian():
	dx = random.gauss(0, RandWalkRange)
	dy = random.gauss(0, RandWalkRange)
	dz = random.gauss(0, RandWalkRange) 
	return Vector((dx, dy, dz))

####returns a new wanderer on sphere
def newWanderer():  
	randAngleA = random.uniform(0,2*pi)
	randAngleB = random.uniform(0,2*pi) 
	x = HardRadius * sin(randAngleA) * cos(randAngleB)
	y = HardRadius * sin(randAngleA) * sin(randAngleB)
	z = HardRadius * cos(randAngleA)
	return Vector((x, y, z))

def dist(A, B):
	xd = B.x-A.x
	yd = B.y-A.y
	zd = B.z-A.z
	return sqrt(xd*xd + yd*yd + zd*zd)

def wanderLoop(ob):
	wand = newWanderer()
	mmesh = ob.data
	while len(mmesh.vertices) < MaxVerts:
		brown = brownian()
		wand.x += brown.x
		wand.y += brown.y
		if D3: wand.z += brown.z
		else: wand.z = 0
		if  abs(wand.x) > HardRadius or 
			abs(wand.y) > HardRadius or 
			abs(wand.z) > HardRadius:
				wand = newWanderer()
				
		for vert in range(len(mmesh.vertices)):
			dpt = dist(wand, mmesh.vertices[vert].co)
			dZ = dist(wand, seedLOC)			
			if dpt < StickThresh:
				st = str(len(mmesh.vertices)+1) + " of " + str(MaxVerts) + " has been assimilated"
				print(st, dpt)
				addPoint(ob, wand, vert)
				wand = newWanderer()
				pass

####Object, point to add, index of vert to connect to (None is -1)
def addPoint(ob, pt, conni):
	mmesh = ob.data
	mmesh.vertices.add(1)
	vcounti = len(mmesh.vertices)-1
	mmesh.vertices[vcounti].co = [pt.x, pt.y, pt.z]
	if conni > -1:
		mmesh.edges.add(1)
		ecounti = len(mmesh.edges)-1
		mmesh.edges[ecounti].vertices = [conni, vcounti]


def newDLAMesh(mname):
	mmesh = bpy.data.meshes.new(mname)
	omesh = bpy.data.objects.new(mname, mmesh)
	bpy.context.scene.objects.link(omesh)
	addPoint(omesh, seedLOC, -1)	
	return omesh

ob = newDLAMesh("testDLA")
wanderLoop(ob)


Feb 272011
 

This is a very simple script I wrote to make BVH’s exported from DANCE (Dynamic Animation and Control Environment) able to be imported into Blender.

It just adds blank channels to joints if there are less than 3.

"""
DANCE BVH EXPORT THING
-Simple BVH file thing that adds blank channels of
    position to JOINTS and FRAMES to allow BVH Exports from 
    DANCE (Dynamic Animation and Control Environment) to be
    imported into Blender.
www.funkboxing.com
"""

infile = "c:\workspace\bvhMINE\bvhdata\skelORIG2.bvh"
outfile = "c:\workspace\bvhMINE\bvhdata\skelTESTOUT.bvh"

def loadDANCEBVH(fin, fout):
    tab = chr(9)
    f = open(fin, 'r')
    lines = f.readlines()
    f.close()
    
    newlines = list(lines)
    newlines[16] = str(tab+tab+tab+tab+"CHANNELS 3 Xrotation Yrotation Zrotationn")
    newlines[30] = str(tab+tab+tab+tab+"CHANNELS 3 Yrotation Xrotation Zrotationn")
    newlines[34] = str(tab+tab+tab+tab+"CHANNELS 3 Yrotation Zrotation Xrotationn")
    newlines[49] = str(tab+tab+tab+tab+"CHANNELS 3 Yrotation Xrotation Zrotationn")    
    newlines[53] = str(tab+tab+tab+tab+"CHANNELS 3 Yrotation Zrotation Xrotationn")    
    newlines[69] = str(tab+tab+tab+tab+"CHANNELS 3 Xrotation Yrotation Zrotationn")    
    newlines[73] = str(tab+tab+tab+tab+"CHANNELS 3 Xrotation Zrotation Yrotationn")    
    newlines[88] = str(tab+tab+tab+tab+"CHANNELS 3 Xrotation Yrotation Zrotationn")
    newlines[92] = str(tab+tab+tab+tab+"CHANNELS 3 Xrotation Zrotation Yrotationn")    

    for li in range(104, len(lines)):
        vals = lines[li].split(" ")
        vals.insert(12, '0')
        vals.insert(12, '0')
        vals.insert(19, '0')
        vals.insert(21, '0')
        vals.insert(27, '0')
        vals.insert(30, '0')
        vals.insert(30, '0')
        vals.insert(35, '0')
        vals.insert(35, '0')
        vals.insert(39, '0')
        vals.insert(44, '0')
        vals.insert(44, '0')
        vals.insert(48, '0')
        newlines[li] = " ".join(vals) 
    
    fo = open(fout, 'w')
    fo.writelines(newlines)


loadDANCEBVH(infile, outfile)
Feb 222011
 

There’s a lot of Kinect-driven mocap development going on and that is fantastic. I also wanted to show off a couple of other animation tools out there. I’d like to see more physics and algorithmic animation tools available and I found a couple of very promising pieces of open-source software.

cartwheel-3d – Physics Based Character Animation Framework


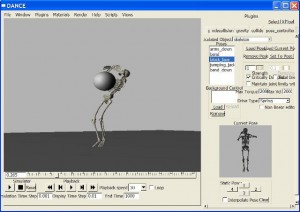
DANCE – Dynamic Animation and Control Environment


Both can be used to create animation with a combination of physics and scripted control. The details of how they work are beyond me, but what they do is pretty amazing. Both are written in c++ but they both heavily use python for scripting and UI.

I am working with cartwheel-3d to try and use some of the features in Blender. I could try to work out a simple BVH exporter for cartwheel, or maybe an OSC server to send animation data to be recorded in Blender. Or simply try to use the functions direction in Blender. Still haven’t got that far. So far all I’ve done is compile cartwheel-3d. So I’ve included some notes on how I did it so if anyone else wants to work on this too they can get started easier.

COMPILE NOTES:
-Basically I followed the instructions on the ‘Get Started‘ page for cartwheel-3d with a few important exceptions.

COMPILING C++ : MS VStudioExpress2010
*no spaces in paths!
*lib folder in workspace ie. “C:workspacelib”
*glew32.dll and glut32.dll lib and lib in PATH variable

-After getting repository and opening- VS2010 converts and messes up target and extensions. To fix this.
>VIEW>PROJECT PAGE>CONFIGURATION PROPERTIES>GENERAL>
-Change Target Name from $(ProjectName) to _$(ProjectName)
-Change Target Extension to .pyd
-Repeat on all projects except ode and gls
-Repeat on debug and release

-Make sure BROWSE INFORMATION is OFF on all projects
>VIEW>PROJECT PAGE>CONFIGURATION PROPERTIES>C/C++>BROWSE INFORMATION
>ENABLE BROWSE INFORMATION – “NO”

DEBUGGING PYTHON: ECLIPSE (CLASSIC) + PYDEV
-Open eclipse (classic)
-Install pydev
-Set interpreter to py26
-Make a copy of ‘cartwheel-3d’ project folder- rename ‘simbicon’
-Install wxpython
-Install pyopengl

-Got some error about Core.py returning _mod before assignment. not sure what I did to siz it- sorry. I remember I opened core.py in the editor to look for the error, then ran again and it worked… weird.

So that’s it for now. Hope to do something constructive with this.

Feb 202011
 

I added a ‘VerletHinge’ class that’s a little hacky but it works to give rotation limits on certain joints. Provides slightly more lifelike flailing… also added a little drawing touch and made the ragdoll hang out until clicked.
[processing]

VerletPoint vPointA = new VerletPoint(100, 100);
VerletPoint[] vPointArr = new VerletPoint[9];
VerletStick[] vStickArr = new VerletStick[8];
VerletHinge[] vHingeArr = new VerletHinge[5];

int nVP = 9;
int nVS = 8;
int nVH = 5;

int xDIM = 300;
int yDIM = 120;

float GraV = .15

xSTART = xDIM/2;
ySTART = yDIM/4;
rdSCALE = 12;

boolean initRD = false;

void setup() {
background(255);
fill(255);
stroke(#568984);
size(xDIM, yDIM);
smooth();
frameRate(30);
strokeWeight(3);

vPointArr[0] = new VerletPoint(xSTART, ySTART+rdSCALE/2); //
vPointArr[1] = new VerletPoint(xSTART-rdSCALE*1.5, ySTART+rdSCALE);
vPointArr[2] = new VerletPoint(xSTART, ySTART+rdSCALE);
vPointArr[3] = new VerletPoint(xSTART+rdSCALE*1.5, ySTART+rdSCALE);
vPointArr[4] = new VerletPoint(xSTART, ySTART+rdSCALE*2);
vPointArr[5] = new VerletPoint(xSTART-rdSCALE, ySTART+rdSCALE*3);
vPointArr[6] = new VerletPoint(xSTART-rdSCALE, ySTART+rdSCALE*4);
vPointArr[7] = new VerletPoint(xSTART+rdSCALE, ySTART+rdSCALE*3);
vPointArr[8] = new VerletPoint(xSTART+rdSCALE, ySTART+rdSCALE*4);

vStickArr[0] = new VerletStick(vPointArr[0], vPointArr[2]);
vStickArr[1] = new VerletStick(vPointArr[2], vPointArr[1]);
vStickArr[2] = new VerletStick(vPointArr[2], vPointArr[3]);
vStickArr[3] = new VerletStick(vPointArr[2], vPointArr[4]);
vStickArr[4] = new VerletStick(vPointArr[4], vPointArr[5]);
vStickArr[5] = new VerletStick(vPointArr[5], vPointArr[6]);
vStickArr[6] = new VerletStick(vPointArr[4], vPointArr[7]);
vStickArr[7] = new VerletStick(vPointArr[7], vPointArr[8]);

vHingeArr[0] = new VerletHinge(vPointArr[5], vPointArr[4], vPointArr[7], 45, 160);

vHingeArr[1] = new VerletHinge(vPointArr[1], vPointArr[2], vPointArr[4], 45, 90);
vHingeArr[2] = new VerletHinge(vPointArr[4], vPointArr[2], vPointArr[3], 45, 90);

vHingeArr[3] = new VerletHinge(vPointArr[6], vPointArr[5], vPointArr[4], 10, 160);
vHingeArr[4] = new VerletHinge(vPointArr[8], vPointArr[7], vPointArr[4], 10, 160);

}

void draw() {
background(225);

if(initRD == false){
vPointArr[0].x = xSTART;
vPointArr[0].y = ySTART;
}
if(mousePressed){
initRD = true;
vPointArr[0].x = mouseX;
vPointArr[0].y = mouseY;
}else{

vPointA.y += GraV;
}
vPointA.update();
vPointA.bounds(0, 0, xDIM, yDIM);

for(int p = 0; p < nVP; p++){
if(p==0,1,3,6,8){
vPointArr[p].y += GraV;
}
vPointArr[p].update();
vPointArr[p].bounds(0, 0, xDIM, yDIM);
}

for(int s = 0; s < nVS; s++){
vStickArr[s].update();
}

for(int h = 0; h < nVH; h++){
//ustr = str(vHingeArr[h].pointA.x)+”,”+str(vHingeArr[h].pointB.x)+”,”+str(vHingeArr[h].pointC.x)
// +”-“+str(vHingeArr[h].aMin)+”,”+str(vHingeArr[h].aMax)+”,”+str(vHingeArr[h].aAng)
//println(ustr);
vHingeArr[h].update();
}
oCOL = 0;
iCOL = 255;

stroke(oCOL); strokeWeight(3); //ARMS
line(vPointArr[2].x, vPointArr[2].y, vPointArr[1].x, vPointArr[1].y);
line(vPointArr[2].x, vPointArr[2].y, vPointArr[3].x, vPointArr[3].y);
stroke(iCOL); strokeWeight(2);
line(vPointArr[2].x, vPointArr[2].y, vPointArr[1].x, vPointArr[1].y);
line(vPointArr[2].x, vPointArr[2].y, vPointArr[3].x, vPointArr[3].y);
stroke(oCOL); strokeWeight(4); //SHINS
line(vPointArr[5].x, vPointArr[5].y, vPointArr[6].x, vPointArr[6].y);
line(vPointArr[7].x, vPointArr[7].y, vPointArr[8].x, vPointArr[8].y);
stroke(iCOL); strokeWeight(3);
line(vPointArr[5].x, vPointArr[5].y, vPointArr[6].x, vPointArr[6].y);
line(vPointArr[7].x, vPointArr[7].y, vPointArr[8].x, vPointArr[8].y);
stroke(oCOL); strokeWeight(5); //THIGHS
line(vPointArr[4].x, vPointArr[4].y, vPointArr[5].x, vPointArr[5].y);
line(vPointArr[4].x, vPointArr[4].y, vPointArr[7].x, vPointArr[7].y);
stroke(iCOL); strokeWeight(4);
line(vPointArr[4].x, vPointArr[4].y, vPointArr[5].x, vPointArr[5].y);
line(vPointArr[4].x, vPointArr[4].y, vPointArr[7].x, vPointArr[7].y);
stroke(oCOL); strokeWeight(6); //CHEST
line(vPointArr[2].x, vPointArr[2].y, vPointArr[4].x, vPointArr[4].y);
stroke(iCOL); strokeWeight(5);
line(vPointArr[2].x, vPointArr[2].y, vPointArr[4].x, vPointArr[4].y);
stroke(oCOL); strokeWeight(7); //HEAD
line(vPointArr[0].x, vPointArr[0].y, vPointArr[2].x, vPointArr[2].y);
stroke(iCOL); strokeWeight(5);

line(vPointArr[0].x, vPointArr[0].y, vPointArr[2].x, vPointArr[2].y);
}

class VerletPoint {
float x, y, oldX, oldY;
VerletPoint(float _x, float _y) {
setPosition(_x, _y);
}
void setPosition(float _x, float _y) {
x = oldX = _x;
y = oldY = _y;
}
void update(){
float tempX = x, tempY = y;
x += getVx();
y += getVy();
oldX = tempX;
oldY = tempY;
}
void bounds(float left, float top, float right, float bottom){
x = constrain(x, left, right);
y = constrain(y, top, bottom-5);
}
void setVx(float value){
oldX = x – value;
}
float getVx(){
return x – oldX;
}
void setVy(float value){
oldY = y – value;
}
float getVy(){
return y – oldY;
}
void render(){
ellipse(x, y, 10, 10);
}
}

class VerletStick {
VerletPoint pointA, pointB;
float len;
VerletStick(VerletPoint _pointA, VerletPoint _pointB){
pointA = _pointA;
pointB = _pointB;
len = dist(pointA.x, pointA.y , pointB.x, pointB.y);
}
void update(){
float dst = dist(pointA.x, pointA.y , pointB.x, pointB.y);
float diff = len – dst;
float offsetX = (diff * (pointB.x – pointA.x) / dst) / 2;
float offsetY = (diff * (pointB.y – pointA.y) / dst) / 2;
pointA.x -= offsetX; pointA.y -= offsetY; pointB.x += offsetX; pointB.y += offsetY;
}
void render(){
line(pointA.x, pointA.y , pointB.x, pointB.y);
}
}

void getAngleABC( PVector a, PVector b, PVector c ){
q1 = b.x-a.x;
q2 = dist(a.x,a.y, b.x,b.y);
q3 = q1/q2;
q4 = degrees(asin(q3));
angBA = degrees(asin((b.x-a.x)/(dist(a.x,a.y, b.x,b.y))));
angBC = degrees(asin((b.x-c.x)/(dist(c.x,c.y, b.x,b.y))));
angABC = abs(angBA-angBC);
return angABC;
}

// ptB
// stickA / stickB
// ptA ptC
class VerletHinge {

VerletPoint pointA, pointB, pointC;
int aMin, aMax;
float aAng;

VerletHinge(VerletPoint _pointA, VerletPoint _pointB, VerletPoint _pointC, int _aMin, int _aMax){
aMin = _aMin; aMax = _aMax;
pointA = _pointA;
pointB = _pointB;
pointC = _pointC;

aAng = getAngleABC(pointA, pointB, pointC);
}

void update(){
aAng = getAngleABC(pointA, pointB, pointC);

//HACK – just move the points closer/further away from each other
if(aAng<aMin){
aCS = constrain((pointC.y – pointA.y) / (pointC.x – pointA.x), 0, 1);
aCRate = constrain(abs(radians(aAng-aMin)), 0, 10);
pointA.x -= aCRate; pointA.y -= aCRate*aCS;
pointC.x += aCRate; pointC.y += aCRate*aCS;
}

if(aAng>aMax){
//println(“doing”);
aCS = (pointC.y – pointA.y) / (pointC.x – pointA.x);
aCRate = abs(radians(aAng-aMin));
if(pointC.x>pointA.x){
pointA.x += aCRate; pointA.y += aCRate*aCS;
pointC.x -= aCRate; pointC.y -= aCRate*aCS;
} else if(pointA.x>pointC.x){
pointA.x -= aCRate; pointA.y -= aCRate*aCS;
pointC.x += aCRate; pointC.y += aCRate*aCS;
}
}
}
void render(){
//line(stickA.pointA.x, stickA.pointA.y , stickA.pointB.x, stickA.pointB.y);
//line(stickB.pointA.x, stickB.pointA.y , stickB.pointB.x, stickB.pointB.y);
}
}


[/processing]