

This is an attempt to merge Blenders Dynamic Paint feature with cellular automata. It started as a python script but then became even more of an educational experience when I realized python wasn’t going to be fast enough to run conway’s life on a 64x grid, let alone a 4Kx one, which was my initial goal. These ended up being 512x grids. I could have gone bigger but I’m using a little netbook for all this so I didn’t go nuts.
After figuring out that python wasn’t going to be fast enough I set out to make a c++ version, not in Blender, just in c++. Long story short it’s an atrocity of loops inside a main function. I didn’t even bother to pass any arguments, just recompiled every time I changed paths. Anyway it ended up being lots faster than the py scripts and I finally had an excuse to write a function I knew very well in a language I’ve been intimidated by for some time (and still very much am).
The c++ code uses the ImageMagick++ library, which made things much easier, but you’ll have to get this lib if you want to compile and use this. Hopefully this whole process has prepared me to get on porting the lighting generator to c++, which really needs to happen if if it’s ever going to be more than a gimmick.
So anyway, here’s the c++ code and here’s the Blender python script that I abandoned in favor of doing it in c++. For the record- this is bad, bad code. Very bad. Also here’s the command line to compile with g++ and imageMagick++, since that took awhile to get past.
user@pc:~$ g++ `Magick++-config –cxxflags –cppflags` conway.cpp -o conway `Magick++-config –ldflags –libs`
Here’s the process for using this to dynamic paint with conways life.
1) dynamically paint a canvas with a brush. This will paint ‘live’ cells onto the canvas
Turn on ‘dissolve’ and set to dissolve in 1-3 frames. Otherwise these become ‘immortal’ cells, which makes for a weird simulation.
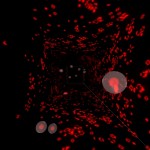
I used red channel only for these demos.
2) compile and run the c++ code.
This will run the simulation on the dynamic paint cache images. It runs the simulation from the initial frame, but always includes the red cells from the next dynamic paint frame so they will be used in the next simulation step.
3) use this simulation output as a map in place of the dynamic paint output.
Sounds easy, and it kind of is, and kind of isn’t.
So if you want to do this yourself- if you know c++ it should be easy. If you don’t it will be very hard. If you’re just learning c++ it may be worthwile to try.
Not sure where I’m going with all this, as usual it was just something to do. Hope you dig it.
