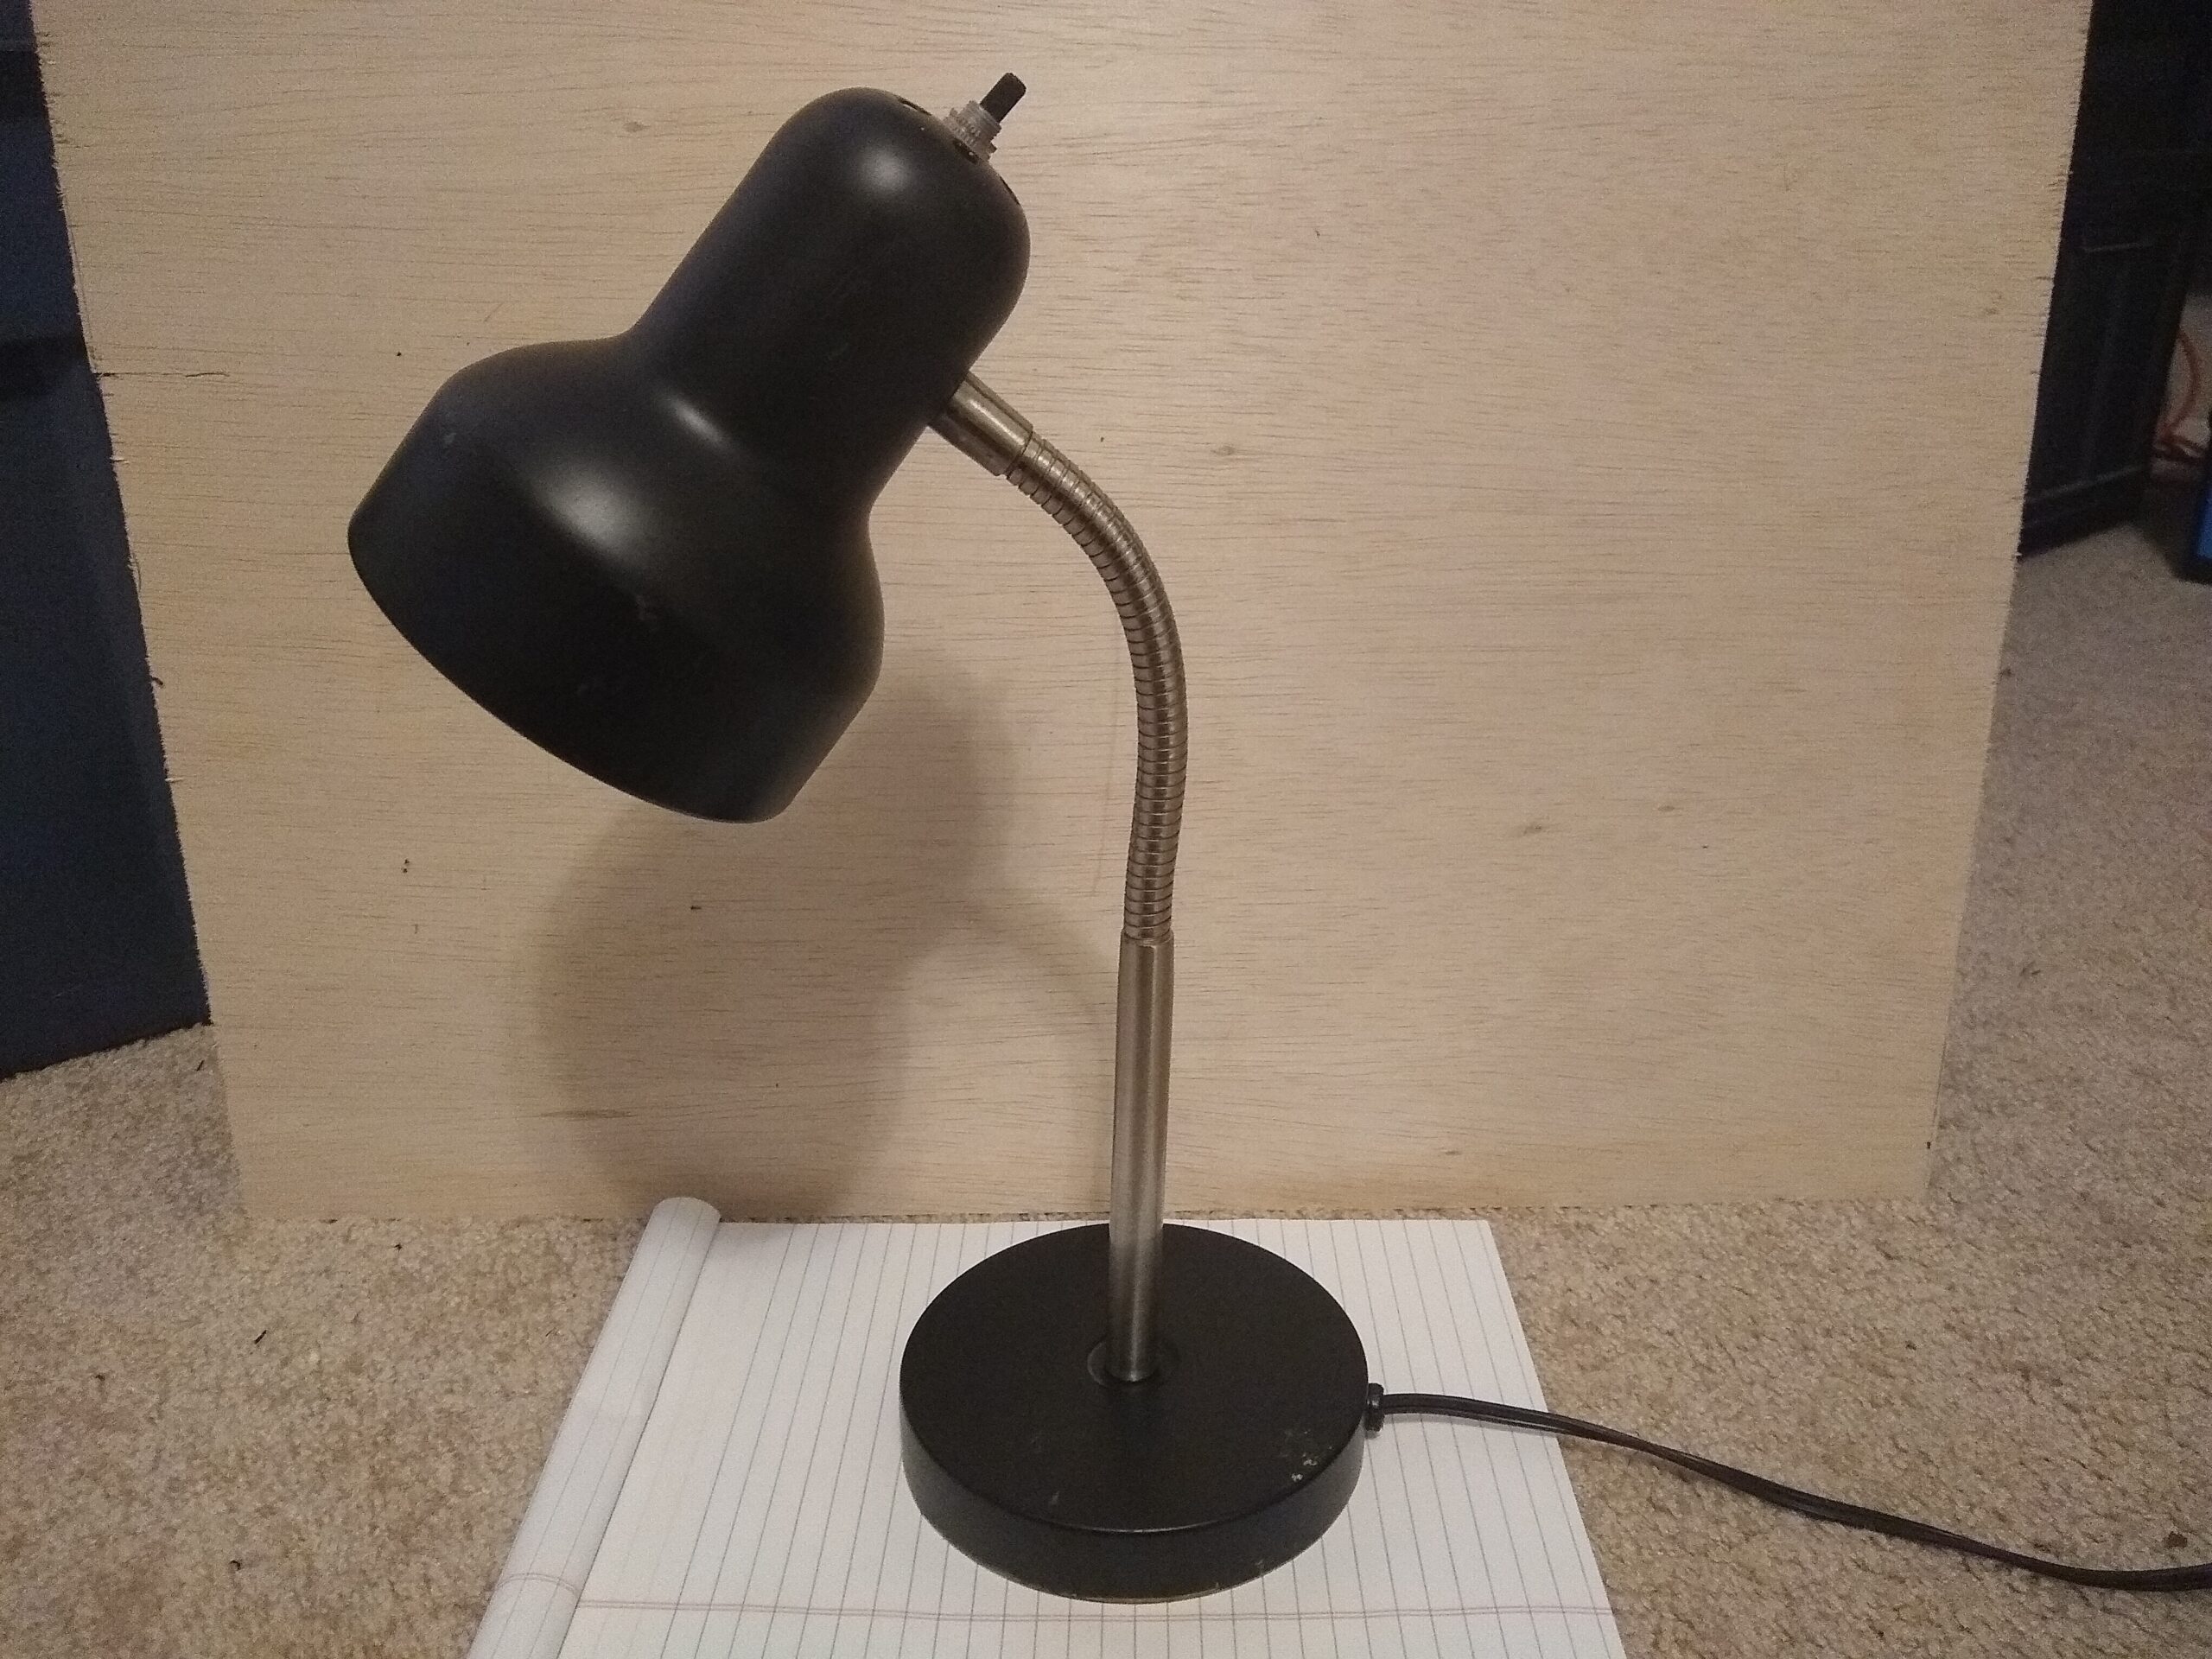
I like these gooseneck desk lamps a lot and I’ve had this one for more than 10 years.
For the past 2-3 it’s had a E27 socket to AC adapter powering a USB charger powering a bare ESP32cam dangling out of the head as a really lazy security camera rig. It ran esphome and piped to hassio.
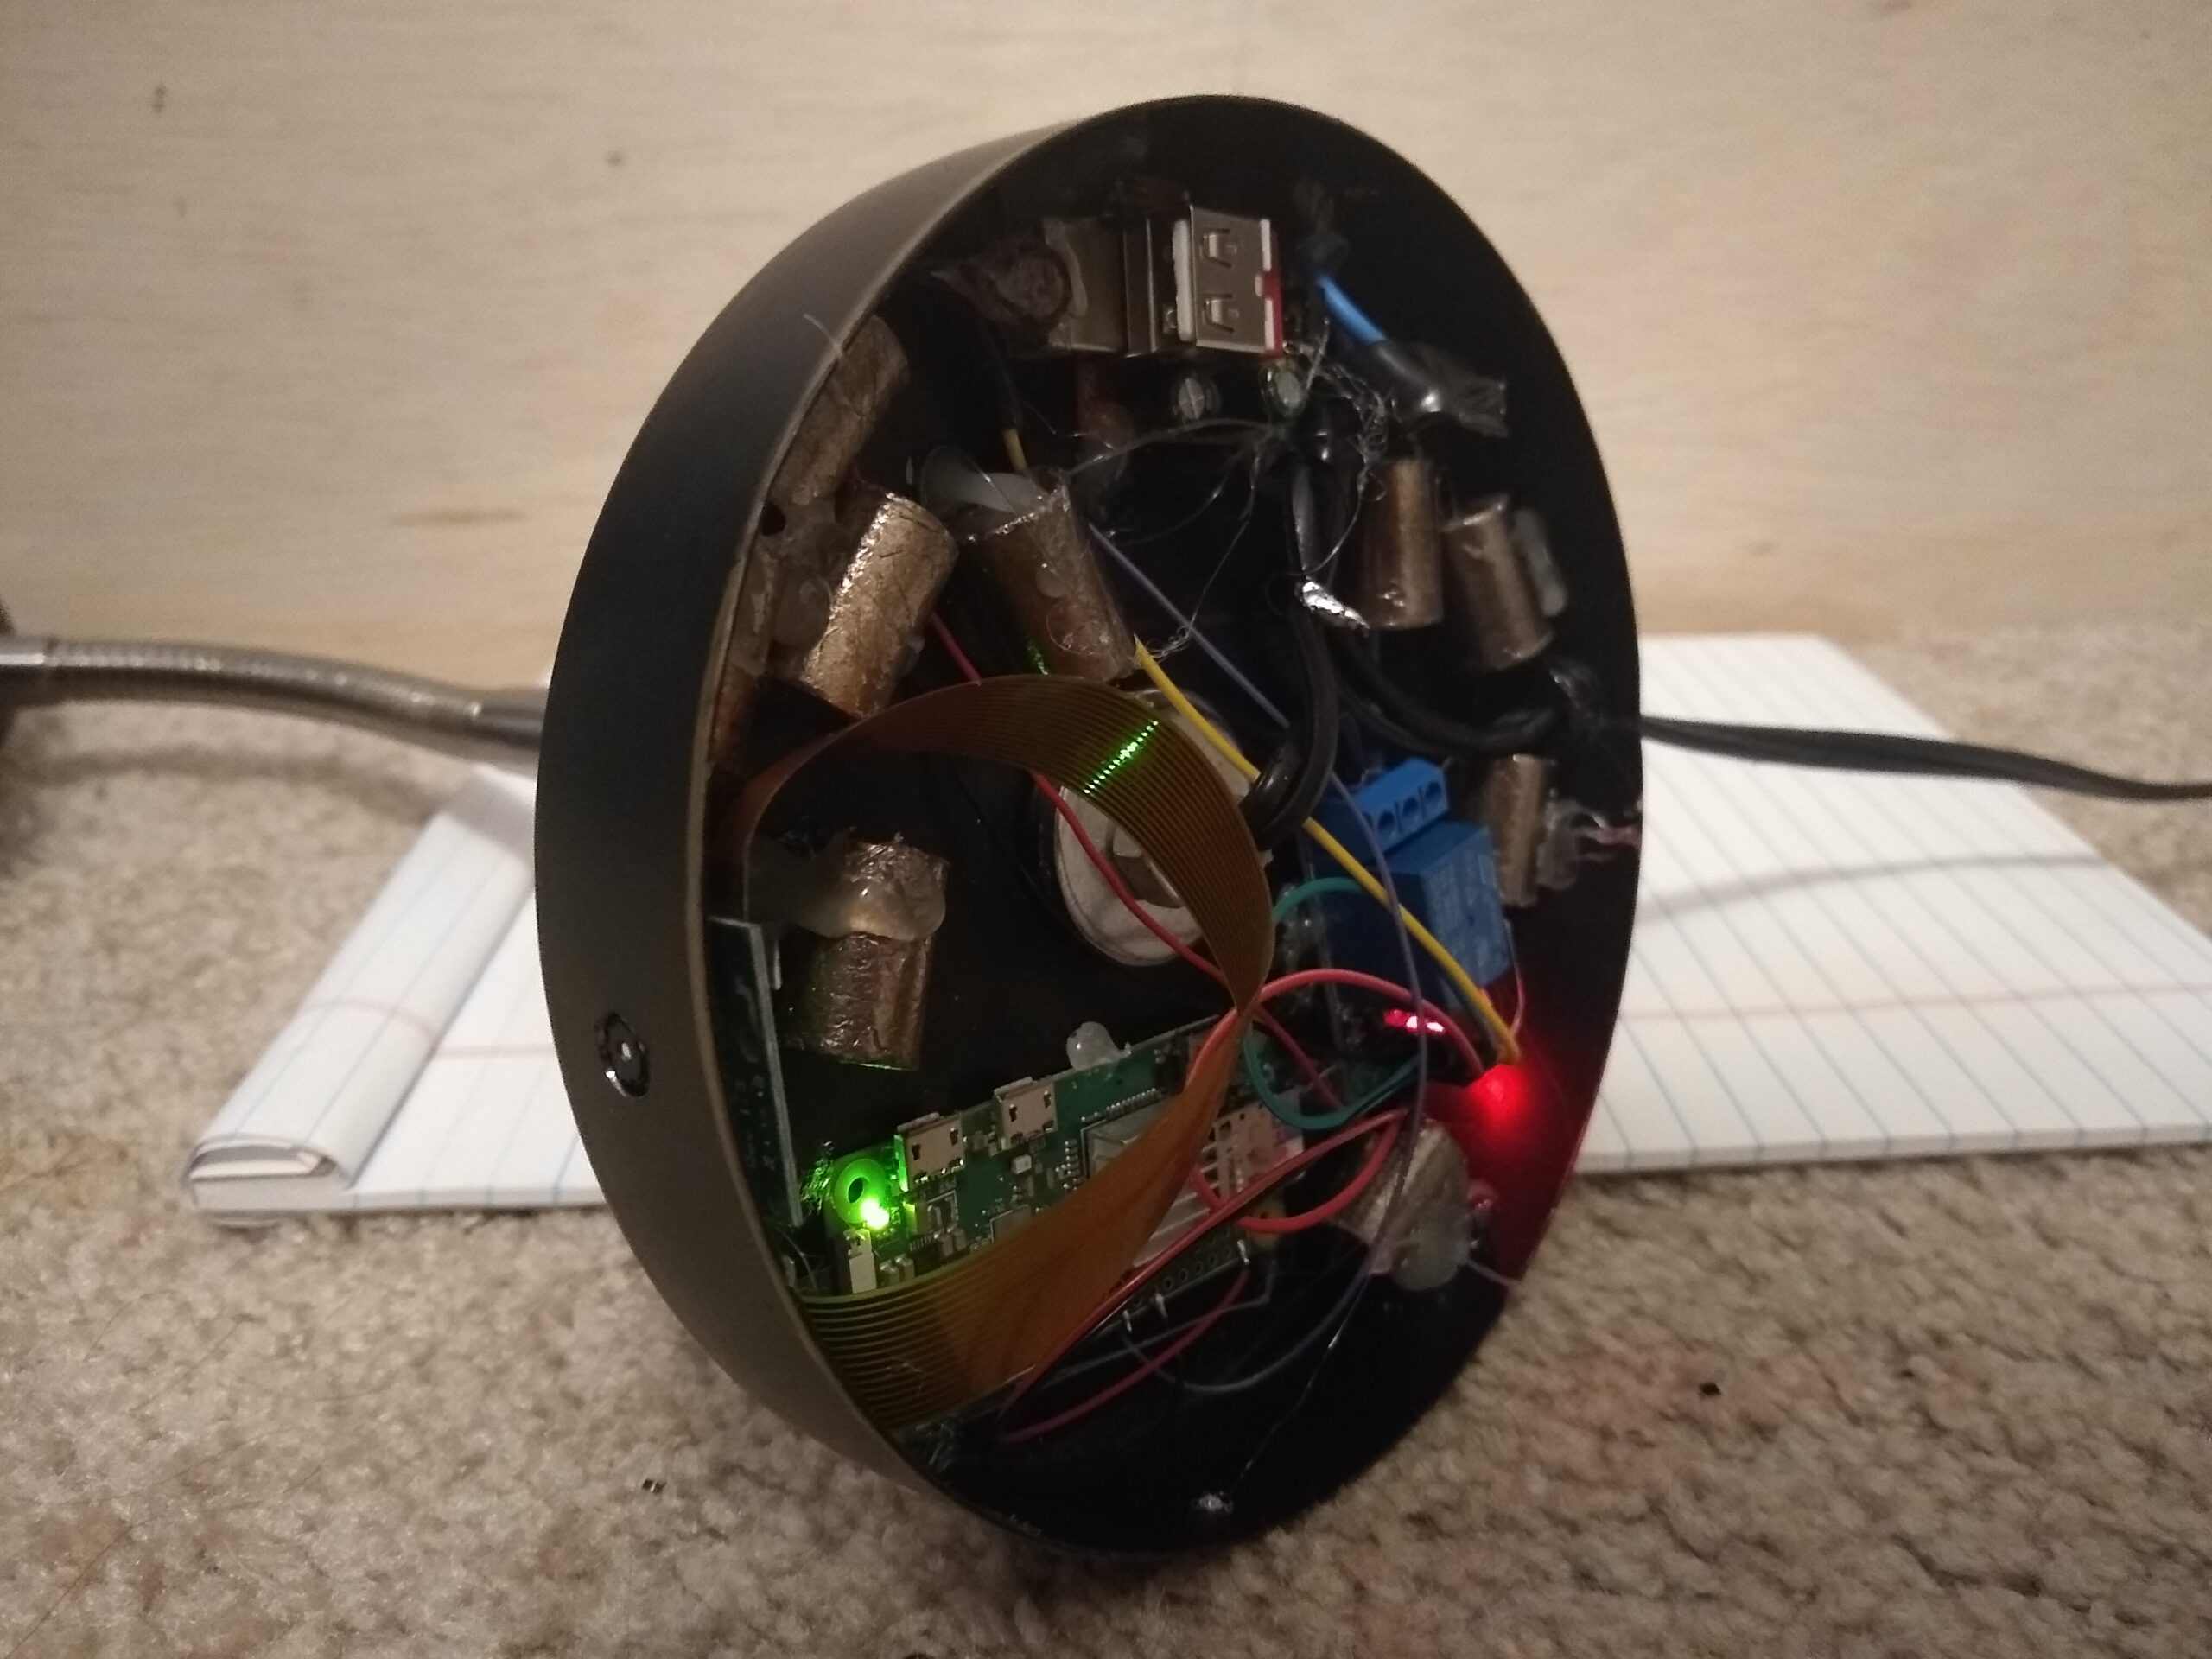
I finally got a wild hare to make it less obviously lazy and popped in a raspberry pi zero W with a camera and a relay controlling the head light The raspi runs motioneyeos and pipes to hassio. The relay fires from the motioneyeos UI and I finally got it to fire from hassio by a shell command switch that uses ssh to run a gpio script on the pi.
I had to remove the base weight to get all the electronic in and that left it a little top-heavy, so I just hot-glued in a half-pound or so of bismuth pellets because I am a person who owns a startling quantity of bismuth for reasons that are probably explained elsewhere on this site.
It all started with hurricane Ida, or probably Katrina, but Ida restarted it. I remembered how much it sucks to not have power for a while and how much difference a little ice and a fan makes.
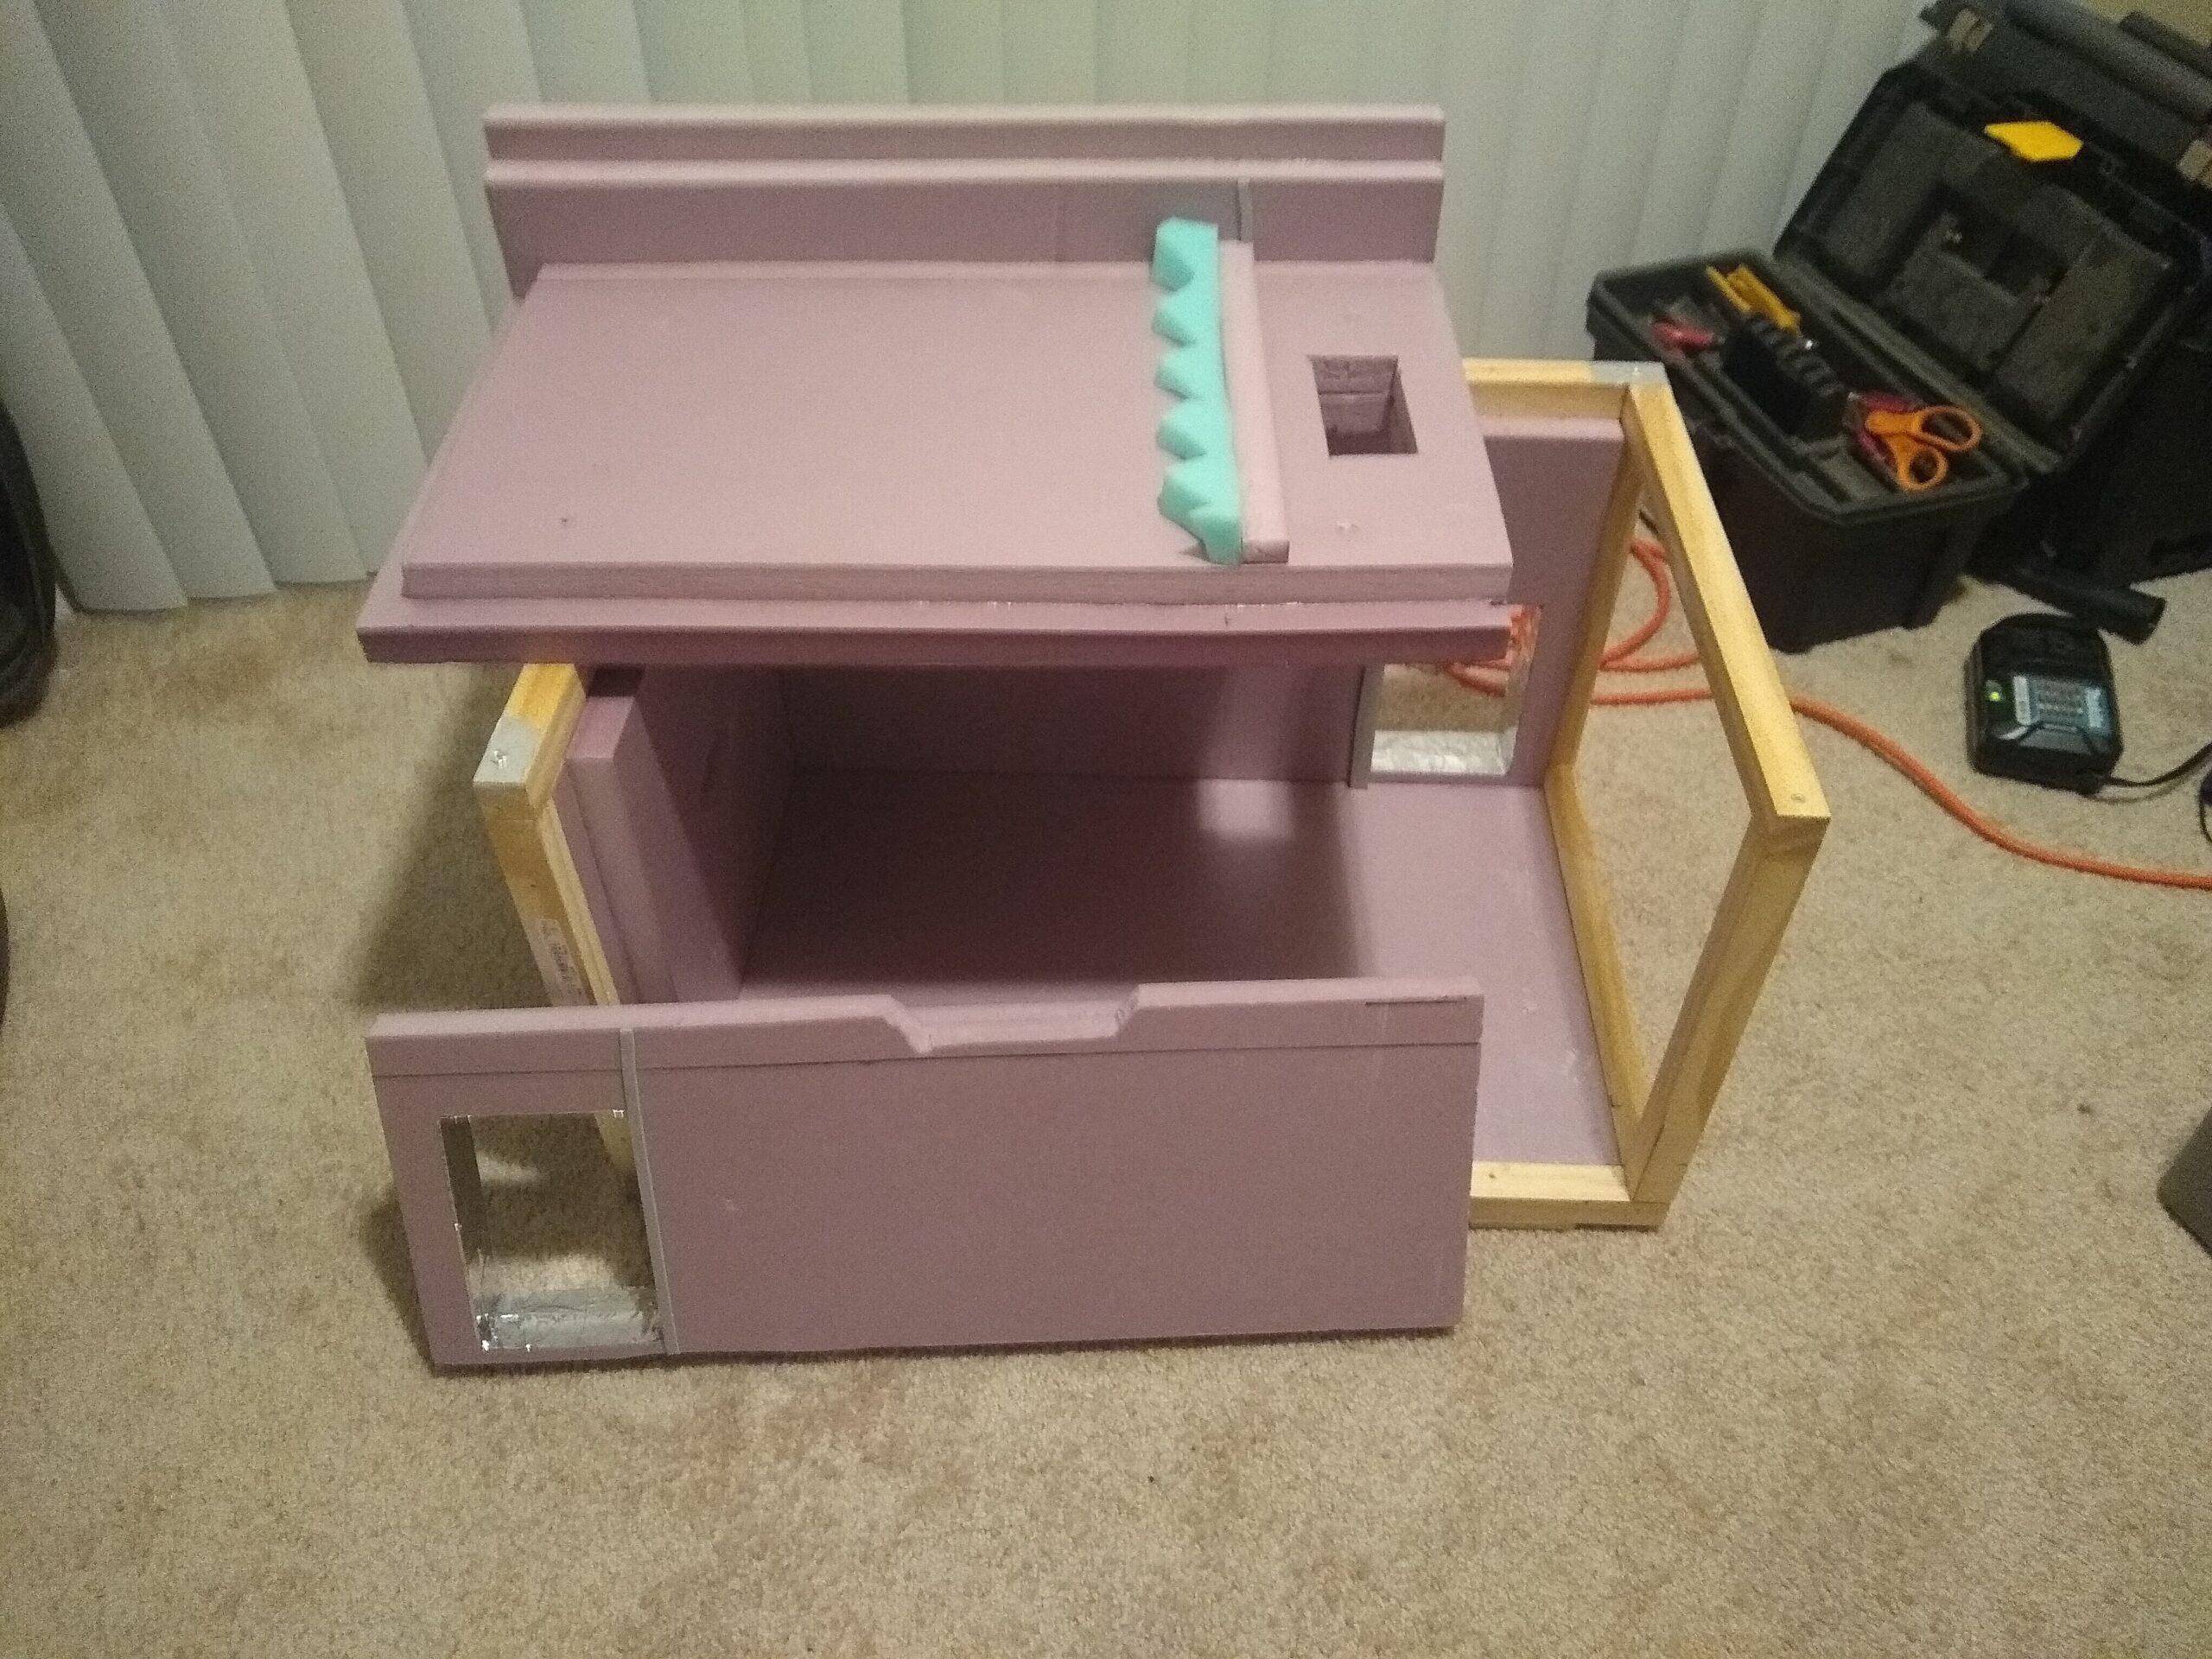
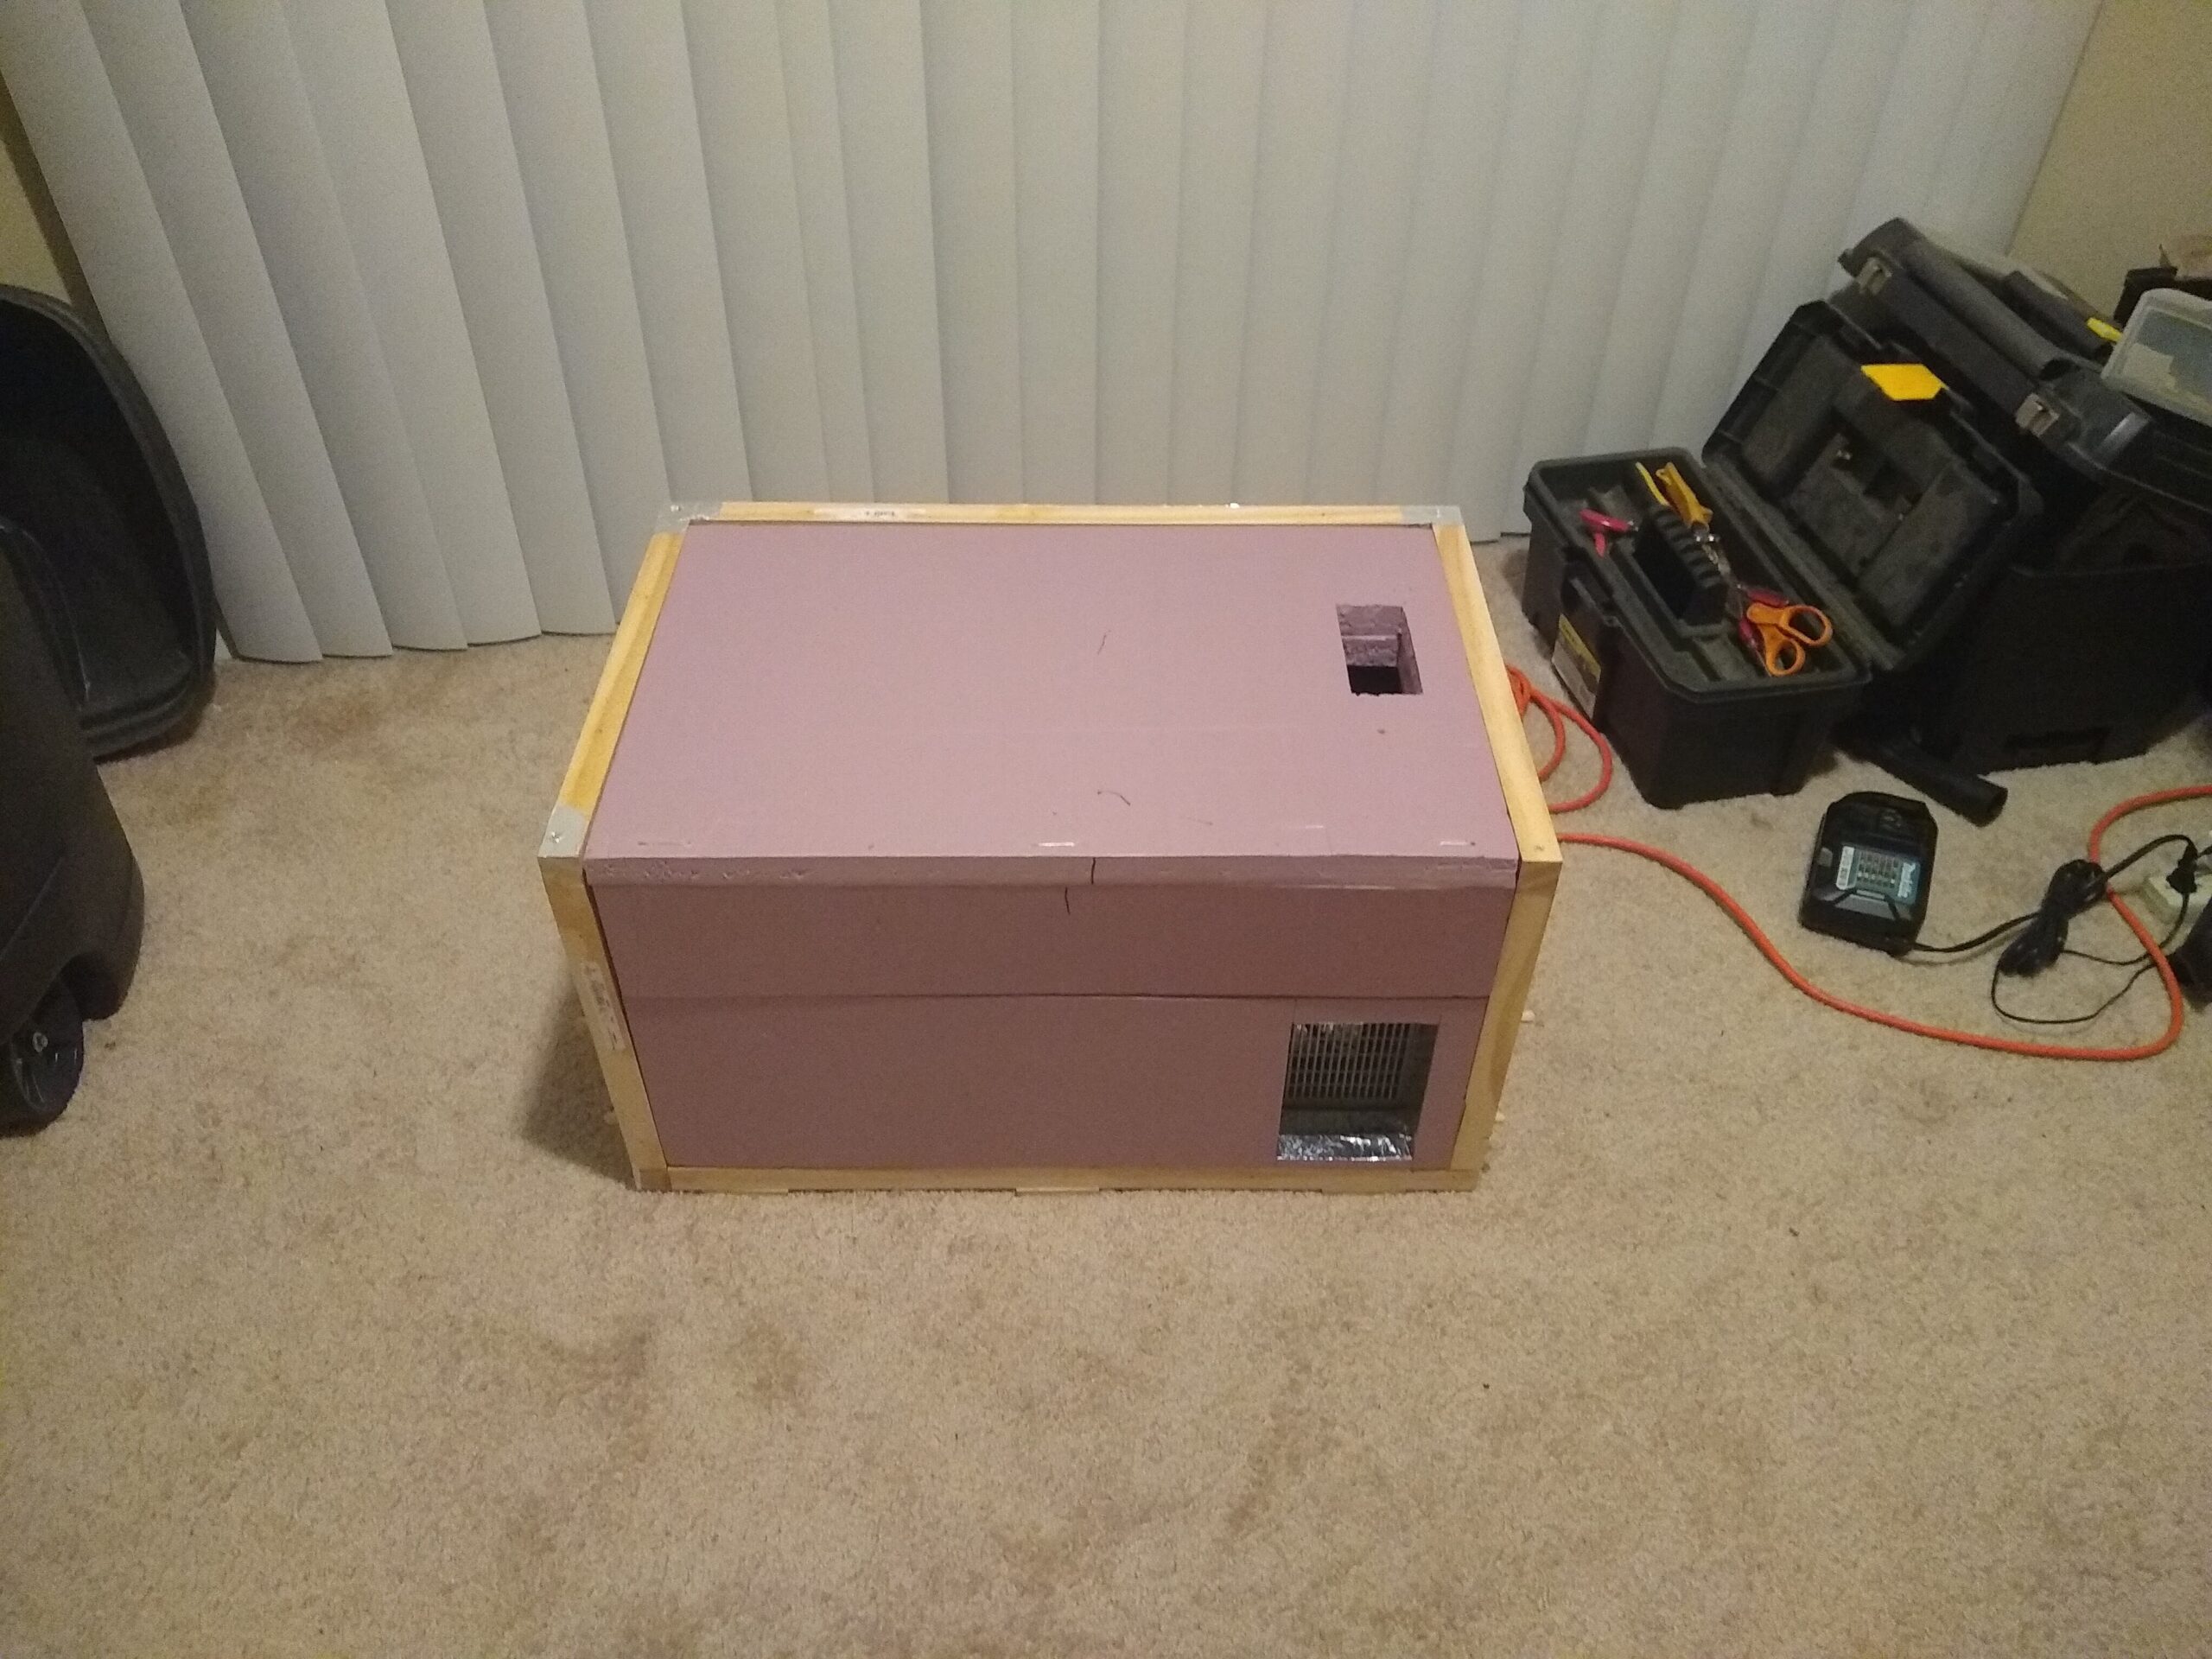
I’ve been down this road before. Katrina sent me down rabbit holes that led to free-piston sterling coolers, peltiers, vortex tubes, and of course evaporative cooling. But life and laziness prevented me from doing much about it until now. Long story short I got a DC portable freezer, an Aplicool C-20 that’s about 20L and supposed to be able to get down to -4F. But I think that’s probably rated in Michigan where 60F is a hot day or something, it struggled in my 76F apartment but it was pretty obviously an insulation problem because the exterior got really, really cold.
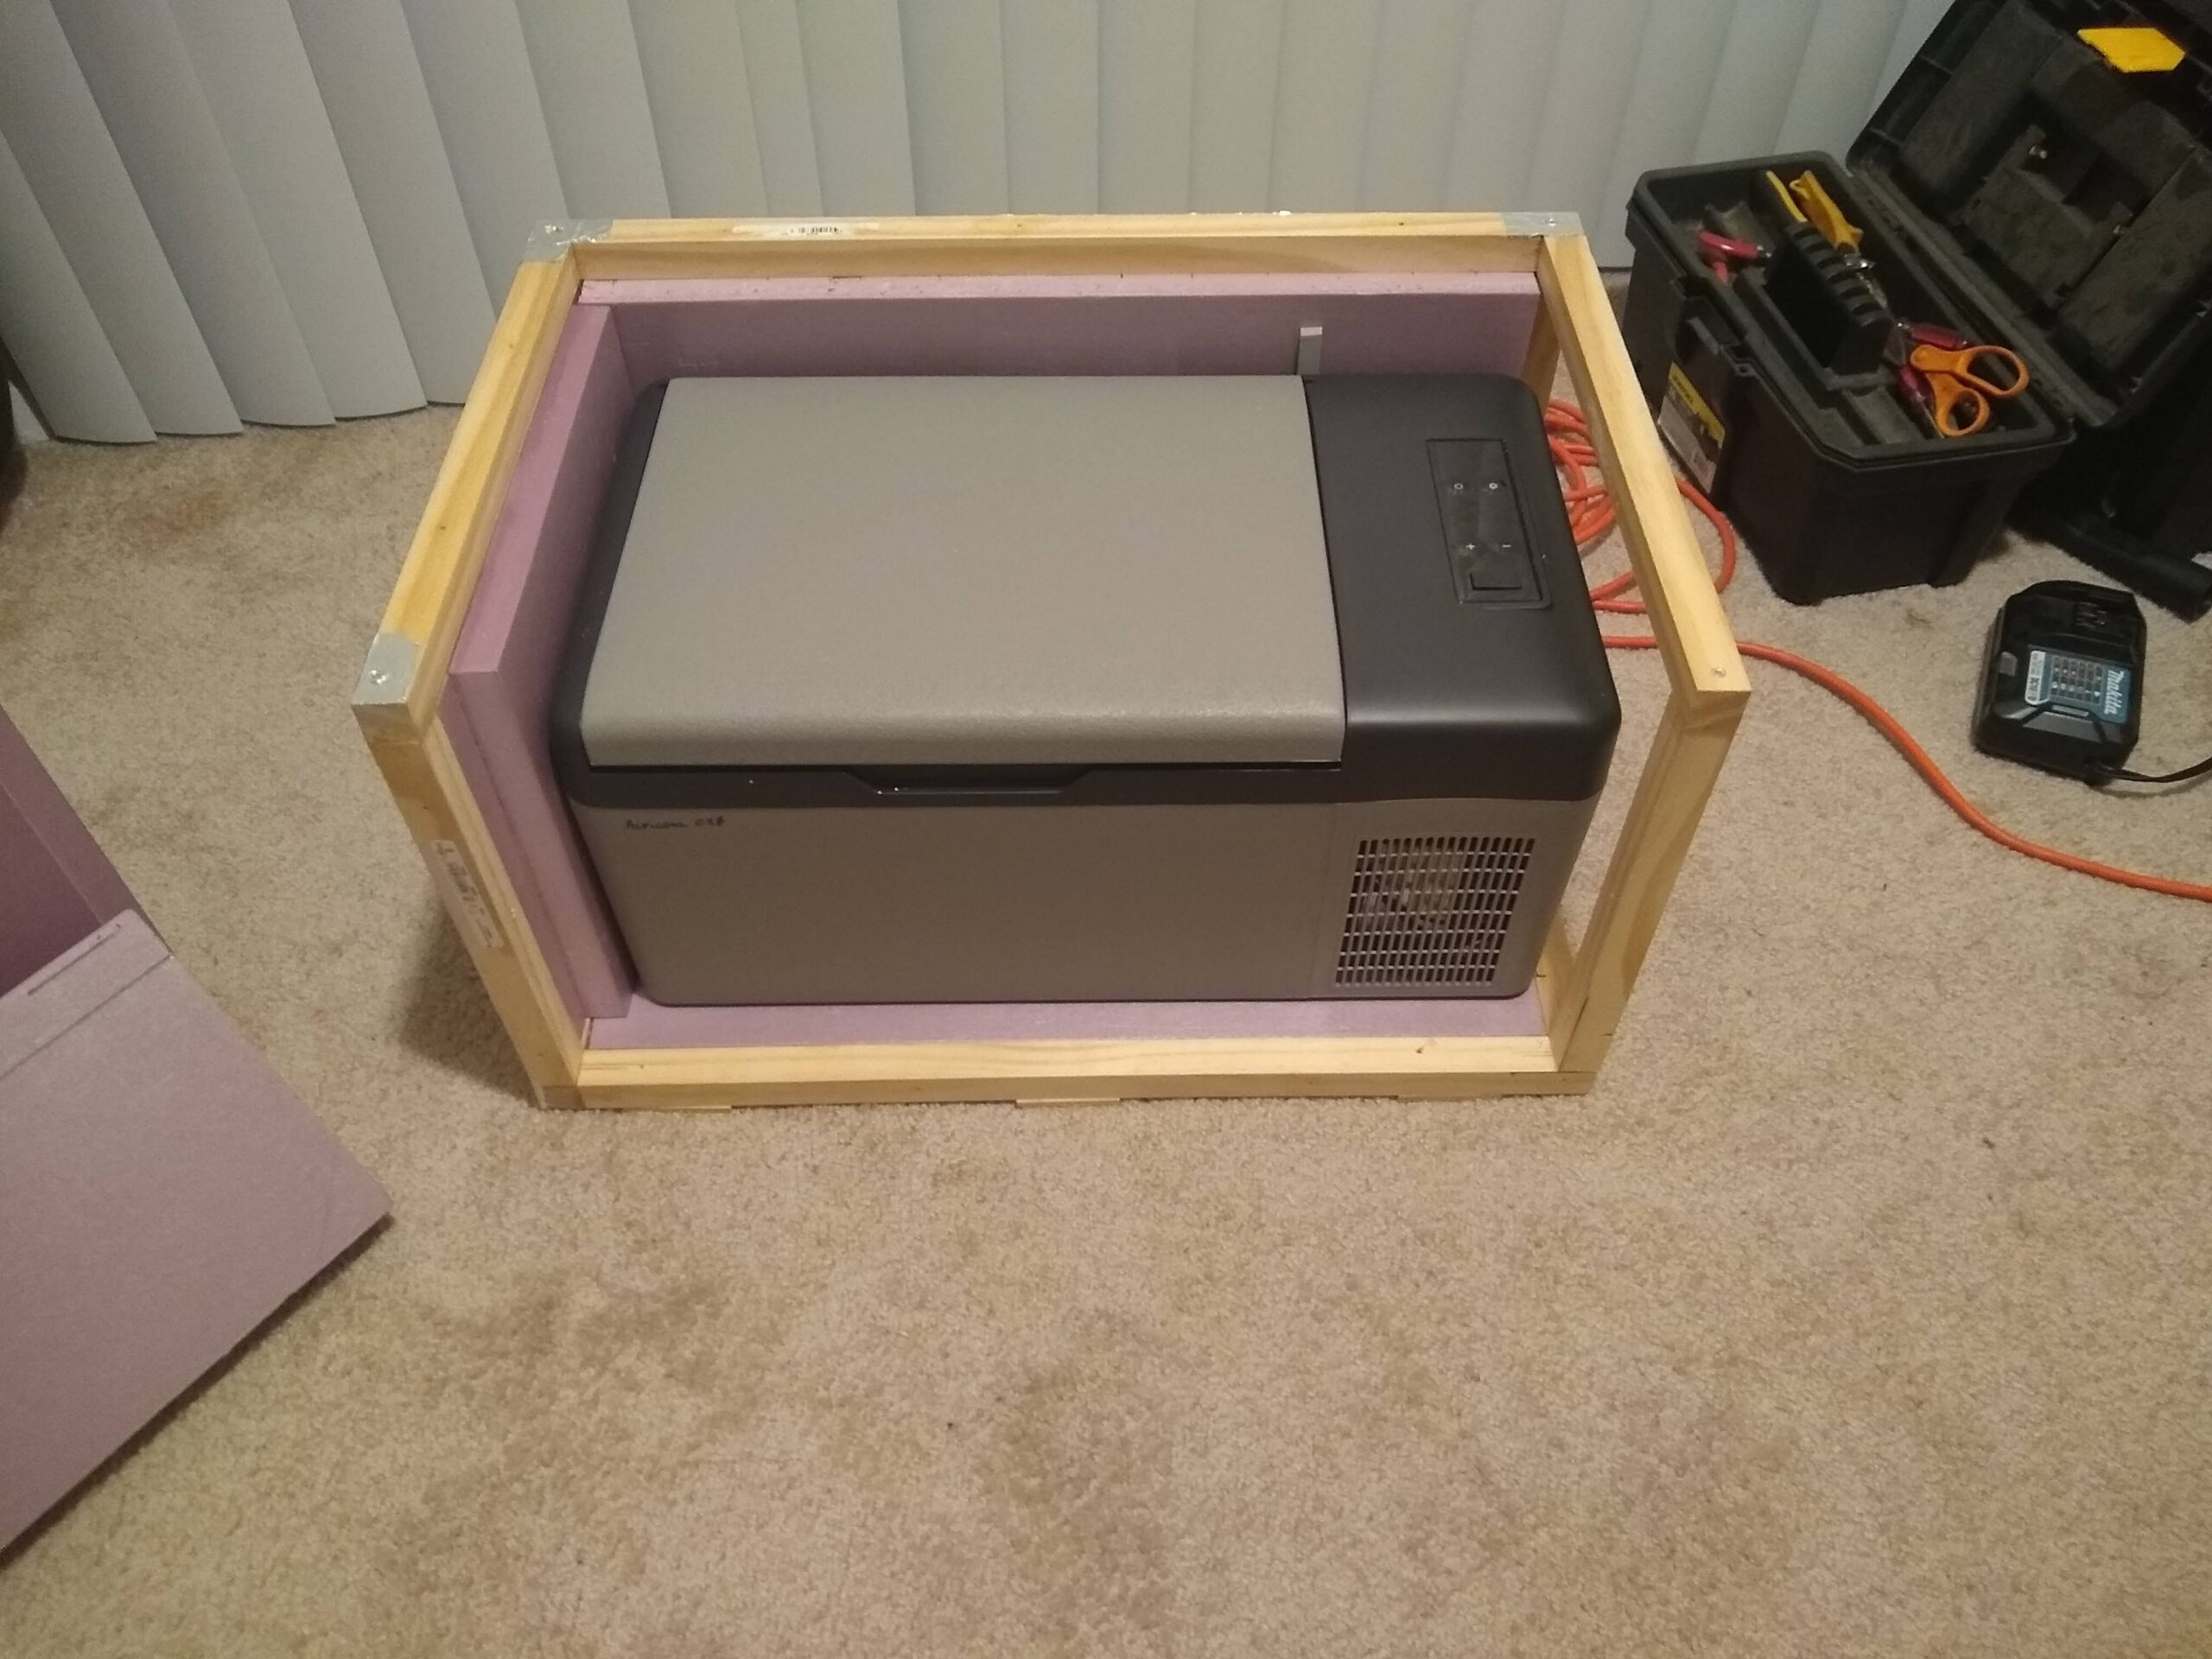
I considered ripping the whole thing apart and rebuilding it but I figured there was a good chance that could end with no freezer and a bunch of trash so I decided I’d do something probably crazier and just build more insulation around the cooler. Kind of problematic to insulate 3/4 of a rectangle when 1/4 is generating heat, but I figured it might work, so I built this monstrosity.
And surprisingly it freaking works. Without the extra insulation it will freeze water and get to about 20F, but it’ll stay there and run the compressor forever. With the foam it goes all the way to -4F and cycles the compressor on\off. I haven’t figured out the duty cycle and the actual gains but it’s an obvious improvement.
So yay, I did a thing that worked out the way I semi planned… now what? I don’t really have much use for it in an apartment so it goes in the stack of gear I made but will never actually use. Actually pretty huge addition so it’s at the bottom of the stack… anyway- it is what it is. If\when I get a tinyhome it’ll be great to have.
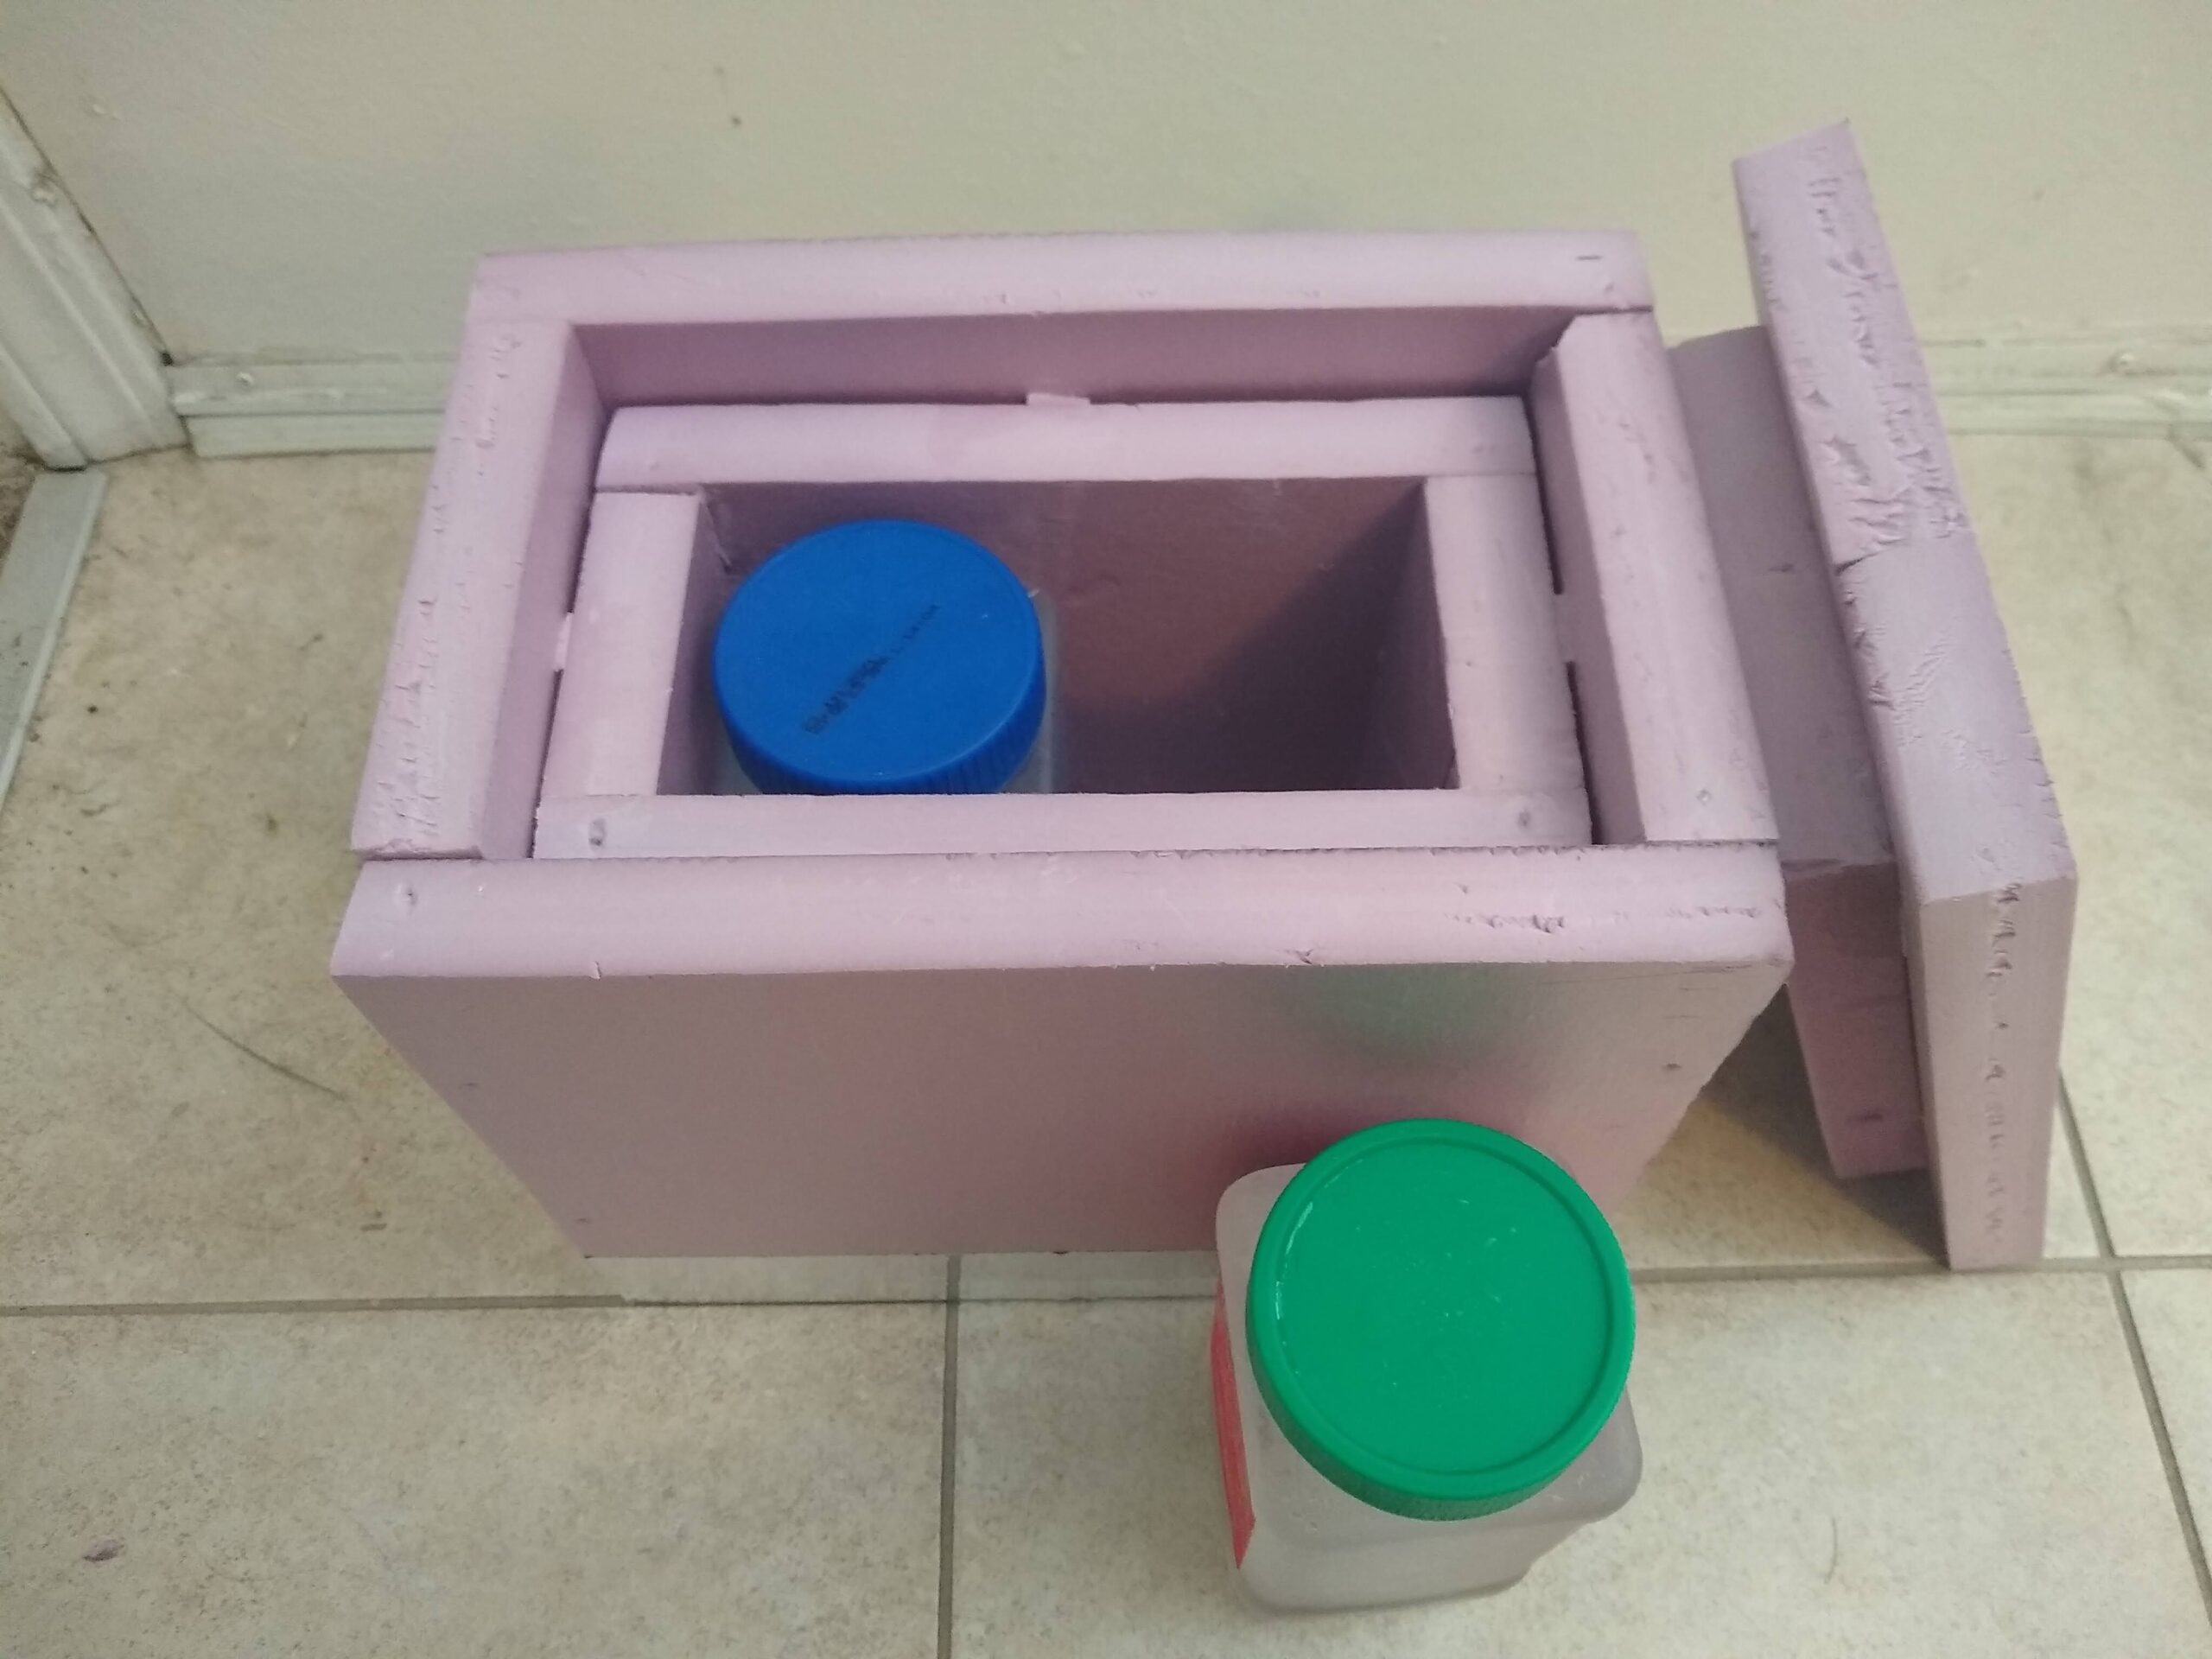
But the unexpected lesson I learned from this exercise is that this pink foam shit is pretty awesome. Very, very strong and workable and insulates like nobody’s business, and I had like 3 extra 2’x2′ sheets of it.
So I made more mostrosities.
This is a mini cooler that holds 2 square instant Community coffee things. They’re great because they’re square, and I use the coffee anyway. They work sort of like those old hard freezer packs. Not sure why I made this but I kind of wanted to see how long they’d stay frozen with 2″ of foam. The answer is about 3 days in an apartment between 70-80F. I was impressed.
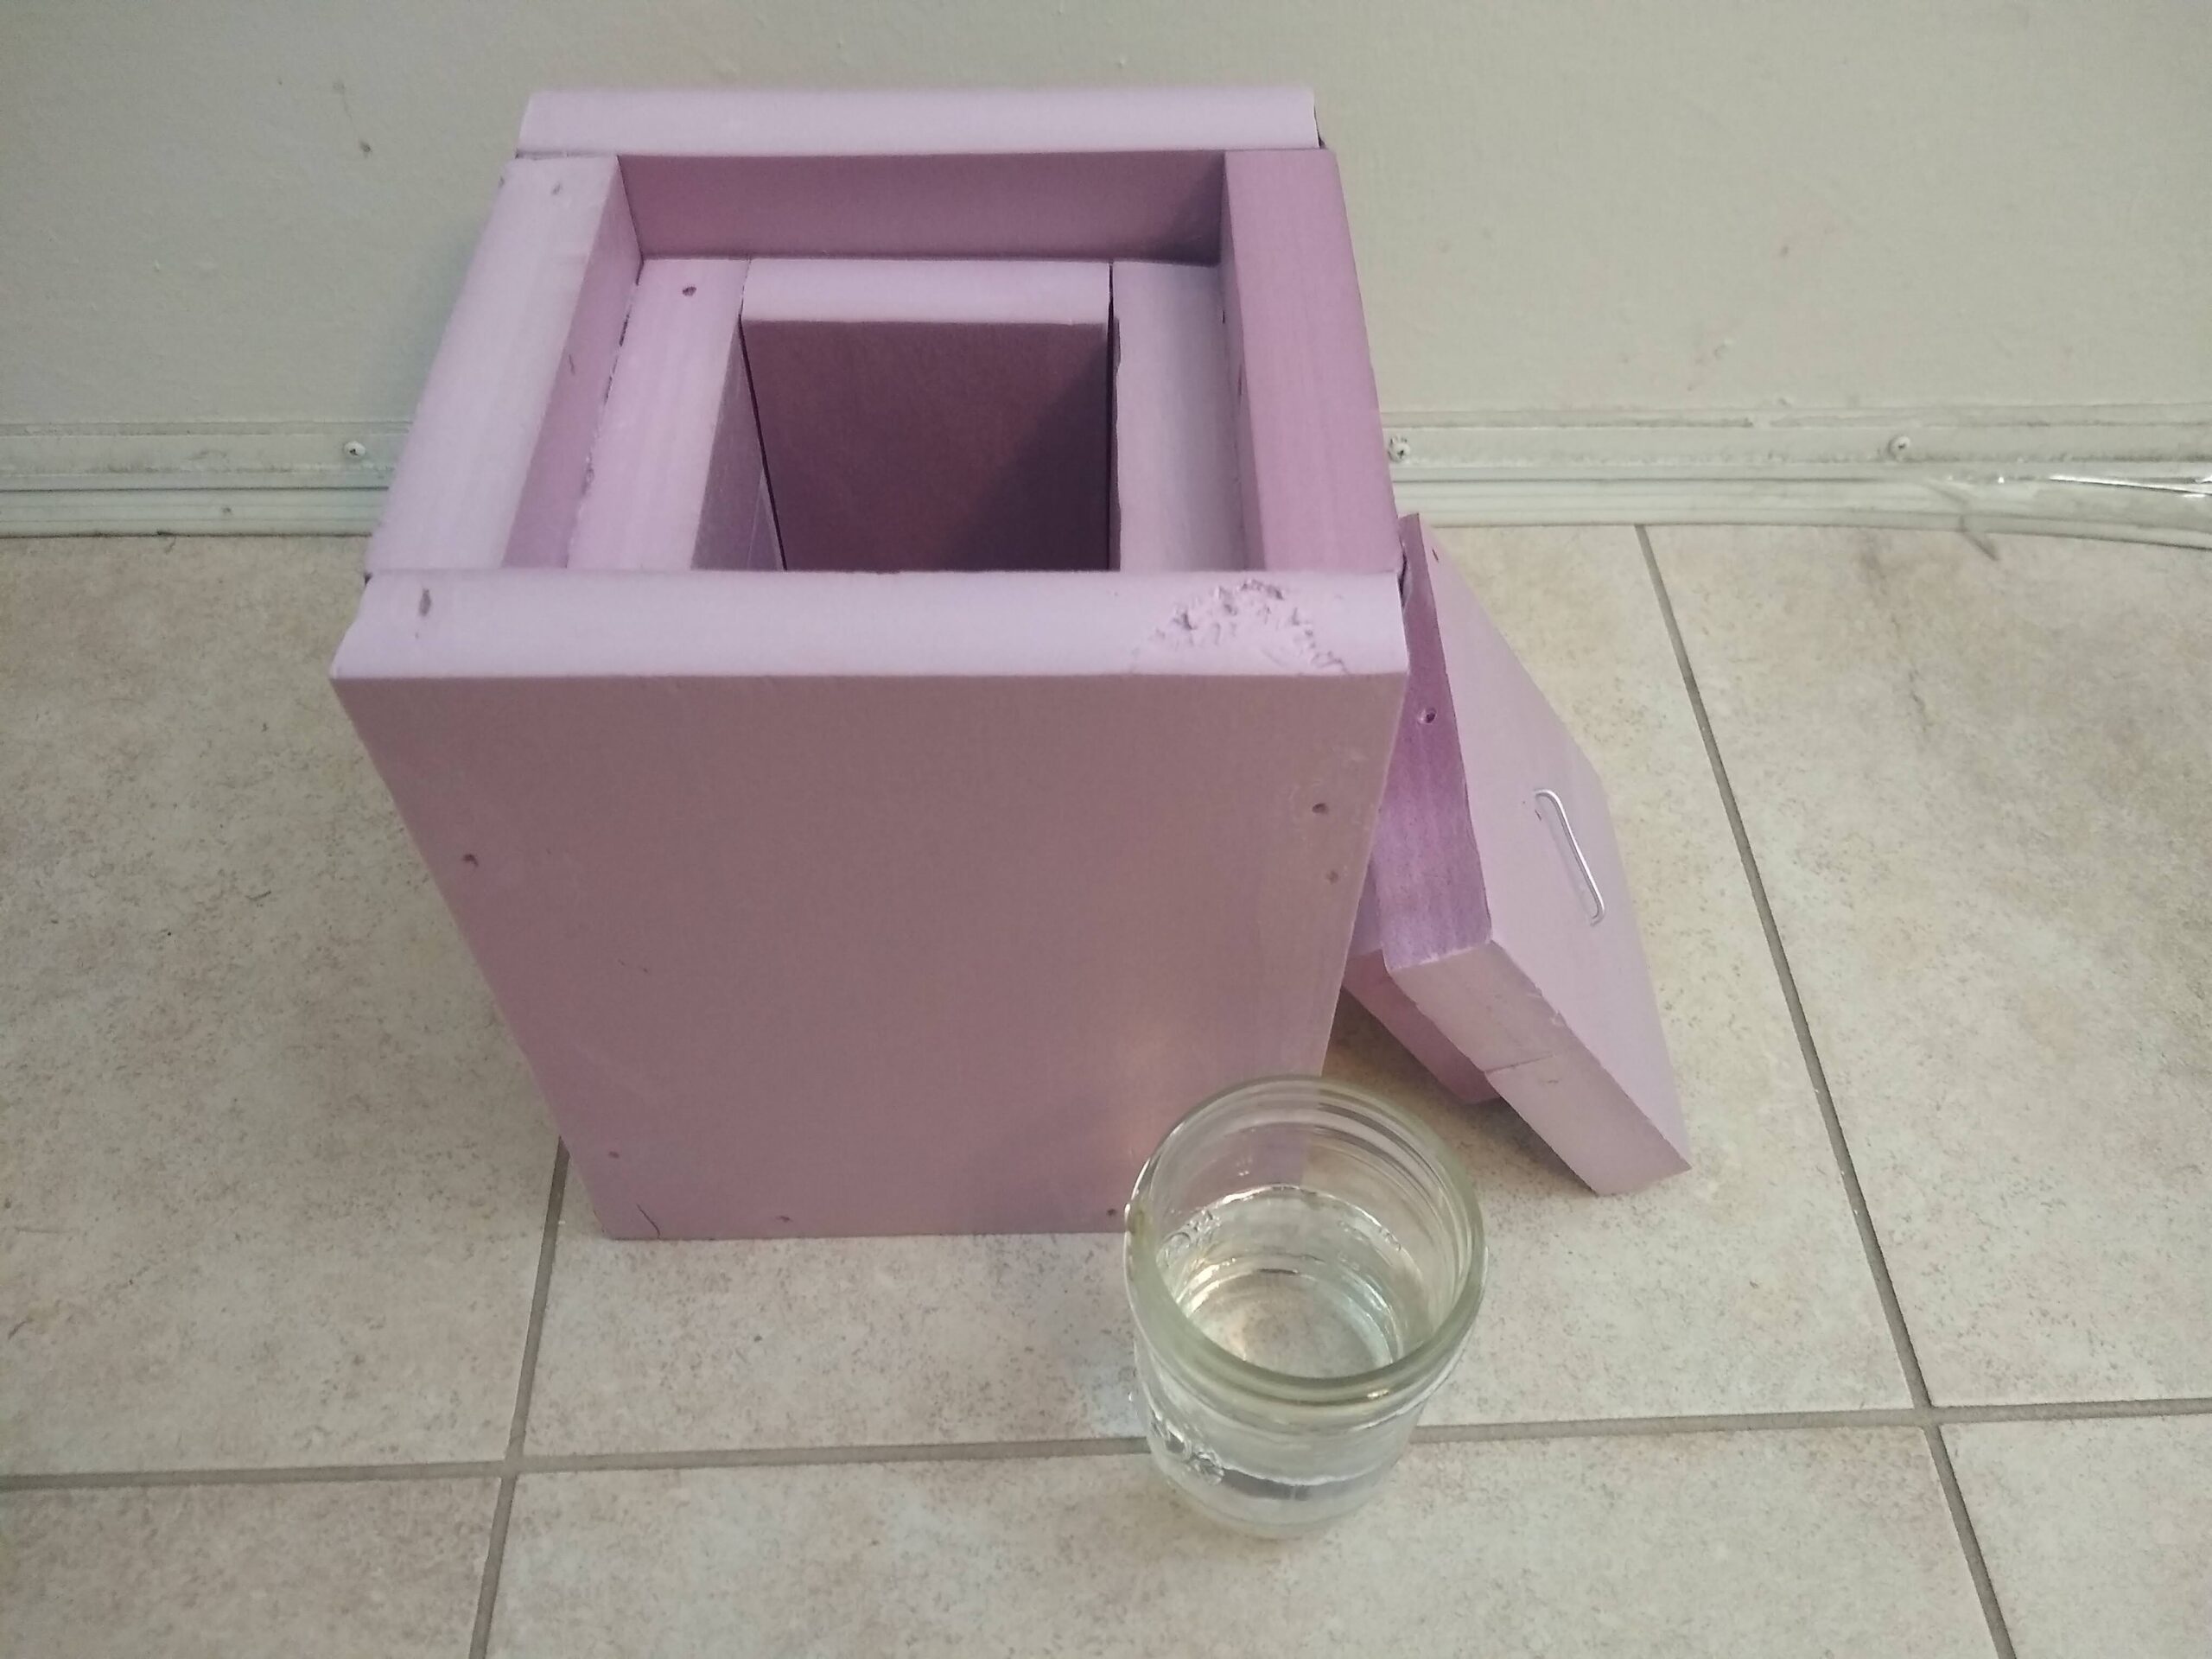
Another one… this one was because I got into the idea of ‘directional freezing’ so I can make perfectly clear ice. But I initially misunderstood the idea so and just thought I was supposed to slow down the freezing, but there’s more to it. So this doesn’t work and it’s basically a really great cooler for about one or two big ice cubes.
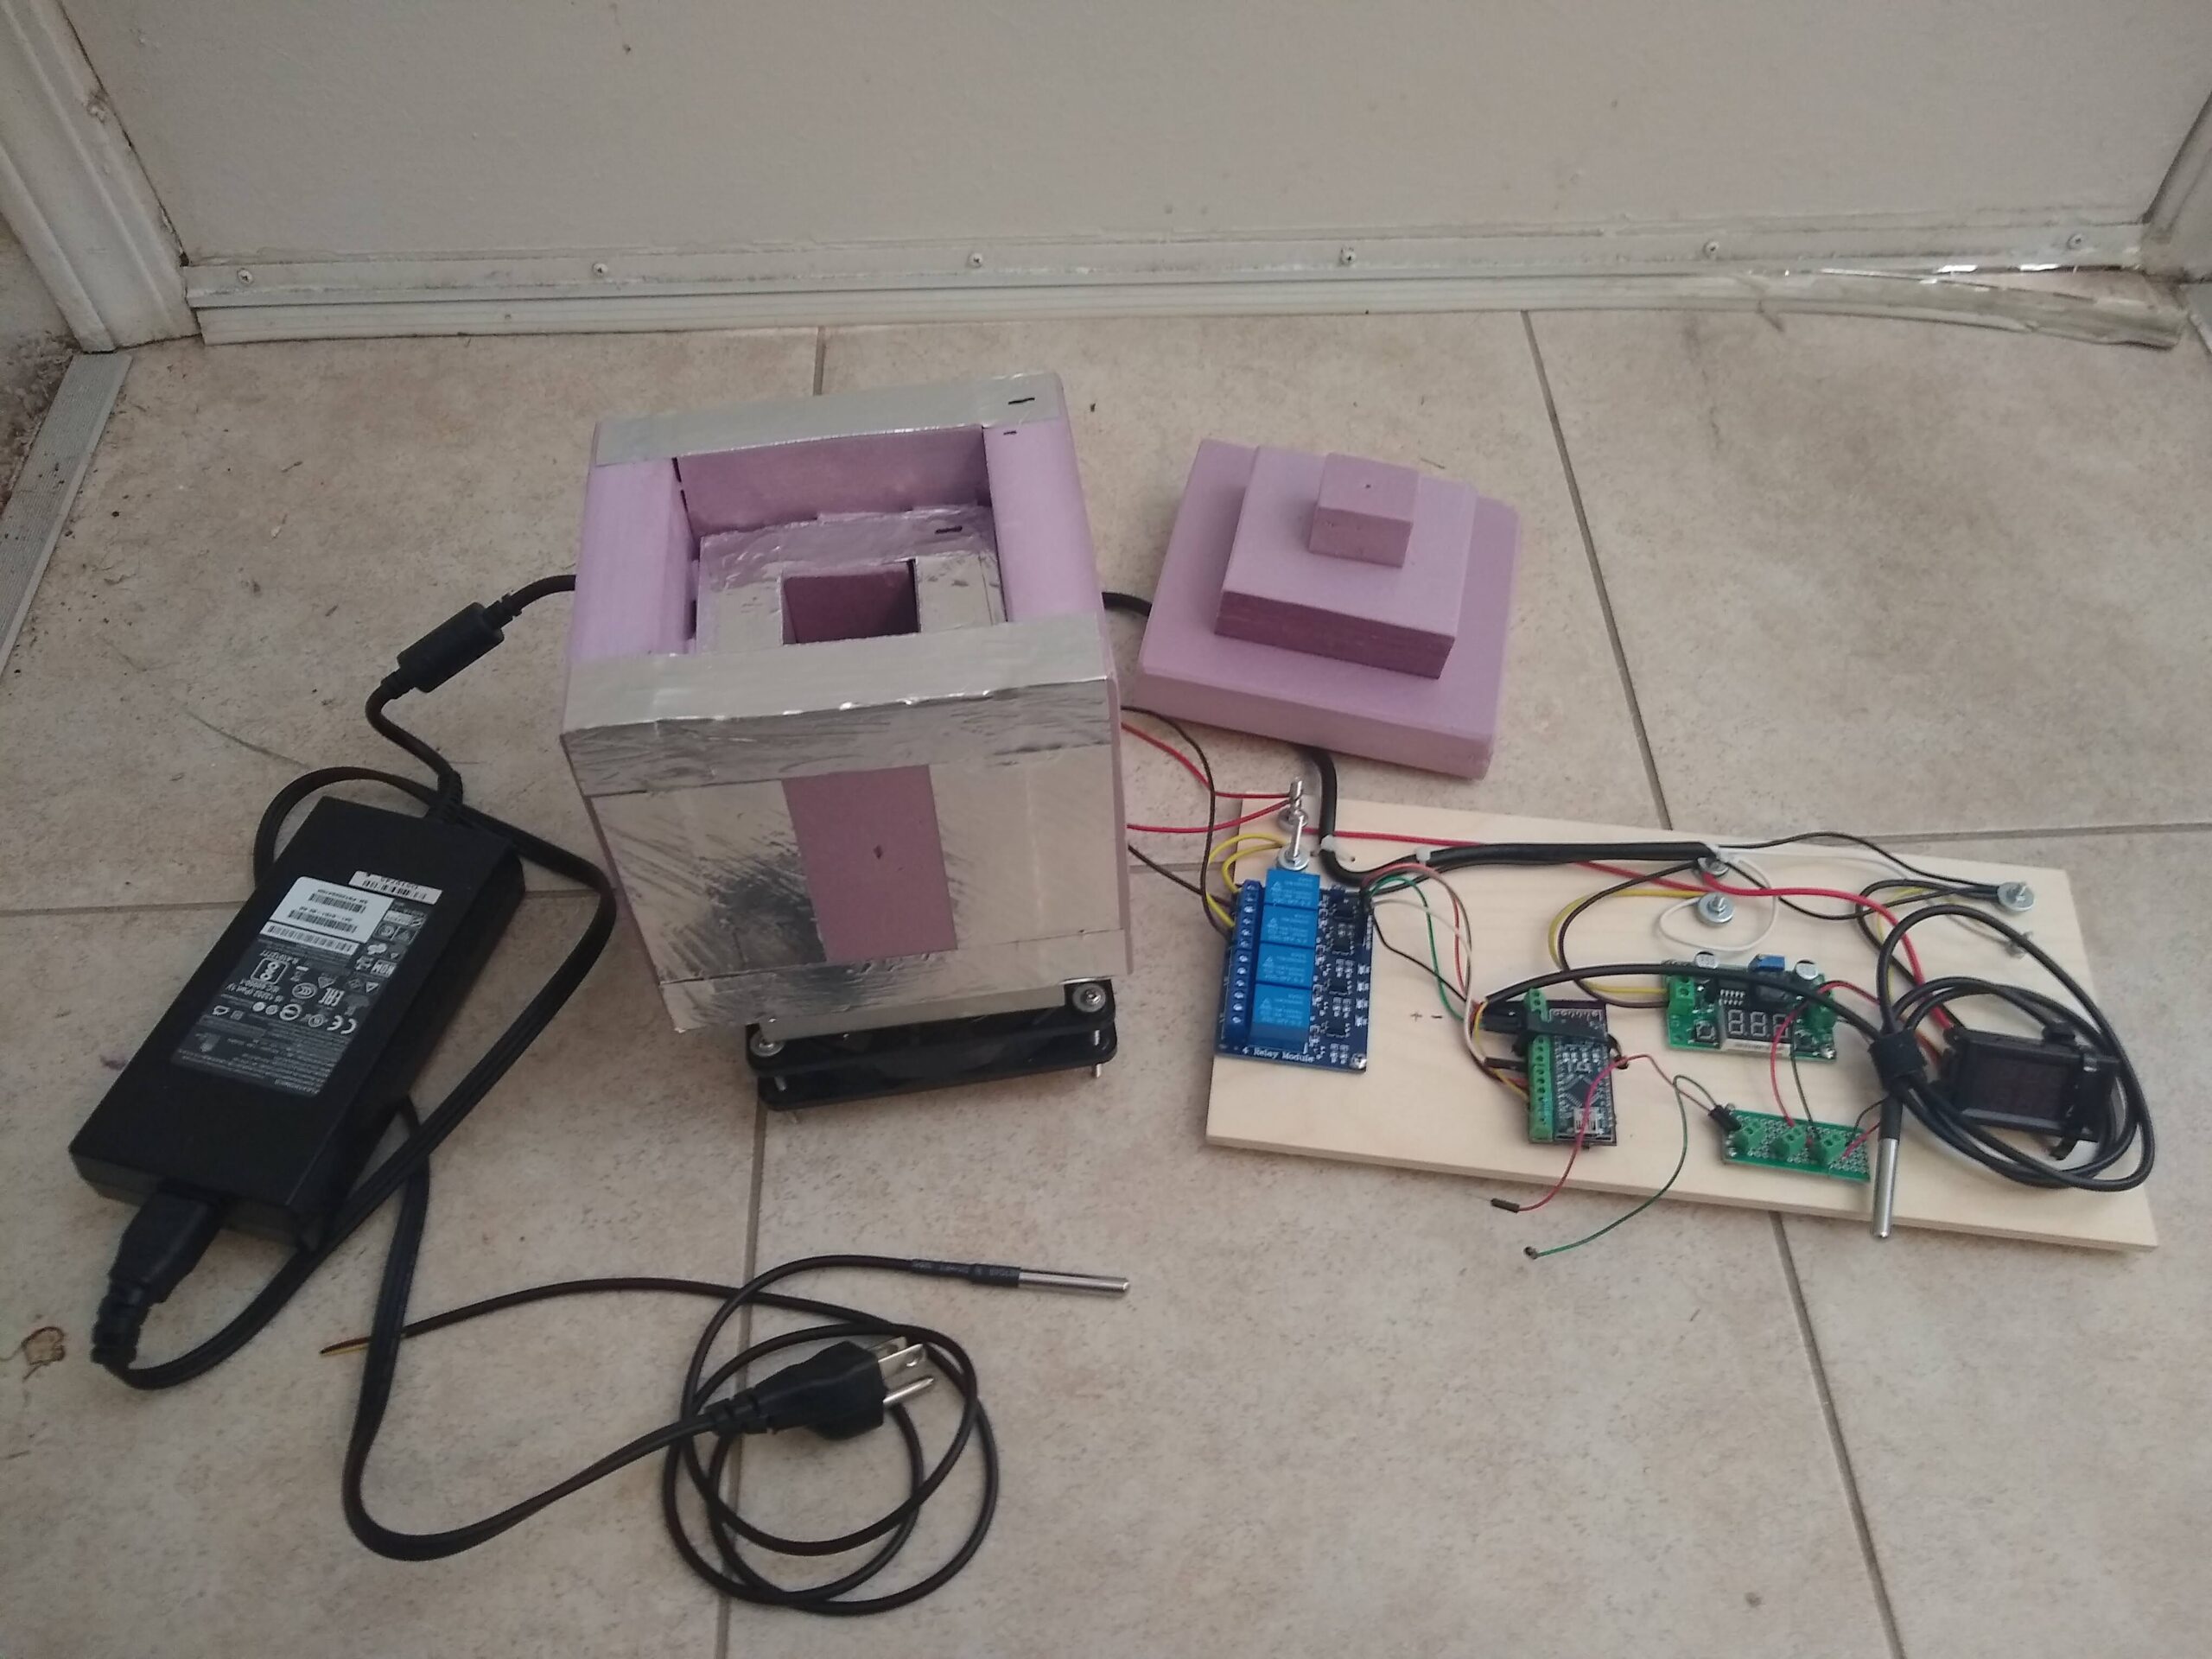
I’m still not entirely sure what I’m up to here but there’s a peltier chip involved. I did finally learn that controlling peltiers with MOSFETS is way more trouble than it’s worth and there’s no shame in just slamming it on-off with a relay like a normal human being.
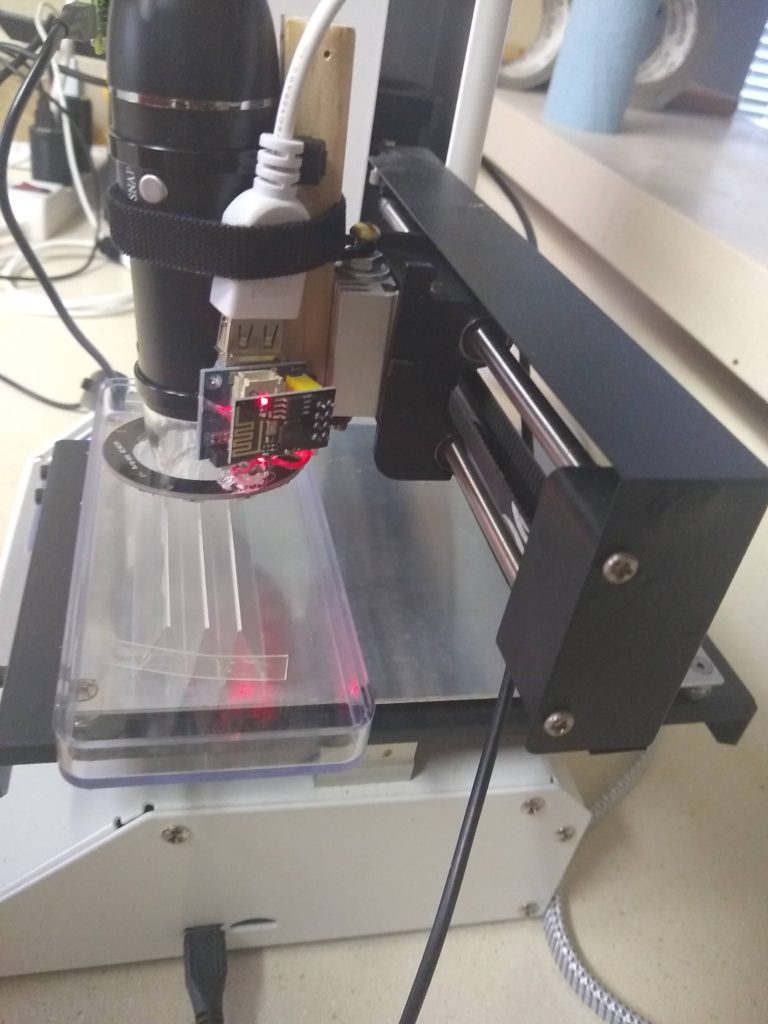
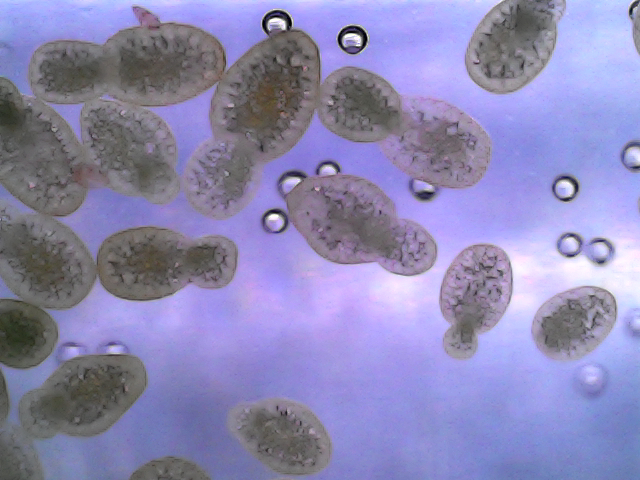
The watermeal stuff made me want to zoom in so I got a $15 USB ‘microscope’ off eBay. It says it’s 50x-1600x but I don’t really know or care enough to check them on optics but it zooms pretty hard so I was pleased with the purchase.
Before long the frustrations of focusing and moving at tiny scales made me wonder how hard it would be to motorize it. Seen a lot of DIY builds with the DVD drive steppers and I had a couple and drivers so I started soldering wires onto those annoyingly tiny flexible pcb leads. Naturally the frustration of that process made me question my whole existence and I stopped long enough to remember I have a perfectly functional motorized XYZ in the form of a MP Select Mini v1 that I got tired of replacing the heater block and fan on. It’s always amusing and infuriating to me how long it takes me to get to the most painfully obvious solution even when it’s sitting in my closet.
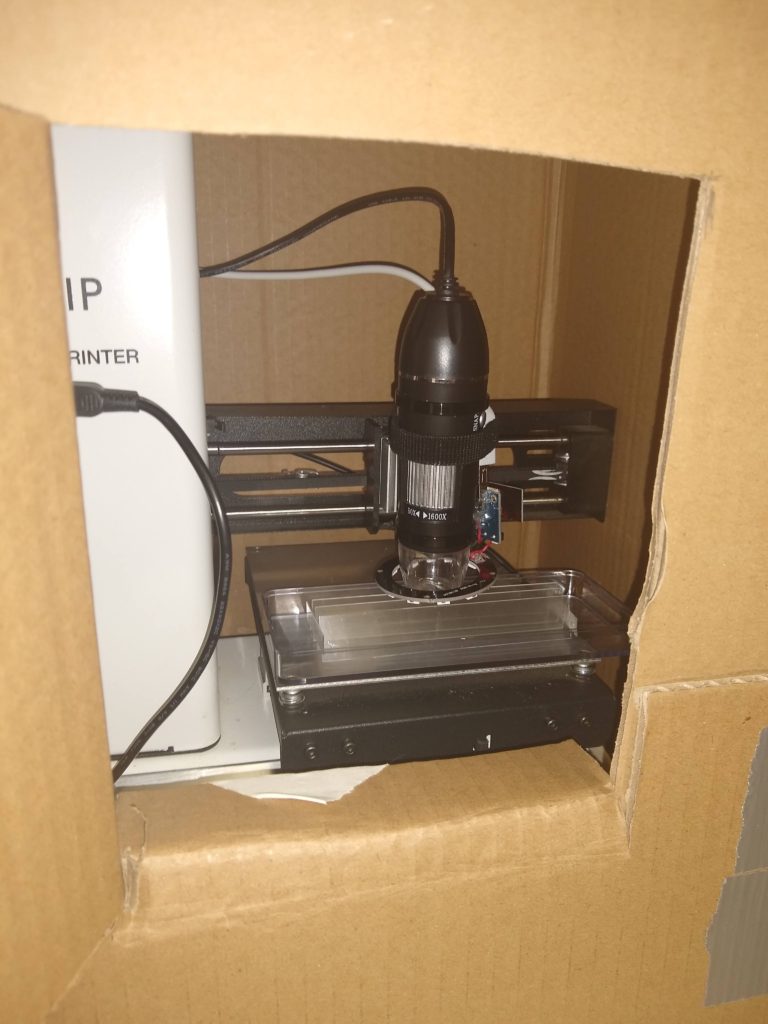
I had a couple of bad ideas on how to fix the scope to the heatsink but eventually I settled on a 1/2″ square dowel drilled to hold zip ties. Then zip tie the dowel to the scope and to a machine screw held in the sink with washers and nuts. It’s rigid enough to manually adjust the zoom on the scope without bumping the frame so that works for me. I forgot to home the Z axis before I strapped on the scope so I’m not 100% sure I won’t crash it into the bed, but this is for moving around in spaces of a couple of centimeters so this works. A less lazy person would have used their perfectly functional MP v2 to make a neat little fitting, but I am lazy so when a drill and zip ties can get me there the printer stays off.
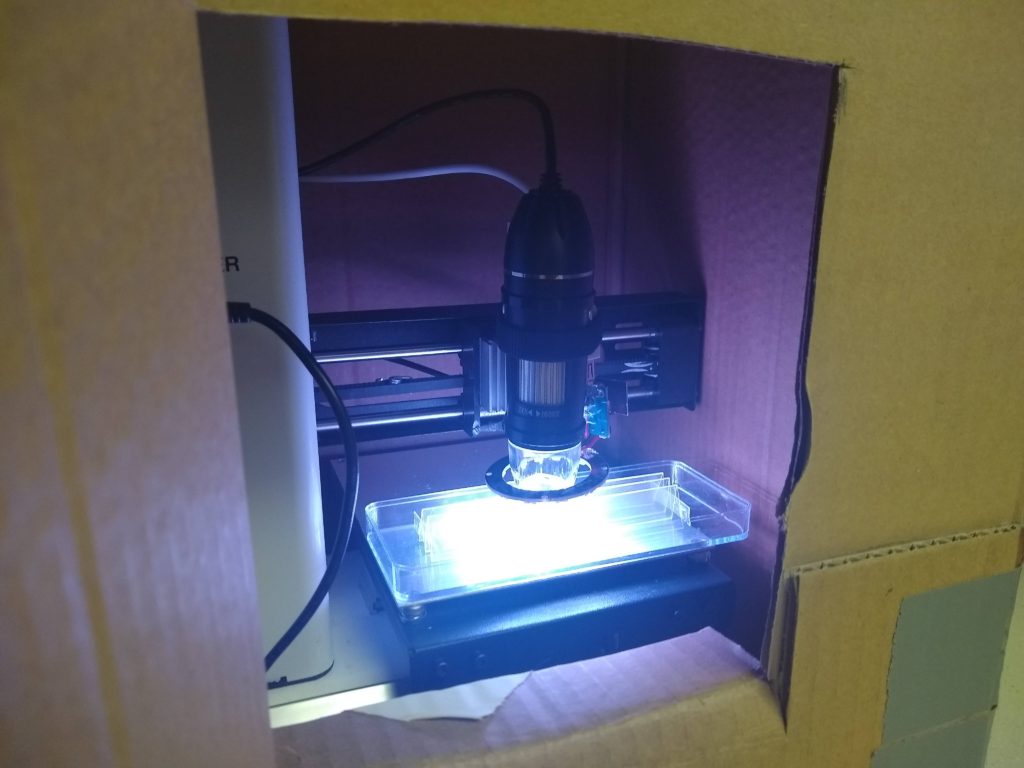
The scope has a built in LED but I added a 12LED RGB ring for more control of the light. The separate RGB channels does make some weird effects at this scale, but I think it makes everything look kind of like a nebula with space monsters and this isn’t about real science so I’m good with it. I should have wired the LED for gpio control but I’m lazy and I already made a bunch of ESP-LED things so I just velcrowed one on.
I actually haven’t done much to justify motorizing the scope yet. It lets me get some super sharp focus by adjusting the Z though. Also for what I’m doing I probably can only use the X and Z since Y would jiggle the water. I’m just doing stationary timelapses for now because I’m pretty far from coding anything that could help the camera follow a pod, but it’s a start.
The motors and camera are easy to control with python, fswebcam and gcode. I could probably send packets to control the LED from the same script but not sure I need that. And the original MP select box with a door cut in the front made a perfect housing for the whole thing.
80\20 T-slotted aluminum hardware rules, but it’s kind of expensive and even the 20-series is just a little too big to make sense for a lot of electronics DIY stuff.
Makerbeam is a 1cm profile series that should be the perfect compliment to 80\20, and at first glance it’s great and seems semi-affordable even for small amounts, but that’s just looking at the extrusions.
I got 4 sticks of 300mm MakerBeam for $18 to try out and thought- hey, this isn’t too bad. Way more than wood but this is reusable foreverish. But I mistakenly thought that a standard M2 nut could work in the slot. I was wrong. Pan head M3 bolt wont fit either, you need a square head bolt or a flat nut… no big deal, right? The M3-5 hammer nuts for 80\20 are like $10 for 50 so I can deal with that.
Nope- the makerbeam M3 flat nuts are freaking outrageous- like a buck each for about .01 cents worth of stamped metal with an M3 hole… freaking infuriating.
The whole point of getting this stuff is that I’m not a machinist, so if I have to start making my own fasteners this goes sideways fast. But… I figured out you don’t have to be a machinist to make something workable.
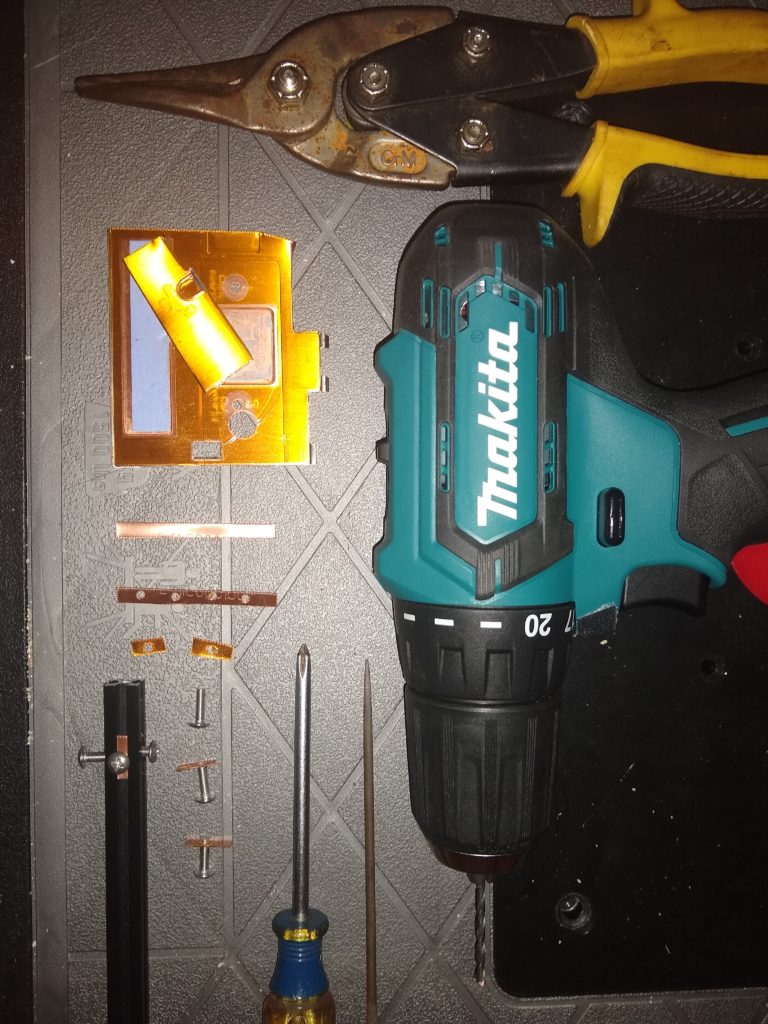
Just needed snips, drill, screwdriver, and a little file helped. A sane person that owned a functioning drill press would do even better.
Started with scrap copper sheet I’d pulled out of a laptop heatsink years ago (Hoarding heatsink materials pays off very occasionally). Cut off a strip thin enough to slide in the MakerBeam slot and drilled some M3ish sized holes. I don’t have an M3 tap so I just filed out a little and turned an M3 through it.
The surprisingly cool part is that even if the hole is off- when you put it in the slot and screw it down it does sort of a brake press action on the nut and it trues up in the slot. They’re not as strong obviously but if you’ve got loads that can tear copper I guess just pay the buck. I figure this could also be a decent alternative the brackets which are also outrageously priced, but actually I’ll probably just use 80\20 for most stuff because this isn’t trivial enough to make dozens of nuts whenever I need them so it’s actually not all that workable, just more so than paying $1 per nut.
This is another one of those posts that I have to make so I can be ‘done’ with some ridiculous thing that I know I’ll never put enough effort into actually being done with.
At some point I thought it would be interesting to have a flat device that extended to a surprising vertical height using a flat coil like a tape measure. A little curl gives flat tape a little rigidity against pressure on the convex side. Thought maybe using two facing each other could give you enough strength to raise up a strip of LEDs. Figured that would be a cool effect right there- little lights that smoothly lift up out of the ground.
It’s kind of a dopey cousin of the ‘Kataka Actuator’. I promise I thought of this before I knew about the Kataka, but it doesn’t matter because they work completely differently. Also the Kataka has a lot more potential utility because it’s fairly strong and can lift useful loads whereas this is just for display type applications. Unfortunately the Kataka apparently suffers from intellectual property crapola that make it too expensive to be useful to anyone like me.
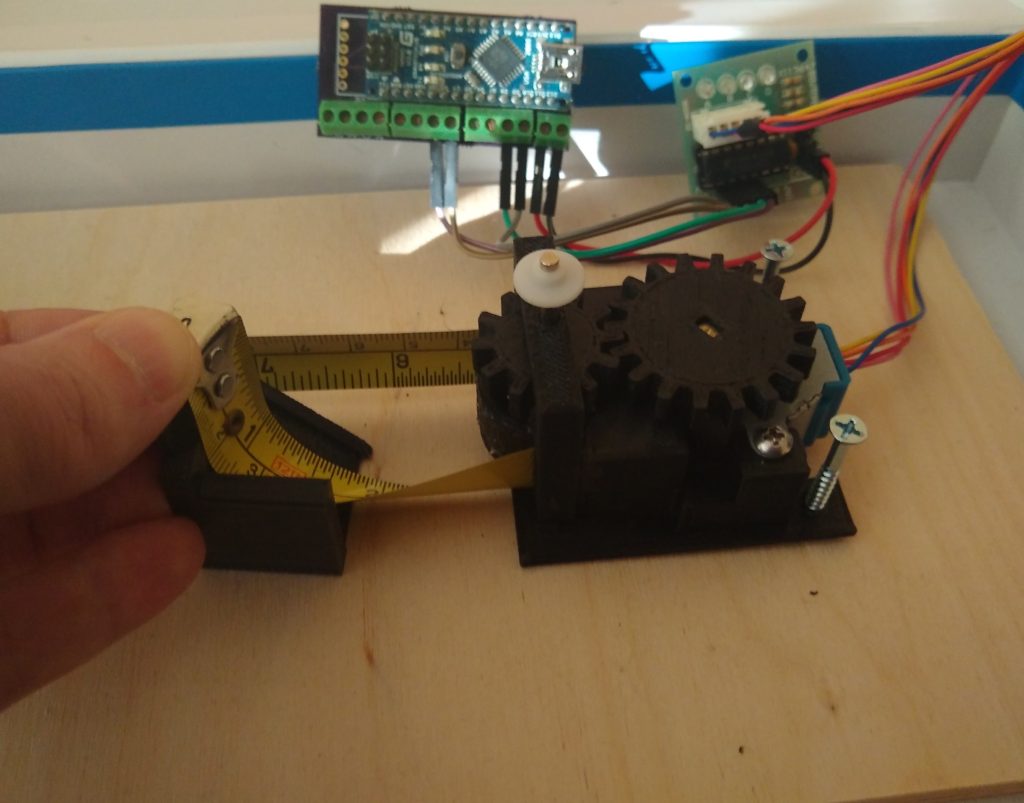
I finally put about a half-day into a crappy proof-of-concept and basically proved to myself that the tape-measure idea probably could work but I didn’t feel like working out all the mechanical kinks to make it actually work.
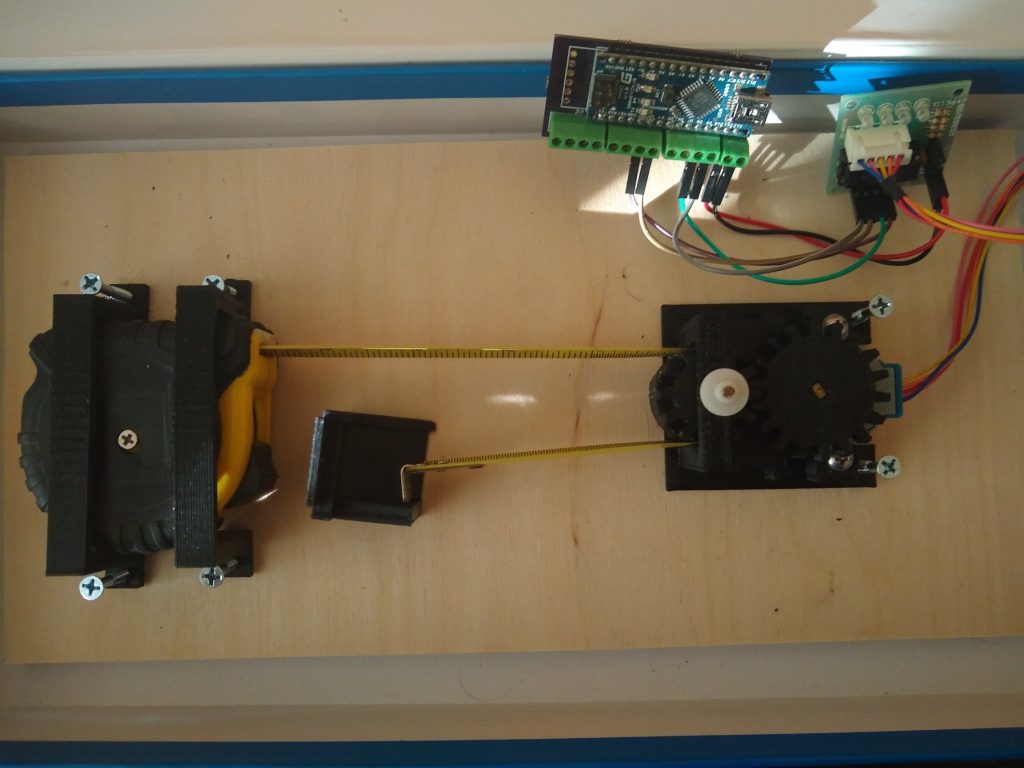
So here it is. The tape-pulling mechanism kind of worked. I had to coat the ‘drum’ with silicone caulk to make it more grabby. A tractor feed system with punched holes in the tape would be more ideal. The ‘turn block’ was trickier than I realized. I’d need to design a better contained but gentler pathway to get it to turn the 90 degrees upwards without binding up the whole feed.
And I put a little thought, but no design, into figuring out how to combine two tape-feeds into one ‘pole’. Figure the easiest thing is just mirror the whole assembly on the other side that meet in the middle to turn upwards, though driving that from a single motor gets more complicated.
Pretty sure I’m never going to get back around to this idea. Seems like someone with a fresher interest in stage lighting could make this a cool project, but I’ve got other obsessions brewing and I just wanted to post this so I can repurpose the arduino and motor, and also the box it’s been sitting in for 6 months because it’s a really nice box- not the blue one, but still nice. I didn’t post the 3d files because there’s why bother.
As if I hadn’t taken this silicone LED thing to absurd enough extents… here’s more.
I came across a product called ‘Encapso K’ that I thought might be fun to test as an alternative to the acetoxy silicone I’d been using. I’ve found the super thick balsa ones never stop curing so they get bubbly and weird after six months or so. Plus I was just getting tired of the extreme goopiness of the caulking process. So I ordered a little kit of this new stuff. It’s two-part platinum cure that solidifies water-clear but is extremely brittle so it’s billed as ‘rubber-glass’ for glass and ice sfx uses. It lives up to the name too. It is clear as glass but cracks and crumbles kind of like a rubery stone. Crazy stuff.
Unfortunately I learned it will not cure inside of the vinyl tubes I use for the tube lights. I’m guessing it’s something about the chlorine in PVC being an asshole but I’m not a chemist. I could try acrylic tubes, but meh. And the liquid is too thin to make the balsa dioramas without precuring some little pieces to hold the planes in place like they use in resin casting and then it’s just resin casting with really brittle, rubbery resin. So I wasn’t quite sure what to do with the stuff for a while. The fact that it wouldn’t cure in the vinyl tubes was kind of a deal breaker for most ideas. And the brittleness wasn’t helpful.
Recently I thought it might be cool to encase the new brittle silicone in the old flexible silicone and then smash it and see what happened. And I did that. And this is what happened.
Pretty predictaby- it looks like fractured brittle silicone encased in a more flexible silicone, kind of like an ice cube.
So yay- I made a kind of an ice cube looking thing out of a couple of different mixtures of silicone. It looks really cool with an LED behind it I think. Maybe I’ll make a light out of it.
I did make a light with the same general idea using crushed glass in an upside down glass a while back. But I wasn’t a big fan of working with crushed glass. I used safety glass so it was little cubey grains but it still wasn’t great. And this way it looks like big chunks of broken glass but without dealing with big chunks of broken glass. So I ended up really thinking outside the box here by using this new silicone stuff to do exactly what it’s sold to do.
But the really surprising part of all this was finding out how fun it is to crack the interior silicone once it’s all cured up. Kind of hard to get the first crack in but once you do it feels like popping creme brulee bubble-wrap. Seriously- if you’re a compulsive folder or squisher or roller of whatever materials are around you- this is cosmic apotheosis. It’s kind of a one-time stress-ball, but it’s one hell of a time. The hardest part is stopping so you end up with a cool looking ice brick thing instead of a glazed snowball. I think I made the video mainly to show the cracking part. I always dig the LED stuff but wow- crushing up these weirdly squishy but crackly silicone bricks… glad I didn’t learn about this in my teens or I’d never have left the house.
This is an attempt at a bot design that’s driven and steered by only one servo. I have no justification for this other than it seemed like it had to be doable.
I’m absolutely sure a single servo actuated steering\drive mechanism exists somewhere, but I couldn’t find any. I’m guessing the designs that do exist are for very specialized applications where some factor makes using only one servo desirable. Using two 9g hobby servos for any reasonable DIY application is pretty much as easy as using one, so there’s really no advantage in the added complexity of the linkages at all.
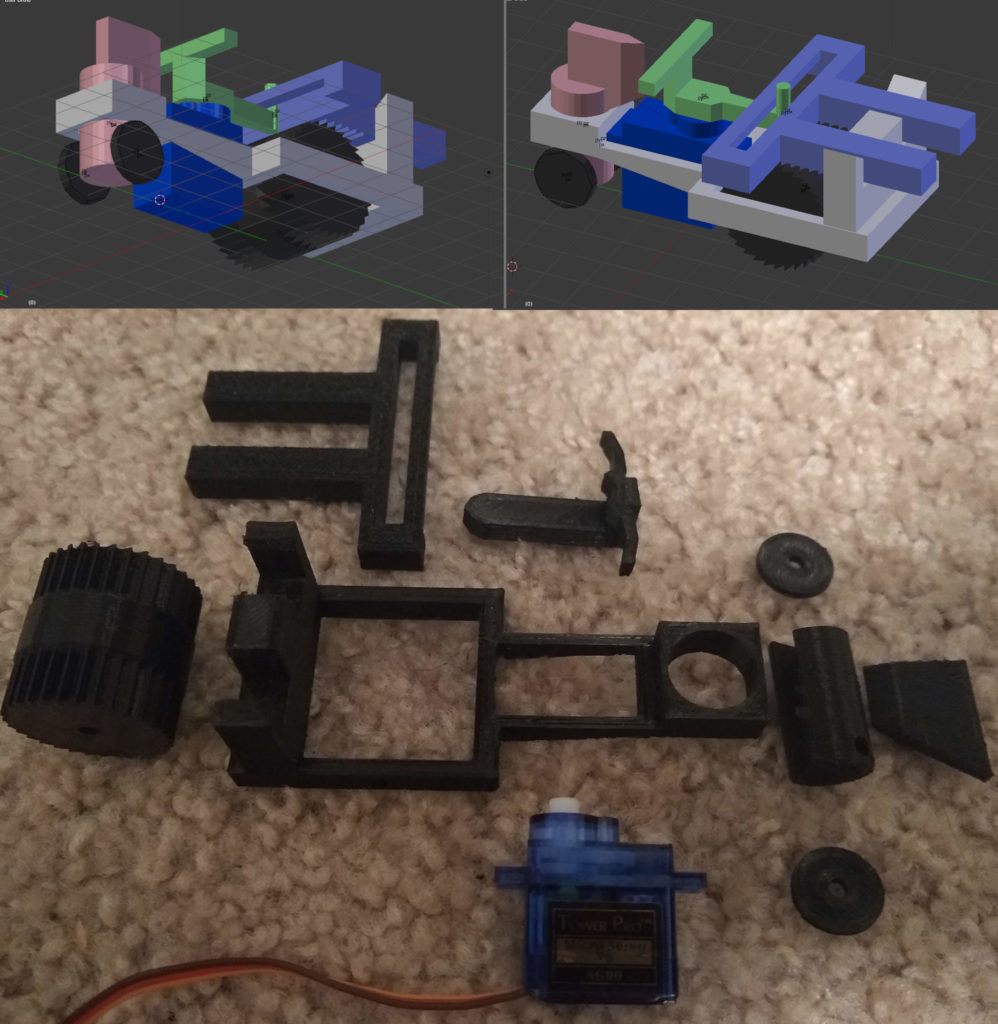
But despite it being a fundamentally pointless idea, I couldn’t get rid of it. A servo set up as a rear paddle of a canoe could control direction and momentum so why not a wheel? I thought about doing something like a ‘wheel paddle’ that would work a bit like a skate, pushing laterally to roll forward and varying the angle to each side to control direction, but that seemed like a copout somehow so I thought about more classic wheel\axle setups. This design is optimized for simplicity- lol… what that means is this is the minimum effort required to satisfy my weird compulsion to demonstrate this is possible, knowing I have no intention of taking it any further than that.
So the drive is a kind of rack and pinion thing with the teeth angled to turn the wheel on only one stroke direction. I should have used a little ratchet catch but didn’t. I’d seen more complex ‘mechanical rectifier’ setups that could drive on both strokes, but meh. I went with the T bar steering setup so you could kind of ‘set’ the direction and just work the servo around it so you can go straight and make smooth turns. Other options were to keep the steering connected to the servo but that would force it to always move in a serpentine pattern.
The video is a bit of a disaster. I tried to create the mechanism in the blender game engine using rigid body dynamics but I’m about 5 years out of practice with that program and forgot a lot so I just kind of winged it. The simulation is clearly jacked. The gear wheel doesn’t work right because I couldn’t figure out a directional rotation constraint and friction is wonky in the bge. Everything kind of floats, it’s awful, but I think it shows the functionality I wanted it to show and that’s the whole point of this pointless thing. I also tried to 3d print it, but… yeah- lot of quick-n-dirty solutions in the game engine version didn’t translate to matter so it didn’t really come together. But since I spent the time and the PLA I put it in the video too.
This obviously wasn’t a success, but I don’t think I can call it a failure either. Like a lot of my projects it kind of works in a way and if someone with more skill and determination took a stab it could probably be cool little demo thing. Anyway- it’s something I did so I could stop thinking about doing it so now I guess I’m done and I can do another thing.
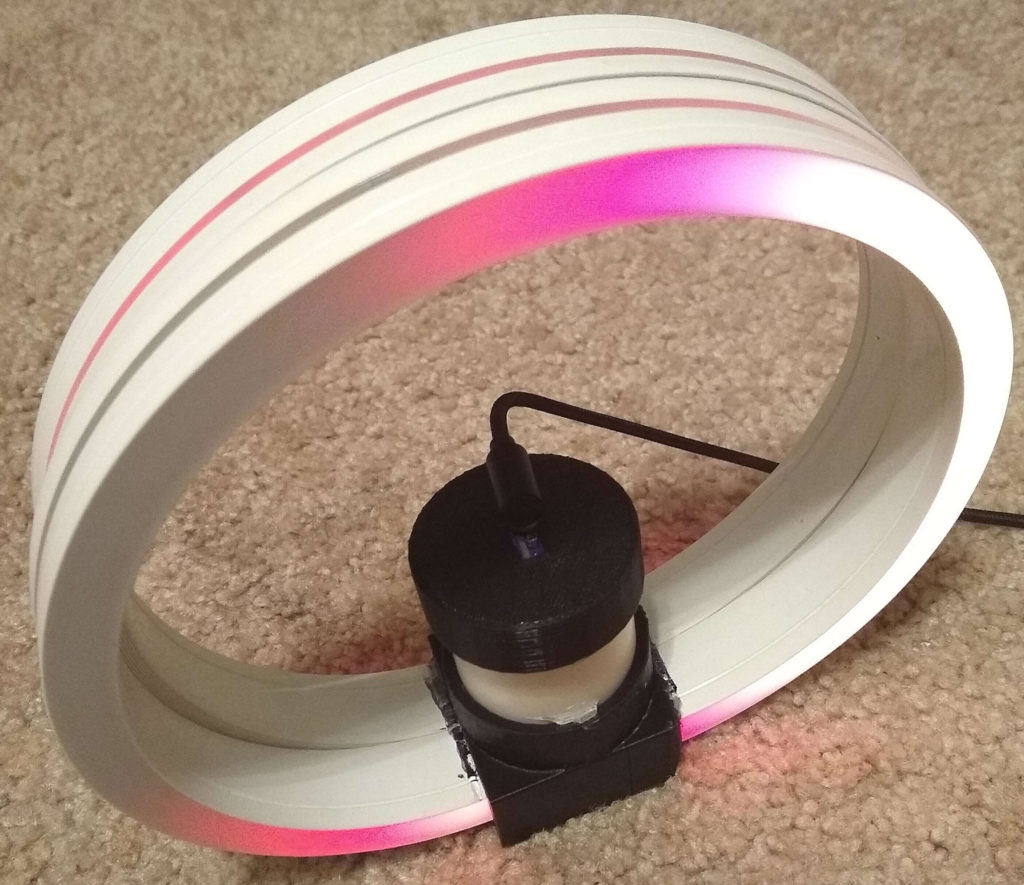
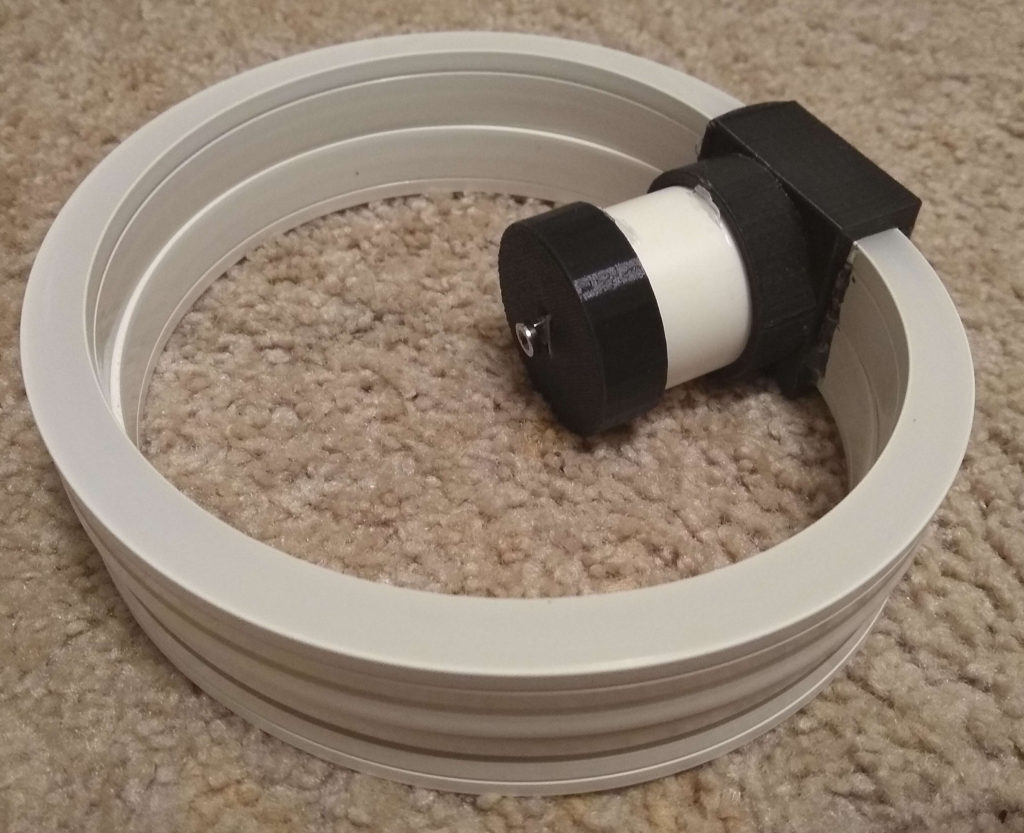
This light exists because a while back I bought some of that silicone-neon style strip diffusion and had to figure out something to do with it. Would have been cool to install the strip above a door or a footlight or something, but I rent so I don’t really do stuff like that.
So this is a pretty simple rig with (65) WS2812 LEDs on a D1 Mini running WLED. The structure is just a PLA printed holder that secures the strips and a small section of PVC housing the electronics. Originally there was a longer section of PVC and an 18650 battery module inside, but I wasn’t satisfied with the runtime with (65) LEDs so I just chopped it and went back to USB power. I popped in a mag-safe knock-off for the power supply. Those are really great.
I really like the diffusion these provide with 60/m LED strips. It’s not as great with 30/m and 144/m is very cool but probably overkill. They make several different profiles and focal patterns, I got this one by accident or mistake. I thought I ordered the circular neon style but this flat square style came so whatever. I’d love to make a larger installation of these on a staircase or something, but unless\until I own something worth a permanent setup I probably won’t be using this stuff very much. But now I have this little display piece to remind me how cool it would be if I ever did.
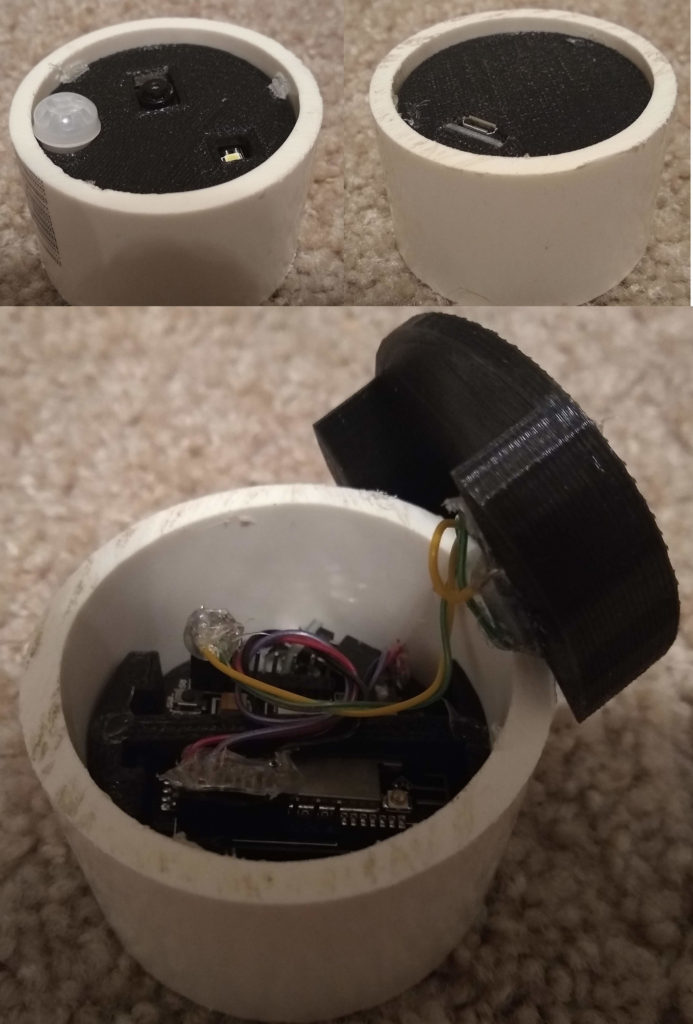
This is just a little housing idea for an ESP32CAM and AM312 PIR sensor A small section of 2″ PVC and PLA printed holder. Pretty simple and sturdy. I’m using this indoors with hass.io, but the PVC housing might be a good basis for exterior cameras too. I’m working on adding a battery module and using deep-sleep modes to make long-term time-lapses but this worked out pretty well so I figured I’d post it.
Here are more silicone tube lights with increasingly unlikely balsa gliders.
Here’s a video I made of the process of making the lights.
The classic toy ‘jetfire’ style balsa planes are aesthetically perfect to me. Form and function in unity. The little nose weights complete the look in the miniatures and it just looks great suspended in silicone all by itself. Add some swirly powder and LEDs and you got some staring to do.
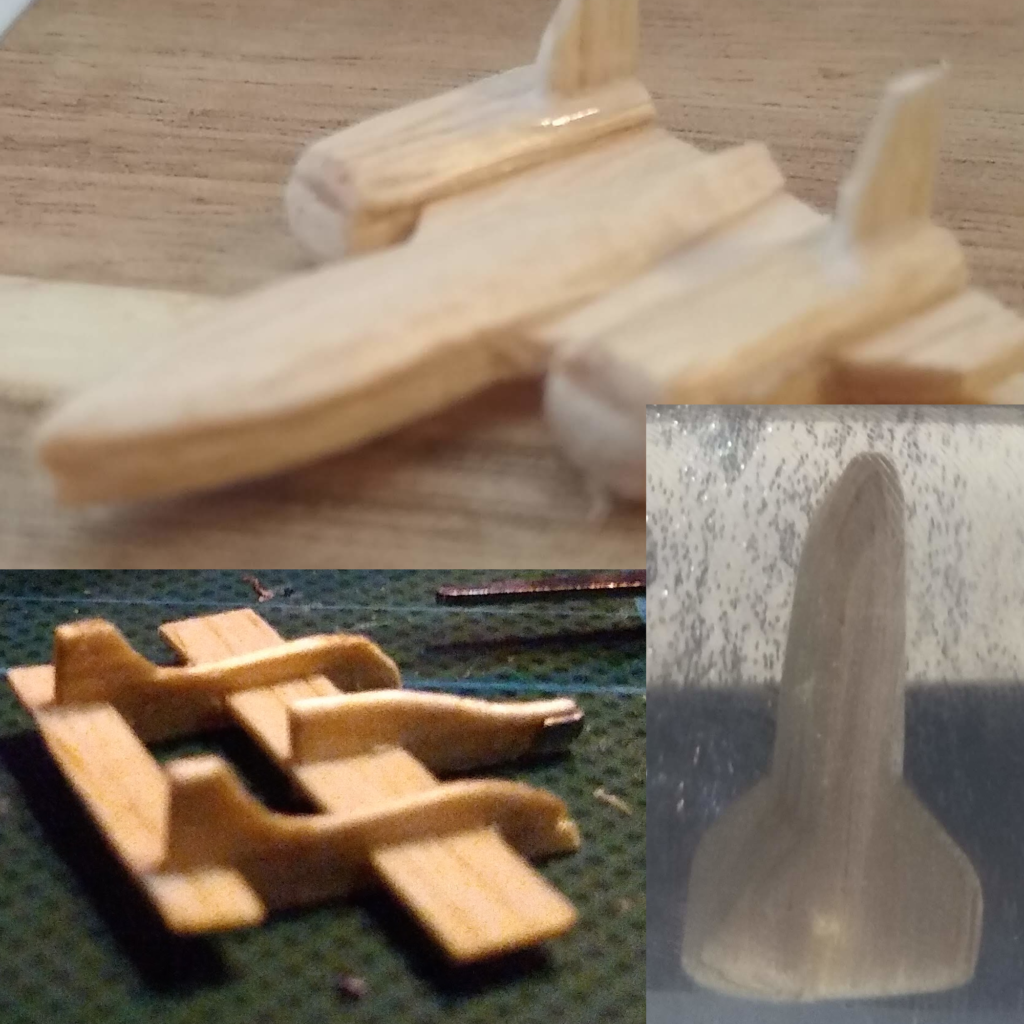
But of course I can’t look at a balsa plane and not think about planes in general, so I started considering other possibilities. I’m not an aerospace engineer or an artist, so I thought about air frames that were very visually distinct and ones I liked just because. So far I’ve found three variations that worked out pretty well.
CTS (Cellulose Transport System) Orbiter – Psych! It’s the Buran! Sort of, not really, doesn’t matter. It is technically a glider air frame, but I positioned it in an orbital orientation so it’s not even pretending to glide, but whatever. It’s geometrically distinct and close to my heart, so this was inevitable.
P-38 Torchlight – Very distinct geometry. Very little sense as a glider. But it’s undeniably cool and was a very capable airplane so I gave it a shot. Turns out it’s pretty easy to make and much stiffer than a typical balsa plane so it’s easy to reposition in the silicone without fear of twisting the wings.
SR-71 Woodpecker – Negative zero glider sense here. Gigantic inert nacelles are not a thing. But who doesn’t love the borderline sci-fi aesthetic of this historic aircraft? I got the general shape and quit. Didn’t know how to make the inlet cones or afterburners and anyway it’s a balsa wood model of a supersonic jet so seemed good enough.
Not sure what’s next. I tried a biplane but getting silicone between the wings without voids is problematic. Not sure I’m ready to go full sci-fi balsa spaceship but it does seem like that’s on the horizon. I’d love to think I can carve Serenity or the Enterprise but I’m pretty sure I can’t. Maybe an X-Wing though, we’ll see.
Also I am willing to sell these but don’t care that much. Etsy seems like a waste of time and I don’t really want to deal with typical consumer expectations. But- if you want one enough to contact me about it- there’s a good chance you’ll get one. I’m thinking in the $100 range is enough to motivate me to put one in a box for a stranger, but if you’re a cool person and have an interesting reason for wanting one that’ll motivate me even more. They do take for freaking ever to cure though, like months. So if I make one custom don’t expect it for a good while.