May 142020
 

UPDATE: Pretty much resolved the stability issues with the ESP32CAM and posted it on github – https://github.com/funkboxing/espcreep

Here is the first semi-functional build of a bot type thing I’ve been working on. I’m calling it ESP Creep, because it’s ESP based and it kind of creeps.

ESP Creep demonstrating how poorly wheeled vehicles perform without friction.

It was made to have a minimum part count and be simple to assemble and control. I’d like these to be available for anyone who wants an extremely inexpensive robotic camera platform. I always envisioned some kind of desktop multi-bot ‘soccer’ platform to help learn and play with vision control systems and such, but there weren’t any cheap-o bots that really fit the bill. This isn’t ready for much except more development, but it does most of what I intend it to do, albeit very poorly, so I figured I’d share.

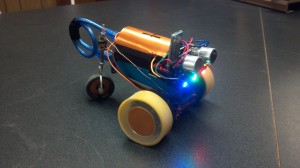
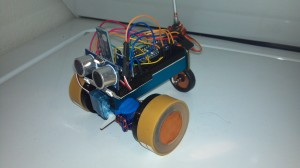
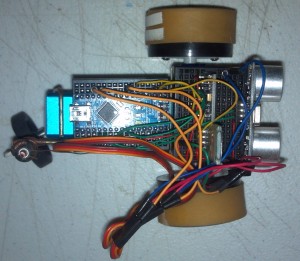
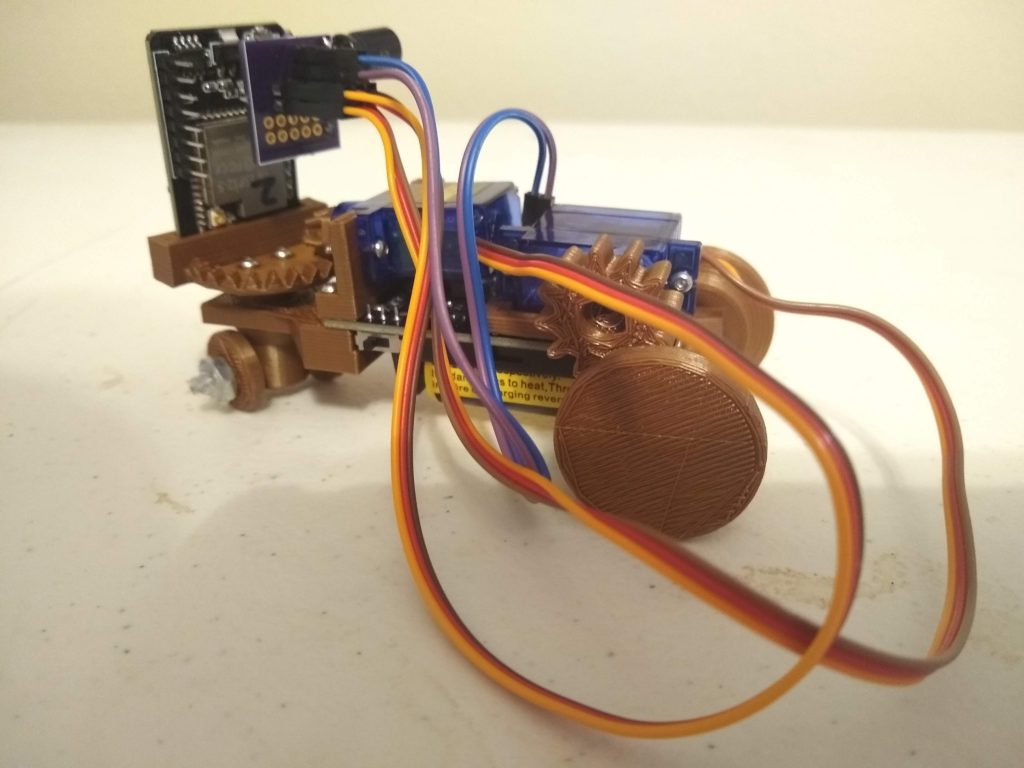
Here are a couple of obligatory glamour shots of the bot. Just look at those unnecessarily long, flowing servo leads… majestic.
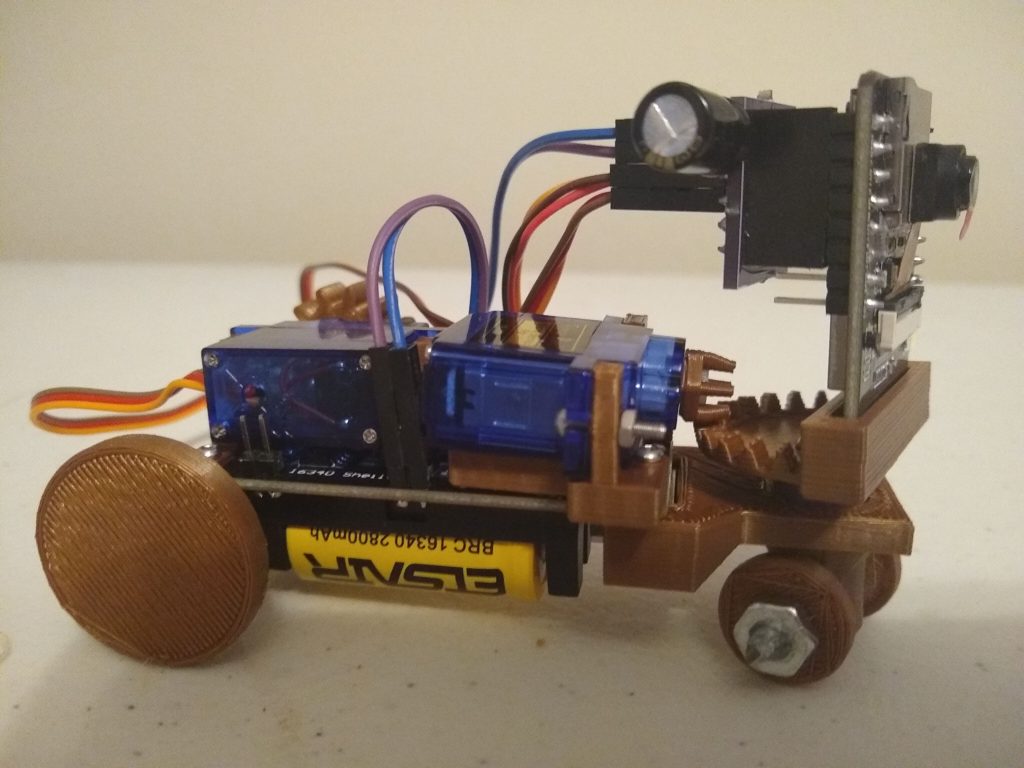
These are the parts involved, sans 3d printed parts and a half-dozen 8mm m2 screws.

~ESP32CAM
~SG90 Hobby Servo (Angle)
~SG90 Hobby Servo (Continuous Rotation)
~16340 Battery Module and battery
~1000uf (6.3v) Electrolytic Capacitor
~Breakout PCB and Connectors.
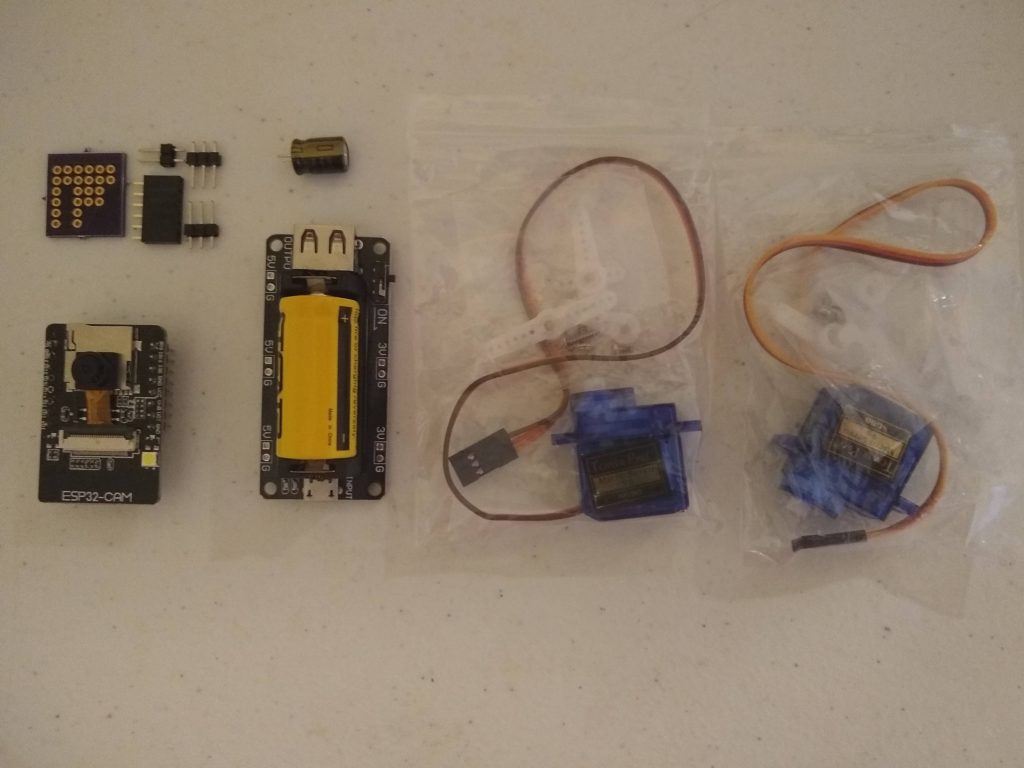
The PCB breakout is the only custom part, and it’s not strictly necessary, just very convenient.

I chose not to do the traditional differential drive. I’m not entirely clear on why I didn’t want to, but I’ve rationalized it with a few apparent advantages. One it’s just easier to handle control wise. There’s no need for ‘mixing’ turn and throttle variables into the motor values. This just makes it +/- for drive, and +/- for turn. Also you don’t have to calibrate motor speeds to make the thing go straight. Mounting the motors for differential drive seemed to make the bot footprint larger, or wider at least. Also I like that it makes steering pan the camera. And I can’t always find continuous rotation motors and I hate modifying angle servos.

Obviously the next step in the 3d design is to get some friction happening on the wheels, and tighten up the wiring situation.

The big problem is the ESP32CAM software. It serves up the camera and parses UDP packets to command the servos. You can see in the video at the end the connection drops. It does that about 30 seconds after you connect. Sometimes I can reconnect right after, but sometimes I need to reboot the ESP. I know the ESP32CAM can be fairly stable because I have several running esphome on hass.io. But I cannot get these things to stay connected with Arduino based code. Some of it might be the motor power demands, the ESP’s are a little finicky with power, but it’s not consistent with motor power, it drops when it’s just sitting there. I added a big honking cap that I think resolves any brownouts but I don’t think the ESP is rebooting because I can still ping it right after it drops the camera connection. I can’t get any error output when it’s connected to serial that gives me any clue what’s happening. But I’ll keep working on it, I’d love some help if anyone ESP savvy has any ideas.

Here are the files. These are not really well organized. It’s everything you’d need to recreate this bot, but it’d take a pretty handy person to get it all working. I would love it if another DIY nerd wanted to jump into this, especially the ESP32CAM arduino sketch. Fair warning this is terrible code and I express my frustration in comments and variable names. Also I can’t find the stencil files for the PCB right now, but I got it made by OSHPark so they’re still up there. Eventually I’ll get more and maybe sell them in kits or something, but if anyone wants them just let me know, I think I can get the files from OSH. Also it’s just breaking out power and data for the servos so anyone could reproduce it.

Contains:
~Blender 3d File
~Arduino Sketch
~Python File (keyboard control)
Aug 132019
 

I’m getting back around to some of my electronics stuff and I was discouraged that the Lolin32 I was using had been discontinued. In retrospect I probably should have used ESP8266 as the basis for WiFi LED control, but meh.

So anyway, I recently found a new board to get excited about, plus a few battery modules that haven’t actually come in yet. The ESP32-CAM has most of what I’d want in a board for simple bots; camera, wifi, and enough GPIO to control a few servos and an onboard flash LEDs. I got my first one in last weekend and spent it trying to get the basic functions for a FPV bot down.

Took me a while to cobble together the functions I needed from available docs and example code, but I’ve got a sketch that does the following:
~Connect to WiFi (SSID\PW hardcoded for now)
~Start camera stream
~Start UDP listener, parse and process incomming packets
~Servo motor control (2) currently
~LED control, onboard RED (ON\OFF) and WHITE (PWM)

Here’s the code I’ve got so far- be warned; like all my code- it’s a nightmare, but it works for me. I left some notes and links to other code I scavenged, but there’s a lot more to do and I honestly don’t even get how the camera stream is working in this sketch, but it does, so good enough for now.

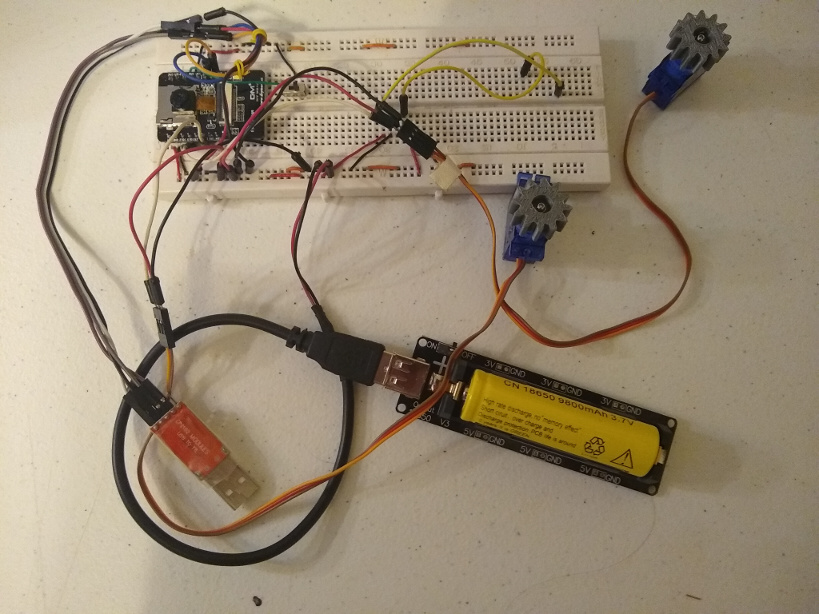
The biggest downside of this board for me is it doesn’t have a built in USB interface so I have to use TX\RX pins to load code, but that’s not too big a deal. Though since only have the one ESP32-Cam at the moment and I’m leaving that one the breadboard for testing. I’ve ordered a few more since they’re so cheap- next one I get will go on this little robot platform I found online and printed. I actually found this design online some time ago and saved the files, but now I can’t figure out where I found it, so if anyone knows this design and has a link to it please let me know.

Hopefully I’ll post more because hopefully I’ll do more, but this is something and I figure if anyone else out there is messing with an ESP32-CAM out there they may find this marginally useful. If by some chance you are working with this board feel free to contact me, it’s got some great potential.

Nov 102013
 

[EDIT] Here is a link to an update of these effects made by Stefan Mayer designed to work with the OctoWS2811 LED Library. Thanks a lot Stefan, great work!

[EDIT] I’m planning to clean up the Android control app source and put it on github, but in the meantime here’s the code.

[EDIT] If you end up using this code for a project please send me a link/pics/video! I love seeing what people do with this! If you like I’ll post a link to your project on the FastSPI FX – User Coolness post. Also make sure to thank Daniel Garcia (the genius dev of the FastSPI library) on the G+ FastSPI Community.

Here is an update to the Arduino FastSPI2 FX demo code (v0.51). I’m also introducing an Android Bluetooth Control App and a Chrome Extension.


I’ll continue to work on improving these programs but I think I have them to a point where it might be useful to some people- so here they are!

Here is the Arduino Sketch (v0.51)

Here is the Android App on the Google Play Store (v0.1a)

Here is the Chrome LED Controller Extension (v0.1)

— — — SETUP / NOTES — — —

ARDUINO:
– This version uses the Software Serial library and FastSPI2 library. Also the default serial speed is now 57600.
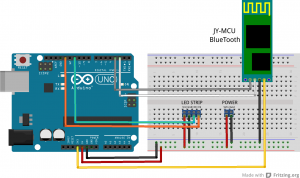
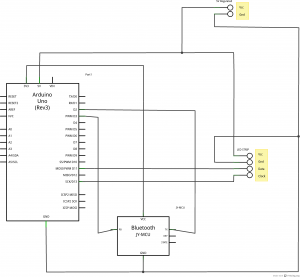
– The following is a breadboard layout and schematic for setting up a JY-MCU Bluetooth chip with an Arduino (Duemilenove or Nano) to drive a strip of addressable LEDs. This should work with any LED strip that is supported by FastSPI2 RC4 and later.
ArduinoBTLEDSimple_011_breadboard_bbArduinoBTLEDSimple_007_schematic_schem

ANDROID APP:
– To control LED strips via the Android app you’ll have to pair the JY-MCU module with your smartphone/tablet in the Bluetooth/Wireless settings. The PIN for these modules is usually 1234.

CHROME EXTENSION:
– To load the extension, unrar the file to a directory. Then in Chrome go to Settings>Extensions>Load Unpacked Extension. Then select the directory. Then you can launch it from there.
– This extension has been tested on Ubuntu 12.04 and WindowsXP. For Windows you’ll have to install the USB Serial drivers, but the automatic driver search seems to work fine for this.

— — —

If you find this really useful, please consider donating a little to the cause. Thanks!
[paypal-donation reference=”FastSPI2 LED FX – Android/Chrome”]

I’m also grateful for bitcoin donations to: 1K5Yy77ejes2FZrHBG5fns3QAicnwZcduq


Oct 152013
 

I had a little trouble finding references to how to setup multiple strips with FastSPI2, so I thought I’d post this.

You just use an offset value like in this example:

LEDS.addLeds<WS2801, 7, 9,   RGB>(leds, 43);       //<---Strip1 - WS2801 - 43 LEDs
LEDS.addLeds<WS2801, 11, 13, RGB>(leds, 43, 12);   //<---Strip2 - WS2801 - 12 LEDs
LEDS.addLeds<WS2811, 5,      GRB>(leds, 55, 16);   //<---Strip3 - WS2811 - 16 LEDs

In the additional strips the first integer passed becomes the offset value and the second is the number of LEDs in the strip.

LEDS.addLeds<STRIP, CLK_PIN, DATA_PIN, RGB_ORDER>(ARRAY, OFFSET, LED_COUNT);

Oct 032013
 

[EDIT] Please check out the newest version of the FX Code (v0.51) with Android Bluetooth Control App and Chrome Control Extension.

[EDIT] Fixed a really dumb problem in the Arduino code, added a color picker to the python GUI, and uploaded a new video demo. The problem was I was using if (serial.available()) and should have been using while. That gummed up the works and made the LEDs flicker if you moved the sliders too fast. That’s fixed now. Should have waited and tested better but I was all excited to get this posted- live and learn, or more likely just repeat the same mistakes and correct myself as I go along.

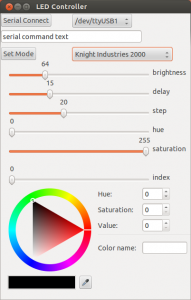
Here’s another revision to the FastSPI2 effects demo code. Some code cleanups, a few new effects, and a python GUI (gtk). GUI can select effect by name and control brightness, delay, color-step, hue, and saturation of various effects.

Screenshot from 2013-10-03 19:52:46

Here’s the Arduino Code

Here’s the Python Code


If you find this really useful, please consider donating a little to the cause. Thanks!

[paypal-donation reference=”FastSPI2 LED FX Code”]

I’m also grateful for bitcoin donations to: 1K5Yy77ejes2FZrHBG5fns3QAicnwZcduq

Sep 212013
 

[EDIT] Please check out the newest version of the FX Code (v0.51) with Android Bluetooth Control App and Chrome Control Extension.

[EDIT] Revised once again, and made a python GUI. See this new post.

This is a revision of the original FastSPI LED Effects Examples I wrote awhile back.

LED_POST

I’ve gotten some very positive responses for these examples so I figured I should update them to be a little less clunky (the operative term here being ‘less’, they’re still quite clunky) This revision will work with RC3 of the FastSPI2 Library.

http://youtu.be/5c6vYoZInjw

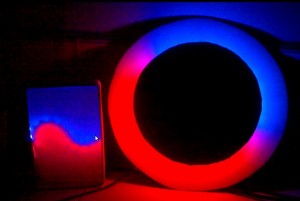
These are little LED displays I made, one is a circular back-light and the other a wave shape with a little diffusion in front. Both are Arduino powered of course. I just ran the ‘demo mode’ on both and tried to start at the same time so they’re not in sync or anything. Just thought I’d show them on a couple of different configurations for the heck of it.

If you have any issues getting this to work please check through the comments on the original post page first. A lot of people have posted very helpful comments about their experience using the code that might help you on your way. And of course feel free to post your issue if you can’t find a solution- I’ll do what I can to help.

Most significantly I’ve removed the need for the SerialCommand library and the really hacky HSV->RGB conversion function in favor of the native FastSPI2 conversion which is much faster and cleaner and supports ‘rainbow’ and ‘spectrum’ modes (though for these examples I just stuck to ‘rainbow’.)

I also added one example of a ‘native’ FastSPI effect; the fill_rainbow function (new_rainbow_loop – mode 88). This is similar to the ‘rainbow_loop’ function except that is fades the colors into one another much better. I’ll add more ‘native’ effects functions like fades to the code later because they are much faster and have nicer aesthetic qualities than mine.

Change modes the same way as in the previous code, enter ‘m’ and then an integer for the mode number (listed in code). Also make sure you send a NEWLINE character. Mode 888 is ‘demo mode’ which cycles through all the modes, but this tends to block the next serial command.

Also you can change the maximum brightness with ‘b’ and then an integer from 0-255. By default it’s set to 64, about 1/4 brightness.

Here is the code.

[EDIT] I recently fixed a few issues where I messed up the HSV conversion and I utilized a few more of the FastSPI2 functions. Also finally started giving the code a version number. This one’s v0.3, I’ll do better with that in the future.

Most notably I added the ability to adjust parameters of many of the effects via serial commands. The following commands are now accepted:

(d)elay 0-INF | d50 | Adjusts the delay value, effects run faster or slower.

(s)tep 0-INF | s5 | Adjusts the steps between colors, mostly for rainbow effects.

(h)hue 0-255 | h180 | Adjusts the hue of effect, mostly for one and two color effects.

sa(t)uration 0-255 | s50 | Adjusts the saturation of effect, mostly for one and two color effects.

Here is the code. (v0.3)

If you have any requests feel free to ask, I’ll see what I can do! I’m more-or-less open for business if you have anything in particular you need tackled. And if you find these very useful, please consider donating a little via. paypal, I’d really appreciate it 🙂

[paypal-donation reference=”FastSPI2 LED FX Code”]

I’m also grateful for bitcoin donations to: 1K5Yy77ejes2FZrHBG5fns3QAicnwZcduq

Apr 102013
 

I would like to introduce:

Stanley Tweedle – Captain of the Lexx.
Formerly Security Guard Class 4 for His Divine Shadow, and Assistant Deputy Backup Courier for the Austral B Heretics.

2013-04-05_16-43-58_5892013-03-16_16-51-29_671

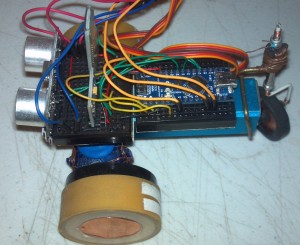
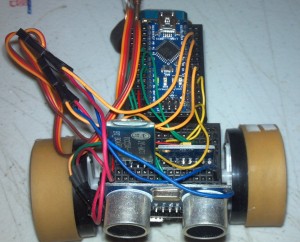
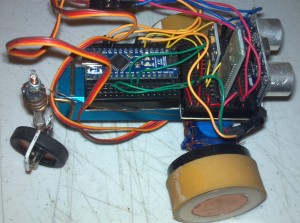
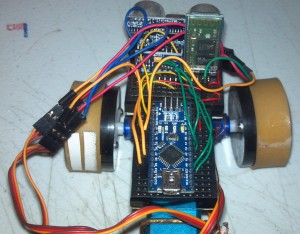
I have a new project that will have to borrow time from my robot stuff for a bit, so I wanted to go ahead and post what
I’ve done so far, mostly for my own reference when I go to pick this up again.

PARTS:
(1) Arduino Nano
(2) 9g Continuous Rotation Hobby Servo
(1) Ultrasonic Rangefinder
(1) 6DOF Acc/Gyro
(1) USB 5V Battery
(3) WS2811 LEDs
(1) Bluetooth chip

Tweedle is complete hardware wise, but I have a little more coding to do before I’m satisfied with his brains. I ran out
of space in the Nano for anything other than input/output so all the control is done from a remote PC via python over
bluetooth/serial. I also made a wiimote script to control him manually. His brains is just basic obstacle avoidance right
now, still trying to see how much nav/odom info I can derive from a 6DOF sensor. Dead reckoning would result in massive
error accumulation, so for right now it just tells him orientation.
Anyway I’m pretty happy with how he’s turned out so far and he’s been a lot of fun. I’m usually not concerned with
aesthetics of these kind of things but I think he’s kinda cute.

This probably won’t help anyone because if you’re deep enough in your a project to understand my code- you’re deep enough
to write it yourself probably faster than it would take to adapt mine to your project… but here is is anyway.

Tweedle Arduino Sketch
Python Ncurses Control Program
Python WiiMote Teleop Program (NOT WORKING)
DOWNLOAD

And here’s some more pics of the wiring…

z2013-09-14_11-34-50_778 z2013-09-14_11-35-19_156 z2013-09-14_11-35-28_663 z2013-09-14_11-36-24_726 z2013-09-14_11-36-40_360


Mar 052013
 

This is going to be a little note/link reference page for all the stuff I’ve done with Raspberry Pi’s. I had this stored in a gdoc but I figured it’s more useful here. This isn’t very well sorted or formatted yet. If you find this page and need some info that I haven’t finished posting, just message me and I’ll try to light a fire under it.

[SETUP FROM RASPIAN IMAGE]
***run rpi-config (automatically runs at first boot)
___ [SETTINGS:]
___ <EXPAND ROOT>
___ <START SSH ON BOOT>
___ <UPDATE RPI-CONFIG>
$ sudo apt-get update
$ sudo apt-get upgrade
***run rpi-update (https://github.com/Hexxeh/rpi-update)
***change uname/pword

[WIFI]
$ sudo apt-get install wicd wicd-curses
***add user pi to netdev if/when prompted
***configure network with wicd-curses (couldn’t get to work without encryption, WEP worked)

[X11VNC SERVER INSTALL AND AUTOSTART]
http://www.megaleecher.net/Raspberry_Pi_VNC_Setup

[MINI LCD SCREEN – INCREASE SHELL FONT SIZE]
http://www.raspberrypi-spy.co.uk/2012/11/cheap-miniature-lcd-screen/
***edit the SD cards boot.cfg, uncomment LEFT/RIGHT overscan

[IPAZZPORT BT KEYBOARD]
http://www.ctheroux.com/2012/08/a-step-by-step-guide-to-setup-a-bluetooth-keyboard-and-mouse-on-the-raspberry-pi/

[WEBCAM]
$ sudo apt-get install guvcview
***worked out-of-the-box with HP HD-2200 1280×720 webcam

[WEBCAM STREAMING (FAST ENCODING WITH MJPG STREAMER)]
http://www.justrobots.net/?p=97
$ ./mjpg_streamer -i “./input_uvc.so” -o “./output_http.so -w ./www”
$ mjpg_streamer -i “/usr/lib/input_uvc.so -d /dev/video0 -r 320×240 -f 10” -o “/usr/lib/output_http.so -p 8090 -w /var/www/mjpg_streamer”
***to display the image stream just add this line to a html-file.
<img src=”http://192.168.88.120:8090/?action=stream” width=”752″>

[ARDUINO IDE]
***this works from the Adafruit Ocidentalis image, might need java packages from basic raspian image
$ sudo apt-get install arduino

[RUN A PYTHON SCRIPT AT STARTUP]
http://www.stuffaboutcode.com/2012/06/raspberry-pi-run-program-at-start-up.html
$ sudo nano /etc/init.d/nokiaLCDboot.sh | (CREATE SCRIPT)
$ sudo chmod 755 /etc/init.d/nokiaLCDboot.sh | (MAKE EXECUTABLE)
$ sudo update-rc.d nokiaLCDboot.sh defaults | (REGISTER SCRIPT)
$ sudo update-rc.d -f nokiaLCDboot.sh remove | (UNREGISTER SCRIPT)
$ sudo /etc/init.d/nokiaLCDboot.sh start

*’&’ at the end of a command runs it as a background process, returning control to the terminal.

*running as daemon – http://www.raspberrypi.org/phpBB3/viewtopic.php?t=37901&p=314885

http://werxltd.com/wp/2012/01/05/simple-init-d-script-template/

[NOKIA 5110 LCD] – NEEDS EDITING
***link to post with image and pin assignments
***not sure if all of these packages are necessary. I did a lot of thrashing around to get this thing working so this isn’t very clean yet.
$ sudo apt-get install python-imaging python-imaging-tk
$ sudo apt-get install python-pip
$ sudo pip install wiringpi
$ sudo pip install spidev
***unblacklist SPI then REBOOT
$ sudo nano /etc/modprobe.d/raspi-blacklist.conf
***turn up CONTRAST 0xc4

[GPIO BUTTON SETUP] – NEEDS EDITING
???***VCC3V -> 10K RESISTOR -> BUTTON -> GPIO 17, 22, or 25 (PIN 11, 15, 22)

[FM TRANSMITTER] – NEEDS EDITING
http://www.icrobotics.co.uk/wiki/index.php/Turning_the_Raspberry_Pi_Into_an_FM_Transmitter
http://www.raspberrypi.org/phpBB3/viewtopic.php?f=37&t=25301&start=25
***CPU or DMA usage???

[TEXT TO SPEECH] – NEEDS EDITING
http://elinux.org/RPi_Text_to_Speech_(Speech_Synthesis)
installing pulseaudio – made it less crackly
use ESPEAK
http://www.gaggl.com/2013/01/raspberry-pi-text-to-speech/
***using this command seems to make it work
$ espeak “hello” –stdout | aplay (piping through aplay or something else seems to be critical)

[LIGHTWEIGHT WEBSERVER]
http://www.penguintutor.com/linux/light-webserver

[PHP SERIAL] – NEEDS EDITING
http://www.fritz-hut.com/php-serial-class/
USE HIS DEMO CODE… CHANGE DEVICE TO /TTYUSB0
AND BAUD RATE TO 9600
AND HAVE TO PUT THIS FILE IN /VAR/WWW/
https://code.google.com/p/php-serial/source/checkout


—PROBABLY NOTHING USEFUL PAST THIS POINT—

[TO EDIT]

• OPEN CV
http://www.raspberrypi.org/archives/tag/opencv

https://github.com/andygrove/rasp_pi_camera_opencv

• SDR W/ TV DONGLE AND/OR FUNCUBE DONGLE
DVB-T+DAB+FM
RTL2832U + R820T Mini DVB-T + DAB+ + FM USB Digital TV Dongle – Black
http://www.oz9aec.net/index.php/funcube-dongle/479-the-funcube-dongle-propro-on-the-raspberry-pi
http://g0orx.blogspot.com/
http://www.funcubedongle.com/?p=861
http://www.eham.net/ehamforum/smf/index.php?topic=84327.0

• WSPR NODE
https://github.com/threeme3/WsprryPi

• COMMAND TO MAKE BACKUP COPY OF SD IMAGE
dd if=/dev/sdx of=/path/to/image bs=1M

• GET SYSTEM INFO
http://cagewebdev.com/index.php/raspberry-pi-showing-some-system-info-with-a-python-script/

• GYRO/ACCELEROMETER SETUP – MPU-6050
http://playground.arduino.cc/Main/MPU-6050
http://arduino.cc/forum/index.php?topic=121825.0
http://arduino.cc/forum/index.php?topic=124153.0
http://www.botched.co.uk/pic-tutorials/mpu6050-setup-data-aquisition/
http://arduino.cc/forum/index.php?topic=103408.0
http://www.i2cdevlib.com/devices/mpu6050#help

• R.O.S. INSTALL ON RASPIAN

—MORE UNSORTED / SOME NOT DIRECTLY RASPERRY PI RELATED—

• R2D2 with VOICE CONTROL AND FACE RECOGNITION…
http://www.wired.com/design/2013/01/raspberry-pi-r2d2/

• RPI ANDROID HTML5 CONTROL OF SERVOS
http://martinsant.net/?page_id=479

• WEB COMMANDS->PYTHON
http://askubuntu.com/questions/218496/sending-keyboard-commands-to-ubuntu-through-python-remote-for-my-blackberry
http://stackoverflow.com/questions/3289584/web-ifing-a-python-command-line-script
http://mail.python.org/pipermail/tutor/2005-November/043372.html

• WEB CONTROL OF GPIO
https://bitbucket.org/sbub/raspberry-pi-gpio-web-control/overview
http://www.instructables.com/id/Web-Control-of-Raspberry-Pi-GPIO/
http://elinux.org/RPi_Low-level_peripherals

• NON ROS ROBOT TELOP
http://raspberrypirobot.blogspot.com/
http://code.google.com/p/cmd-robot/
http://www.finventing.com/2013/01/06/robotic-light-painting-with-raspberry-pi/

• HTML FORM BUTTON
http://stackoverflow.com/questions/4120678/multiple-buttons-on-a-form

• OPENCV
http://www.betasix.net/opencv-2-2-python-examples/
http://blog.jozilla.net/2008/06/27/fun-with-python-opencv-and-face-detection/

• HTML CONTROL
http://www.raspberrypi.org/phpBB3/viewtopic.php?f=32&t=23897

• X11VNC MULTIMONITOR
http://en.gentoo-wiki.com/wiki/X.Org/Dual_Monitors (search ‘occasional dual monitors’)

• WIIMOTE
http://www.cl.cam.ac.uk/projects/raspberrypi/tutorials/robot/wiimote/

Dec 172012
 

So here’s my review of the Hexbright – Open Source Flashlight

• It’s insanely bright. You really have no idea. Seriously impressive.
• Good and solid, yeah. Perfect fistful of flashlight but still goes in the pocket. It’s not a mace like a big maglight but you would not want to be cranked upside the head with this. You could drop it on a bare foot without fracturing anything, but you’d remember not to do it again.
• Battery life seems good. Haven’t stress tested but no complaints yet.
• Simple, rugged construction. Twist off end pulls all the guts out of the aluminum and you’ve got access to the board, battery and LED, no problem.
• Nice beam! The single LED and lens give a really unexpectedly beautiful spread. A little hot in the center but it is a flashlight…
• Color temperature – 5380K – just shy of daylight. Meter also showed a tiny green spike in high mode but not noticeable with the eye. Easily color corrected with a little gel.
• Programming – easy to get started (but to be fair I’m pretty experienced with Arduino). Just had to load the board file and I was off and running. Loaded a couple of examples and pretty soon I was adding code the factory firmware. This is where having a ‘programmable’ flashlight is really cool. So for instance I didn’t like the fact that I had do cycle from LOW-MED-HIGH to turn the light off. So I added some code to where a long press after LOW or MED will turn the light off. Lots more possibilities here.
• Overalll: It’s an amazing flashlight and it’s open-source! Get one!
Images
Canon EOS 400D
1/4 s | f/4.0 | 28mm | ISO 400 | Daylight (5200K)
OFF | ULTRA-LOW | LOW | MEDIUM | HIGH

Here’s my hack at the firmware. Adds an ‘ULTRA-LOW’ mode, and a ‘DAZZLE’ mode. Also long-press will turn the light off from any mode.

modified hexbright firmware

Oct 262012
 

[EDIT] Please check out the newest version of the FX Code (v0.51) with Android Bluetooth Control App and Chrome Control Extension.

This code has been revised and I made a new post about it – please see updated post HERE

[EDIT] If you end up using this code for a project please send me a link/pics/video! I love seeing what people do with this! If you like I’ll post a link to your project on the FastSPI FX – User Coolness post. Also make sure to thank Daniel Garcia (the genius dev of the FastSPI library) on the G+ FastSPI Community.

[EDIT] If you have any requests for certain types of effects I’d be happy to look into it. Just let me know what you’re looking to do and I’ll take a swing.

If you find this code very useful please consider donating a little via paypal. I’m having some ‘financial instabilities’ right now and any little bit would help. And if you need a certain effect coded, a donation would certainly obligate me to get that working for you! Sorry for this, it sort of feels like panhandling and the real credit should go to the library creator, but we do what we have to… Thanks for understanding.

[paypal-donation reference=”FastSPI LED FX Code”]

I’m also grateful for bitcoin donations to: 1K5Yy77ejes2FZrHBG5fns3QAicnwZcduq

fastspijpg

Some LED effects I’ve written for Arduino and FastSPI library.

Mostly written for a circle of LEDs but plenty useful for any configuration.
Code available here… the code

***Here is an update to the FastSPI_2_RC1 – the code

Used WS2811 strip, but have also tested with WS2801.

I’ve only tested this on the duemilanove and nano boards. It’s looking like this does not work on the UNO and I’m not sure about the Leonardo or the new Due.

Several people have indicated problems finding the SerialCommand library – so here’s the version I’m using SerialCommand

Here’s where I found it. Thanks to this guy for the library- Steven Cogswell
http://husks.wordpress.com/2011/05/23/a-minimal-arduino-library-for-processing-serial- commands/

http://youtu.be/Jcs1udKP4rs