Mar 232020
 

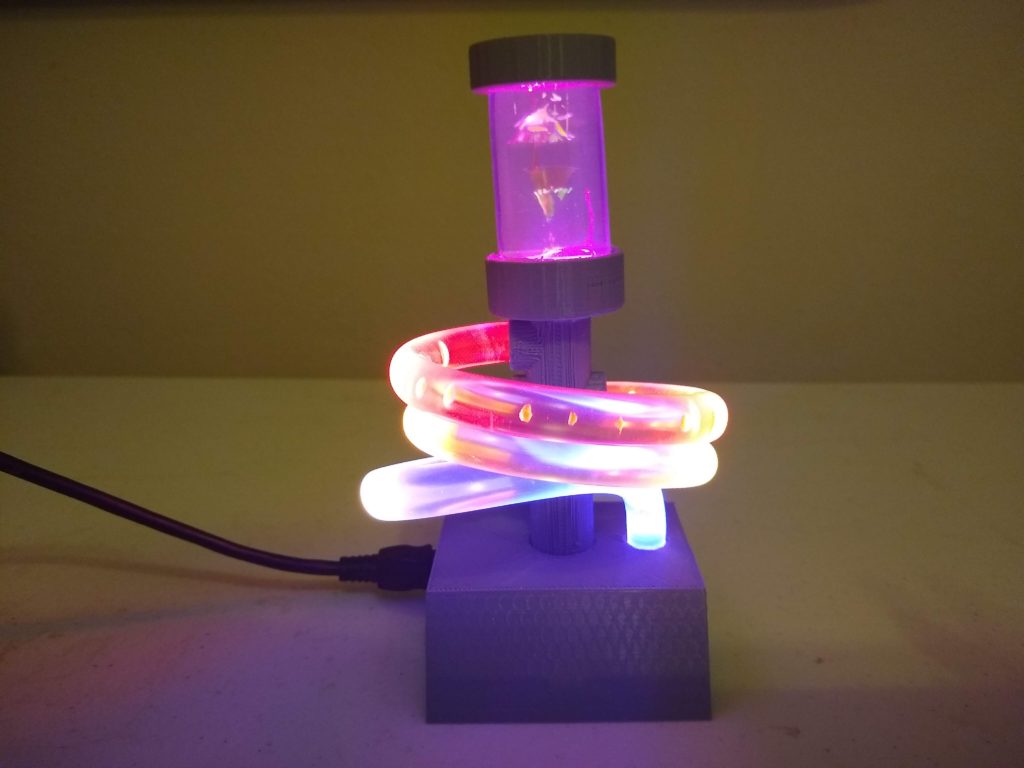
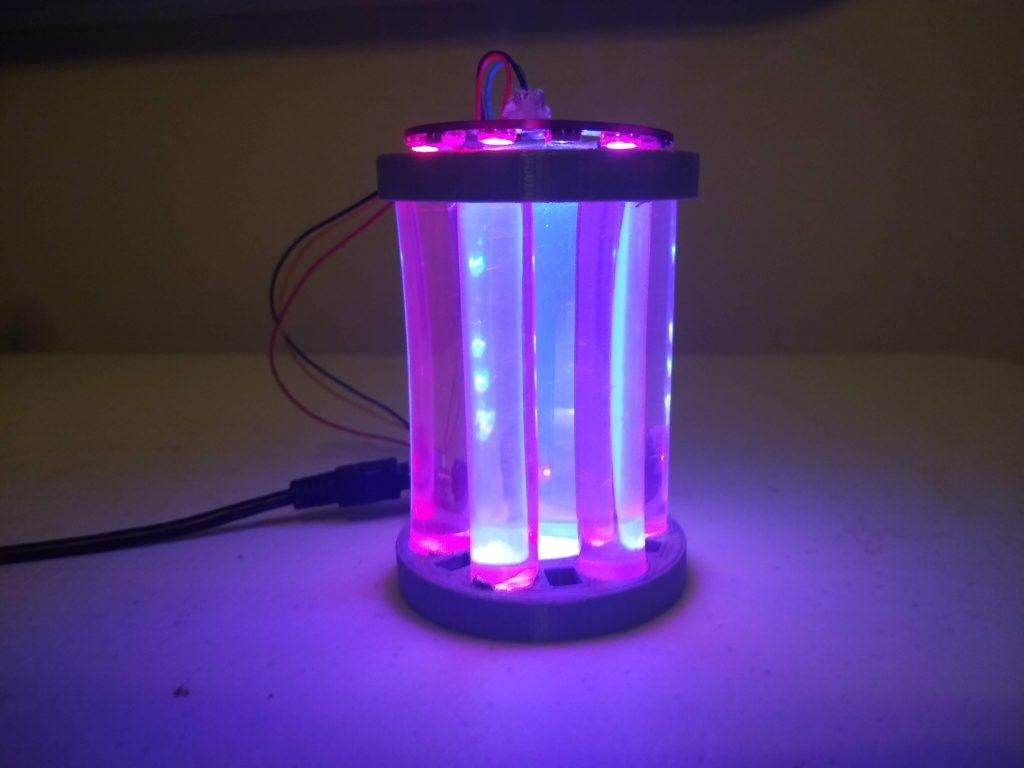
This is a tube of silicone with two bundles of optical fibers and some highlighter fluid. It’s lit from above with a UV LED. There’s a little 3d printer collar that holds the fiber bundles onto 5050 RGB LEDs. I did a few handheld tests with the fibers with a collar and I thought it transmitted enough light to be an interesting effect so I jammed some fiber into some silicone and let it cure.

The results are pretty messy and not really what I had in mind. I cut the ends at an angle to try to make them more visible, but as it turns out you can only really see them from above. I tried to get the bundles to fan out to the sides in the silicone but they broke at too great an angle so they mostly ended up semi-parallel with the tube so their lights are invisible. Also there’s no way to avoid big bubbles coming up through the bundles- silicone finds a way.

It was weird enough to justify documenting, but I don’t think I’ll be gung-ho with the optical fiber. There may still be some uses for it but this test was pretty unimpressive.

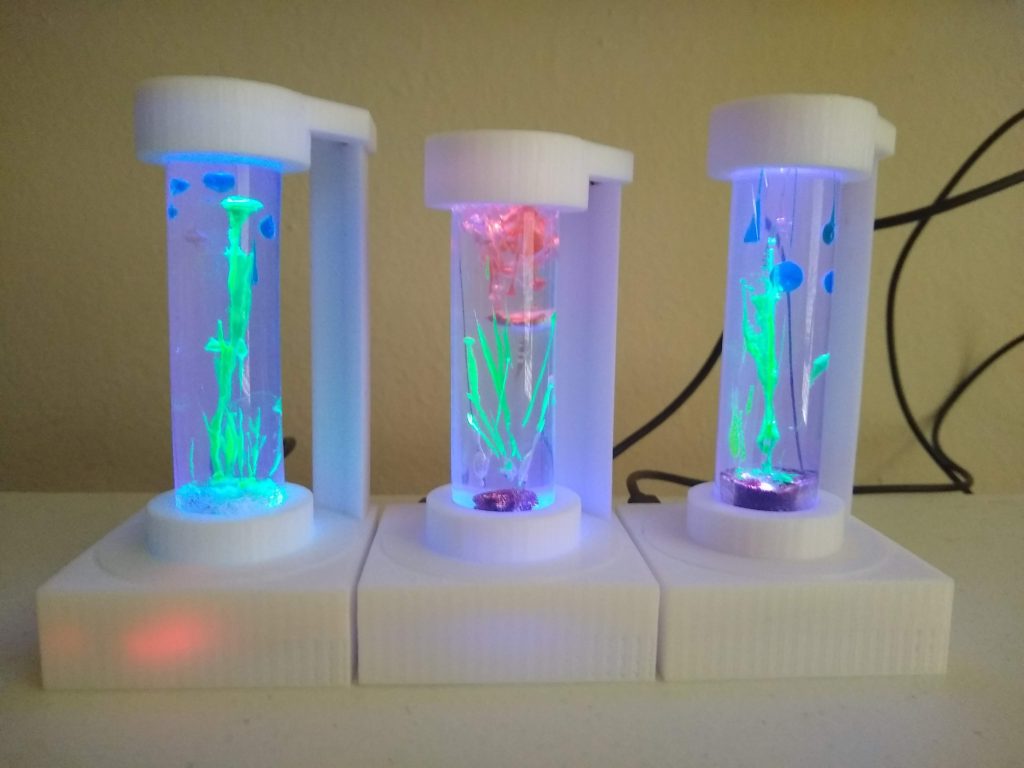
The rest of the video are various things in a temporary lighting rig with one RGB LED below and a UV LED above. Not sure any justify permanent builds because of various defects, but they’re part of the learning process.

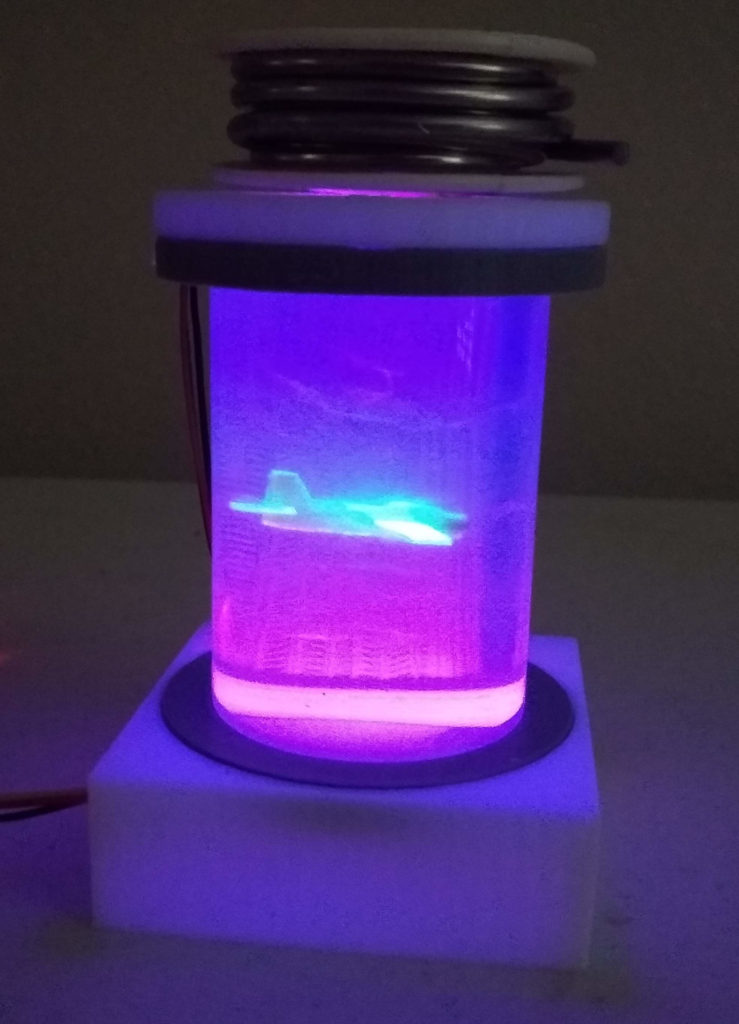
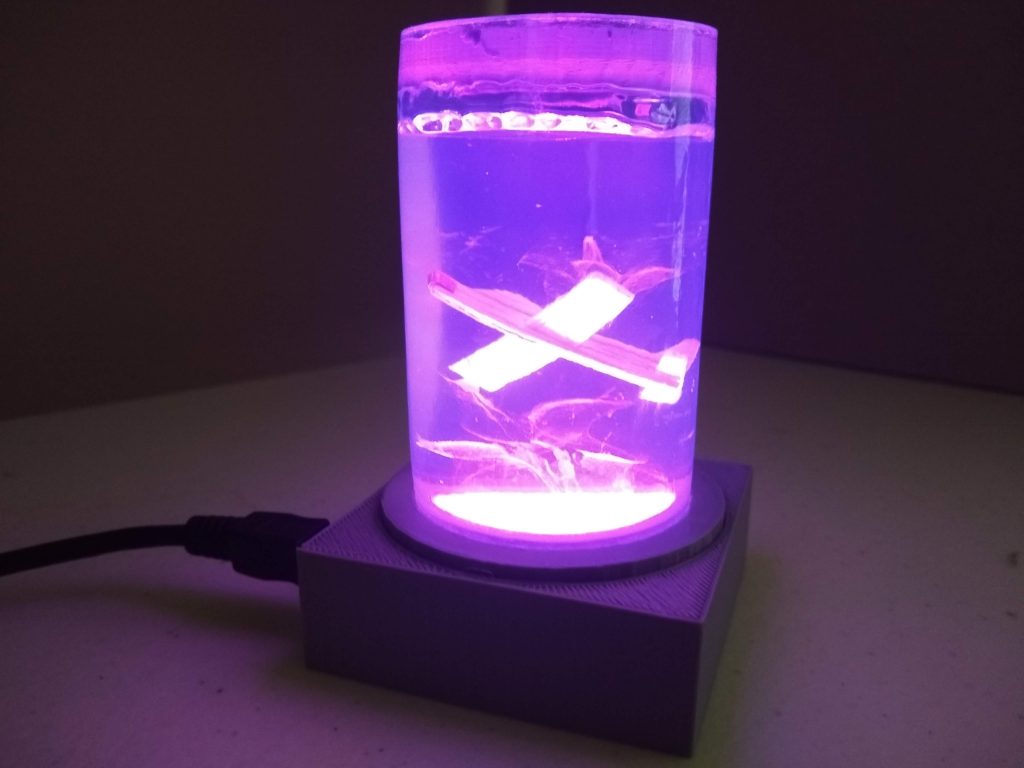
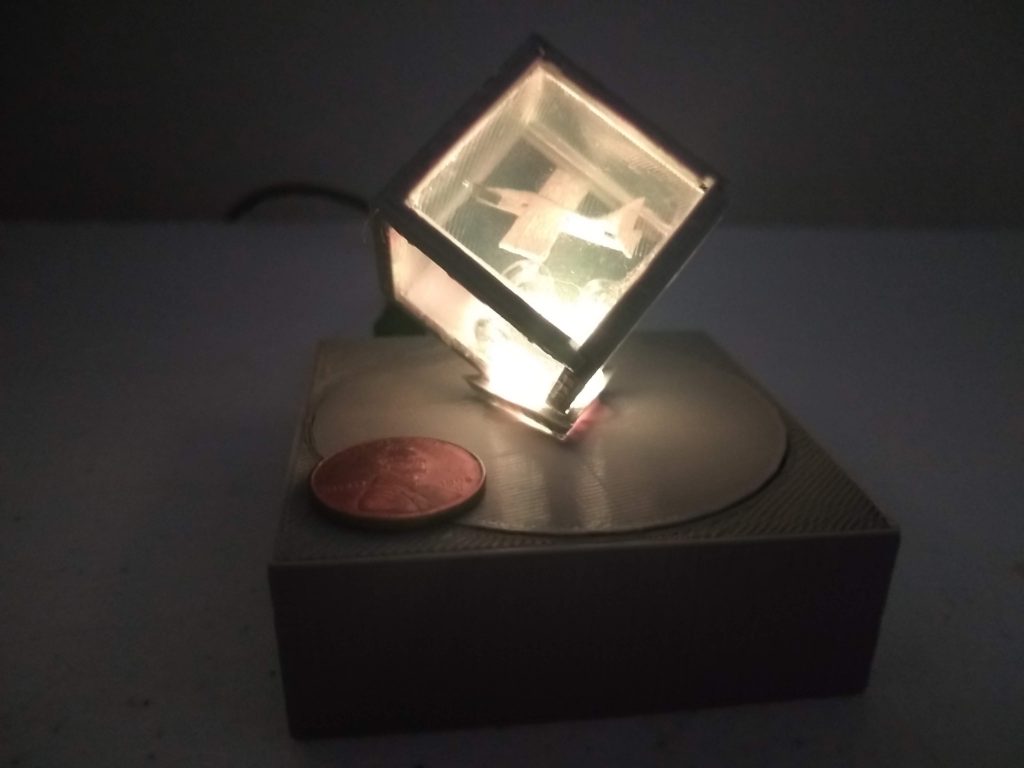
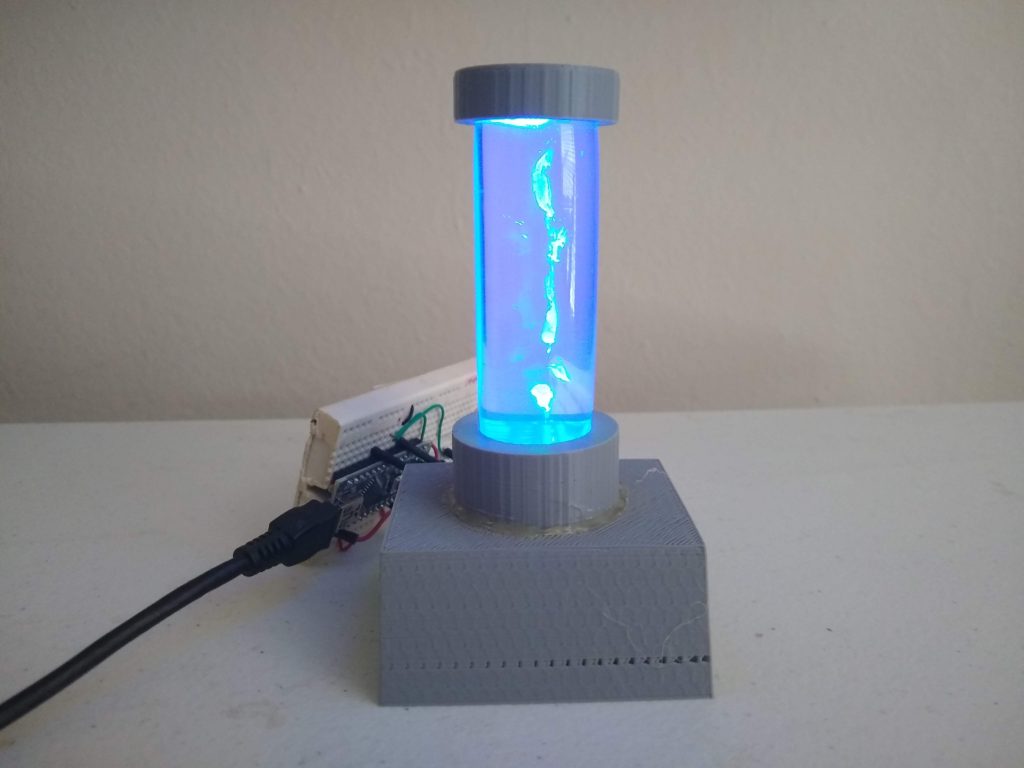
This is the same balsa tube concept in the fresnel tube rig. I should have made the plane a bit bigger and rotated it a bit so it’s not just going straight. Also the powder smoke effect didn’t work out as cool as the other one but I think I know how that works better now. I sprayed the plane with a good bit of highlighter fluid and it pops pretty well with the UV but it gets washed out by the RGB in the video. I like the general balsa plane in a tube scene concept so I’ll keep working on that.

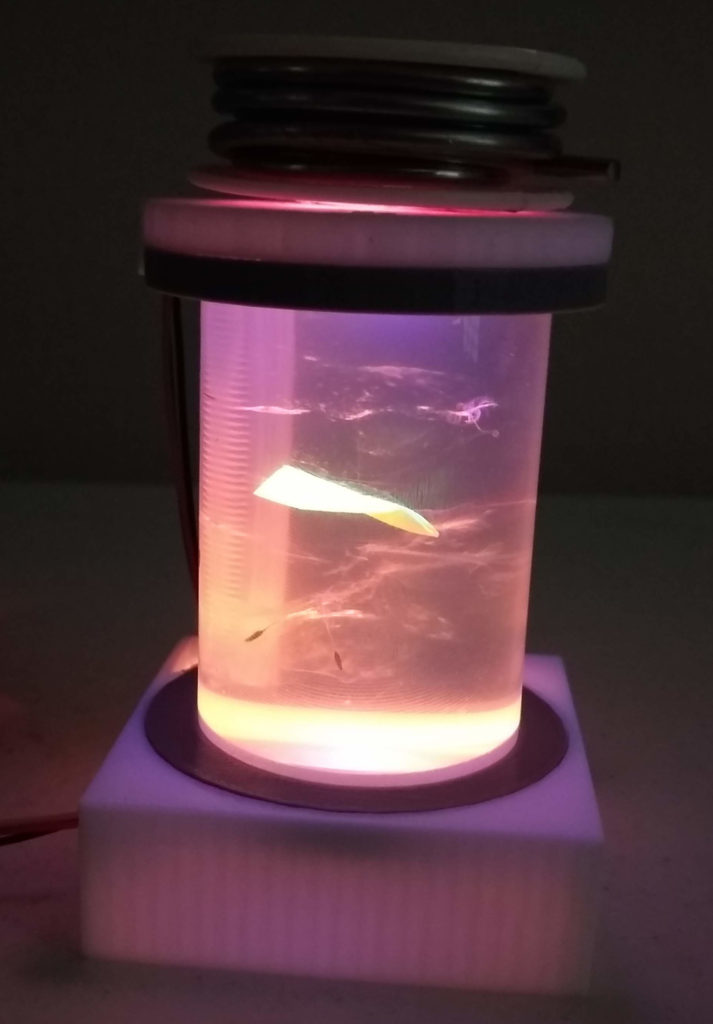
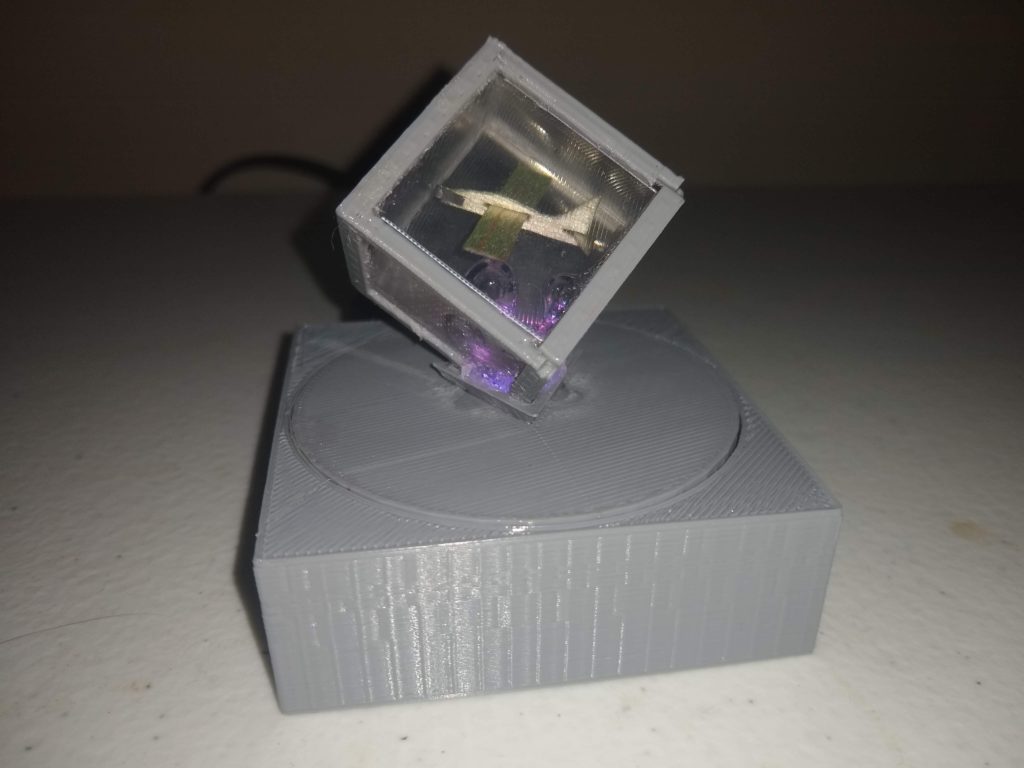
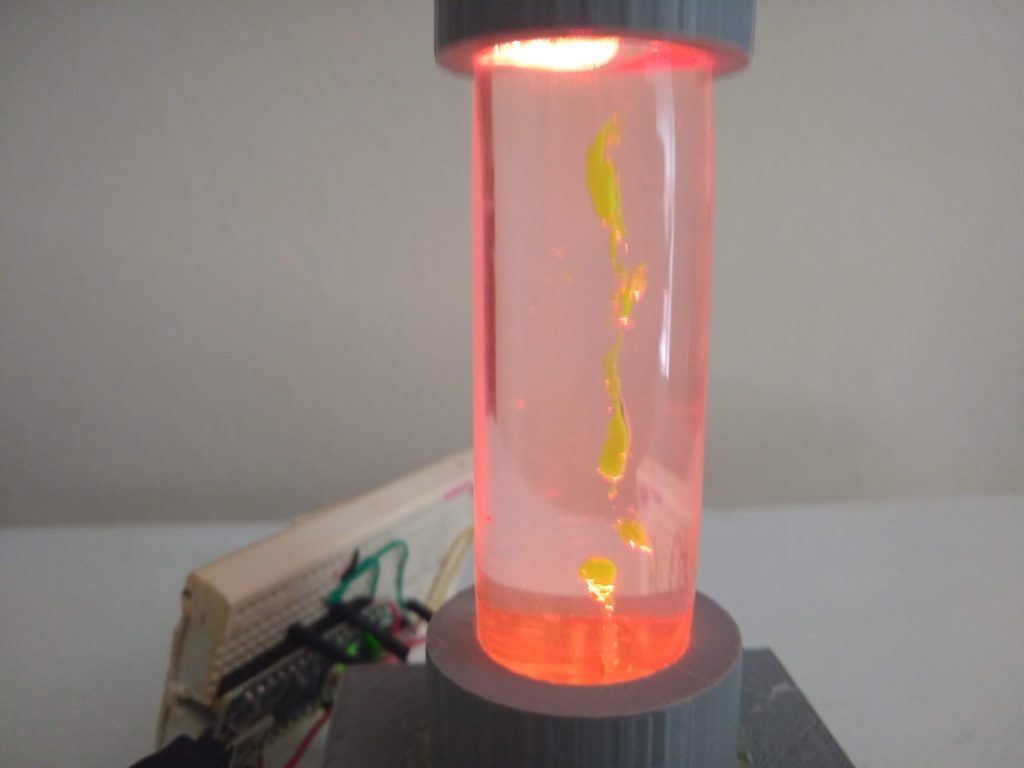
Same basic idea as the balsa plane but a paper plane also soaked in highlighter fluid. They’re surprisingly hard to fold symmetrically that small. I placed it too far off center so it’s too close to the edge. I also added some dandelion seeds but they squished so it looks pretty weird. I’ll probably work more with the paper plane but this one was kind of a bust.

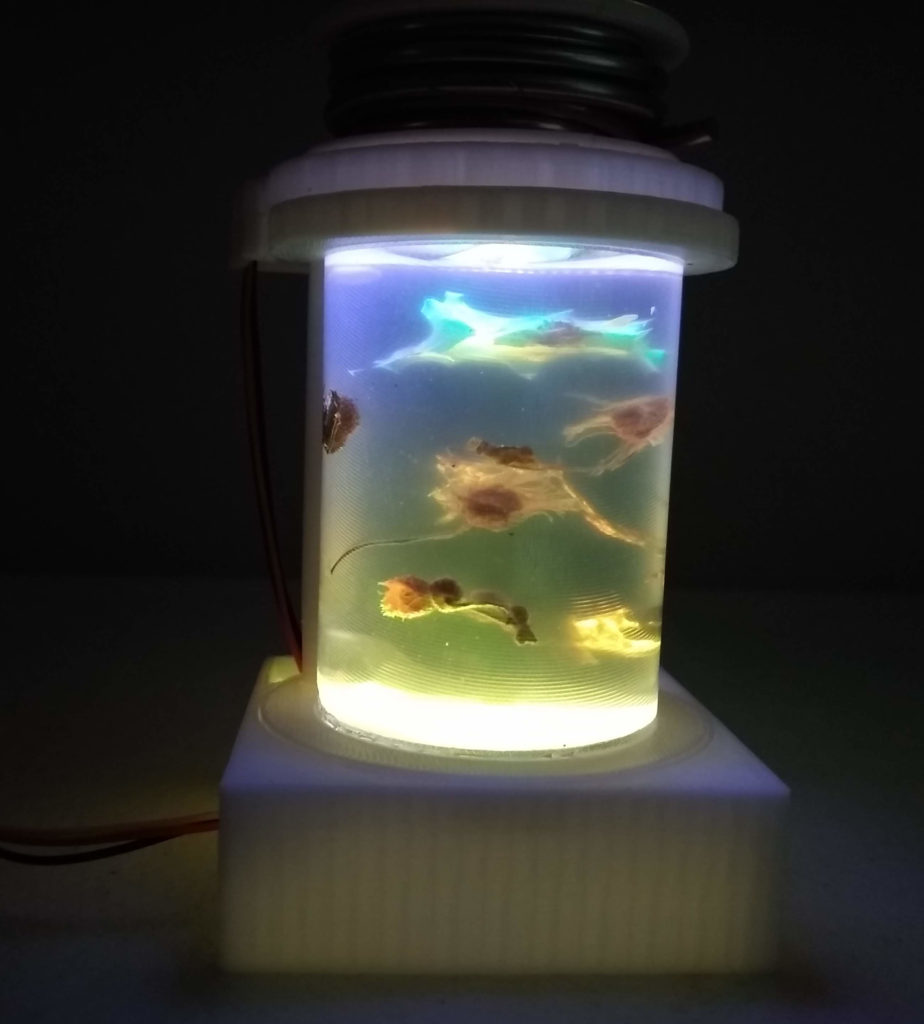
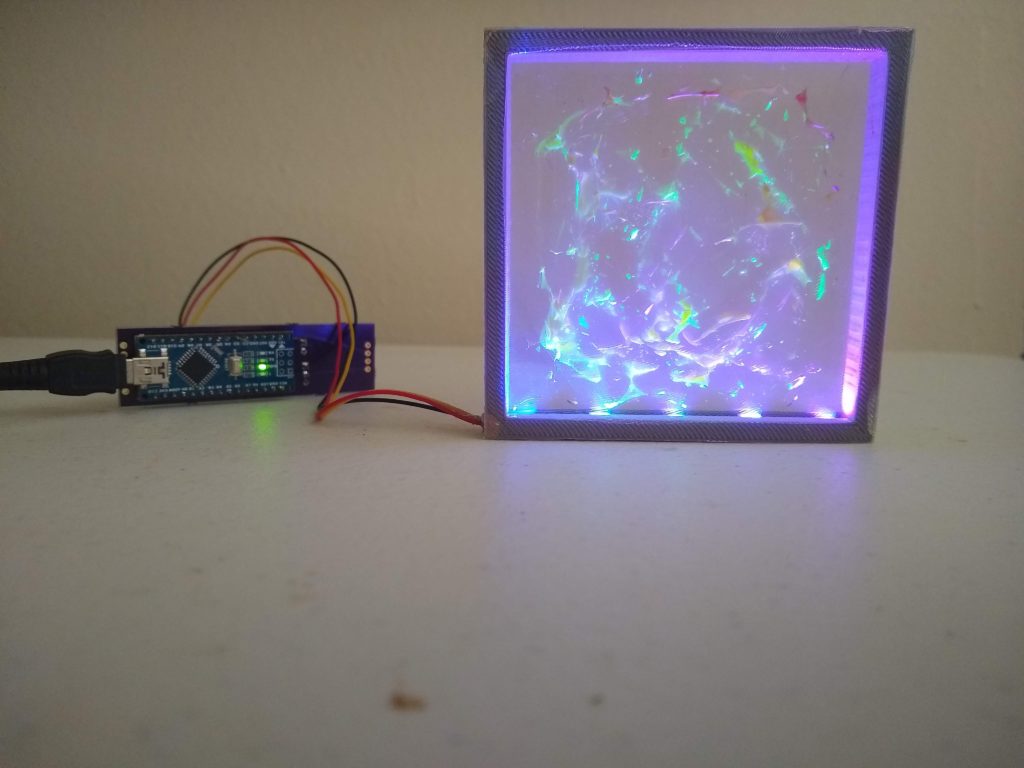
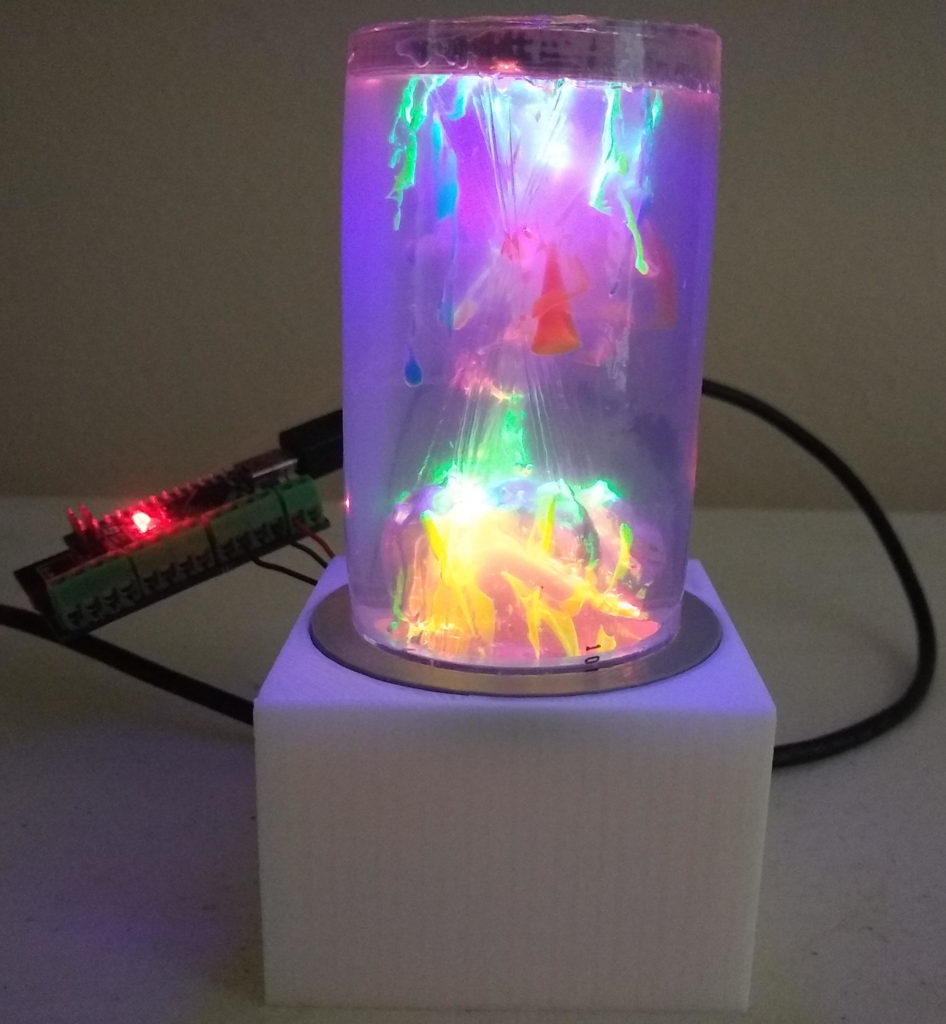
This one was just stupid and gross. I gathered some little flowers and berries, sprayed them with highlighter fluid, and stuck them in silicone. I guess I was thinking silicone stops time but they continued to wilt but they aren’t drying out so it’s just a mess. The only interesting bit was I just squirted some elmers glue at the top for no reason and it make an interesting ‘concave cloud’ formation that I might try to work with later. Overall it’s just a nasty mess but I wanted to see what it looked like under the light so this is it.

Also if you’re wondering the solder roll at the top is because the temporary rig isn’t secured to anything and the wires pull off the top so the roll is just as a weight.

Mar 162020
 

I originally wanted to make a sort of ‘flame’ in the tubes but in playing with the fluorescent and silicone I stumbled on a nice floral aesthetic and made these stands to light them. These are lit from the top with one RGB LED and from the bottom with one UV LED.

The ‘stems’ are created by cooling the silicone and injecting warm gelatin\highlighter fluid with 16-18g dispensing needles. The cold silicone makes the gel set up quickly and gives the stems a bit of a texture. The ‘dirt\sand’ is coffee\grits. I thought I needed to leave a hole in the middle to allow the UV LED through so I used straws to leave a hole, but turns out it looks better with the UV on the tube edge so next time I won’t bother with the hole. The ‘flower’ tops didn’t turn out well this round- I let the silicone cure too much so I couldn’t get the ‘ribbons’ that I had in other tests but the next batch should turn out better.

Here are a the tests leading up to the first flower tubes. The bottom One of these tests was the inspiration for the tubes, it just started to look like a flower so I jammed some coffee into the bottom to look like dirt and I figured it looked good enough to try a few more.

And here are the first batch of intentional ‘flower’ tubes. Lots of mistakes but learned a lot and a few of them came out well enough to justify the LEDs.

Mar 152020
 

Cubic portals are cool, but we all know tubes are the future so of course the next step in inter-dimensional balsa travel should be tubular.

I’m slowly learning some tricks to working with silicone but it’s a slow process partly because I’m slow and partly because silicone is a truly insane material to work with. There’s a gap in the top that formed slowly as it’s been curing over a month or so but now I’m leaving holes in both sides for curing so I can control the shrink better. That’s the thing with this stuff- you can’t really build the light until the silicone has settled and sometimes you have to keep adding silicone every few days so it meets where the LEDs will be. It’s kind of a nit picky process after you’ve laid in the silicone, you just pick at it once a week or so until it settles in to whatever it’s going to be.

The smokey trails are just baby powder dabbed in with a q-tip while the silicone is wet, that was a surprising success, it adds a lot.

This build is lit with an 8-LED RGB ring and an addressable UV LED I got from Adafruit. The UV is WS2812 but the RGB channels are all UV chips, pretty cool.

I spritzed the plane with highlighter fluid but I don’t think I used enough because it’s not really popping. The FX loop is just cycling colors and brightness on the RGB and fading between the UV chips to give the UV some movement. Unfortunately the UV\fluorescent didn’t really add much on this one, but I’m learning. I’ve got a few other plane tube type trials curing so I’ll try a different configuration next time.

I need to figure out how to get better pictures of these things because these look a lot cooler in person, but it is what it is for now.

Mar 112020
 

This is an artifactually intelligenting quantumish singularitinity combining cartoon shnano-toob structures with nob-libnear crystalfinity waveforms.

Also it’s a 3d printed cube with fresnel plastic windows filled with clear silicone. And there’s a balsa plane too.

I screwed up in the process and let a big bubble form that blocks a good bit of the LED, but it was a fairly successful little test and I’m going to make another one with what I learned making this one.

Mar 012020
 

Here are a few more lights.

SHOTLIGHT

This is the shotlight prototype I ‘fixed’ by replacing the dome top with a vinyl tub. I still haven’t made the version with the shotglass or last tube section yet, but this was one of my first fluorescent fluid tests and the lighting effect is coming along so I thought I post it here. There’s also some fluorescent drops in the smaller tubes- that was a strange test where I injected the fluid while I was pumping the silicone into the tube. I had to pump the caulk gun with my feet so I could handle the tube and syringe, it was nuts. Injecting it wet like that the fluid beads up into a perfect droplet from the pressure as the silicone flows down the tube. However if you look in the picture the droplets are distorted- after I cut a 10″ section and it cured a few days I found you could squish the tube really hard and the droplets would spread out in the mashed silicone. Interesting effect but I don’t think it’s cool enough for all the trouble.

FRESNEL FRAME

Frame with LEDs filled with silicone and spastically squirted with fluorescent fluid and squished together with fresnel sheets. No pattern or anything, but even so it came out kind of interesting.

HEX TUBES

Just another iteration of the ring\tube light I posted before. This one uses slightly larger tubes on the perimeter and added an larger tube in the center.

FLUORESCENT FLAME

One of the first tests of getting fluorescent fluid into the silicone, lots of fun potential there. Just made a stand because things need stands.