They’re warp coils now, not just tubes filled with stuff to create a lighting effect that kind of reminds me of warp coils- they’re actual warp coils.
There was a disappointing development with the test rig. A few days after I made it the silicon curing in the tubes shrunk up inside it and left a big air gap that screws up the light transmission around the tube. It stil looks okay but you see a lot of light blasting out the back that wasn’t there before.
I thought about trying again but filling up the printed holder with silicone too when it shrinks up it pulls in more silicone, but I’m not sure that would work or would be worth it, and it’s messy enough as it is.
The more obvious solution is just fill the tubes and let them cure, then cut the tubes down where the silicon shrinks to and jam that into the LED. It’s not as ideal as letting the whole thing cure in one clear continuous mold, but I’ve noticed the interface between the LED and tube filling isn’t as critical as I thought. A perfect seal with the silicone seems only about 10% better than just jamming the silicone in after its cured. Obviously that’s just me ballparking it based on observation so who knows. I think if there is something to be gained in a perfect interface between LED and waveguide then it’s so unattainable it’s not worth the effort past just making sure they’re pretty well crammed in there with no big bubbles or gaps. But since I had the silicone out I figured I’d try to get creative and tried a few things:
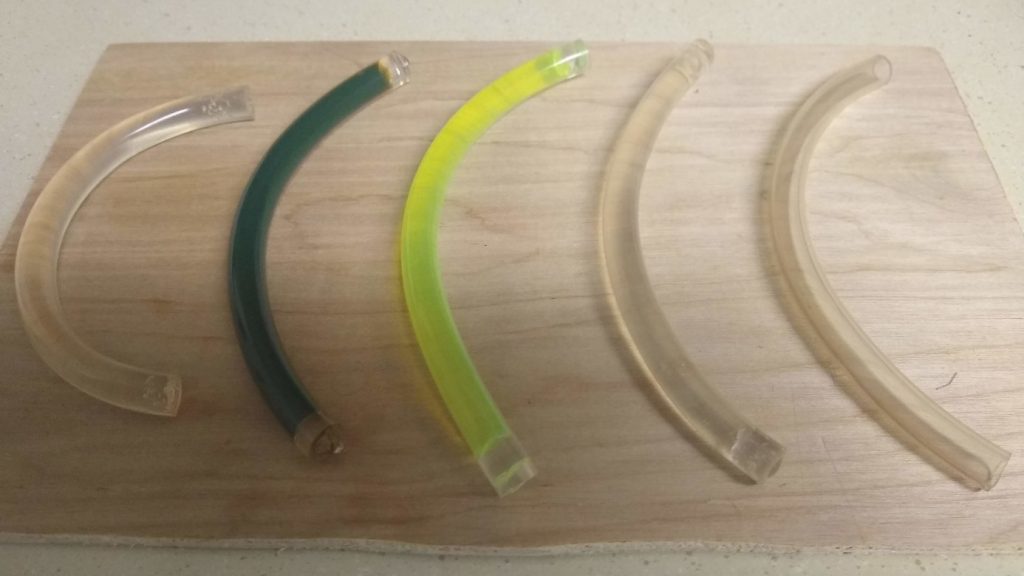
~Air: Probably should have started with this but for some reason I never tried it. The fact that it doesn’t work doesn’t excuse the fact that I should have tried earlier.
~Water: Sealed water in the tube with silicone.
~Fluorescent Water: Soaked a yellow highlighter in hot water and sealed that in the tube with silicone.
~Water So Fluorescent it’s Opaque: Soaked 5 colors of highlighter in hot water… more is not always better.
~Silicone: Clear silicone again. This time cured and cut before installing.
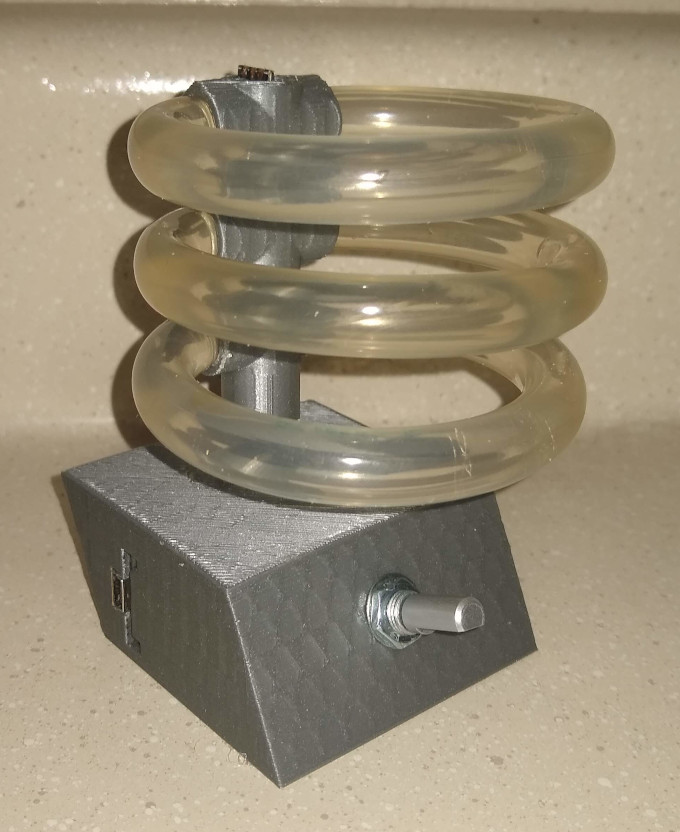
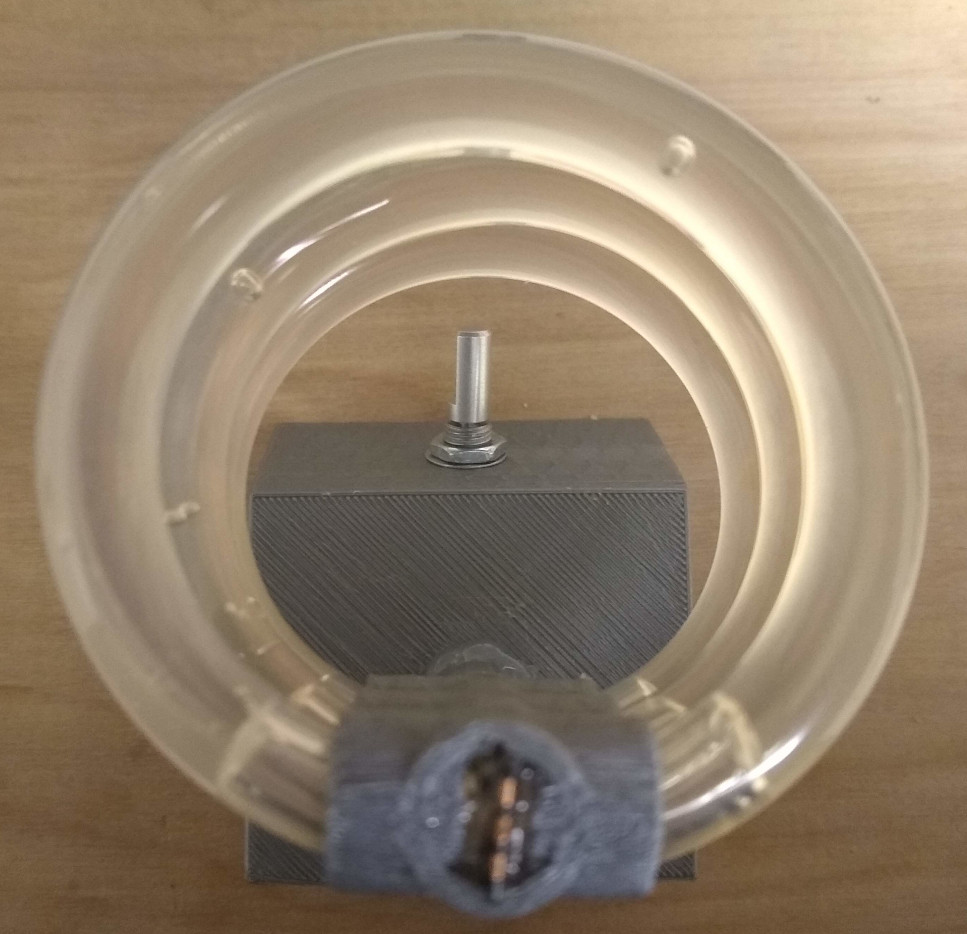
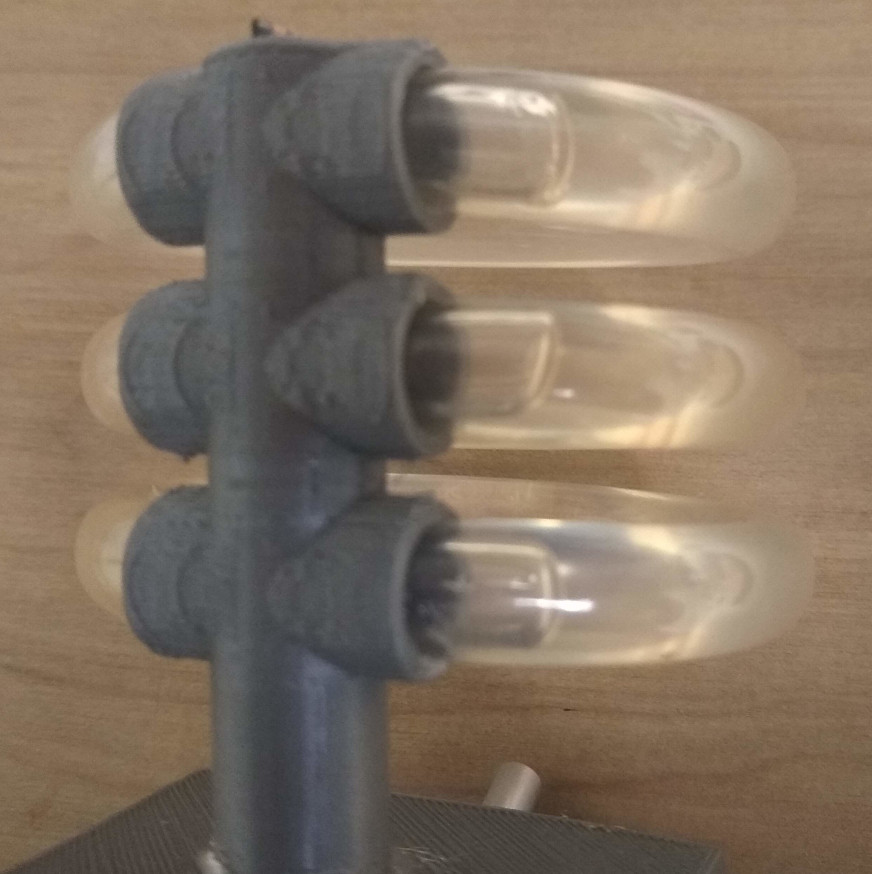
In the ring tower from bottom to top it’s air, yellow fluorescent water, and silicone.
The water tube leaked a bit when bent into a circle so I put it on the older tube tester. The fluorescent cocktail is just kind of gross. Maybe a lighter solution might work better, but I think I’m just going to count that as a total fail and pretend I never did that.
~Air: Apparently air is worthless, it obvious doesn’t refract light enough. There’s no value to air whatsoever, never use air for anything.
~Water: Water doesn’t seem to work as well as silicone, but it’s not a fair test because I’m guessing how it would look with both ends lit. I don’t think water has any advantages for the warp coil effect. It’s an equivalent or greater messiness and pain-in-the-neck factor with silicone and doesn’t work quite as well. Working with water adds the possibility of a spill killing the board, but silicone actually waterproofs everything. Also the interface between LED->Silicone->Water is probably why it doesn’t work, and it feels like it kind of defeats the whole purpose. The only thing I can think to use is that it’s a liquid so could be used for snow-globe particle effects stuff. If I could keep the bubbles small it might be interesting, but any air forms one bubble and does this action here. Kind of cool how it creates the swimming pool lighting effect when it reaches the LED, but idk how to use that right now.
~Fluorescent Water: The yellow is an interesting effect. I think I’m seeing a bit of a luminance spike in the yellow\red range but I’m not sure how much of that is really UV being converted to visible light or how much is just the tint of the dye. In any case I don’t think it’s really worth the effort for this, but something to think about for special applications. The effect is only really dramatic when you compare under reflected light like these photos with the camera flash on and off:
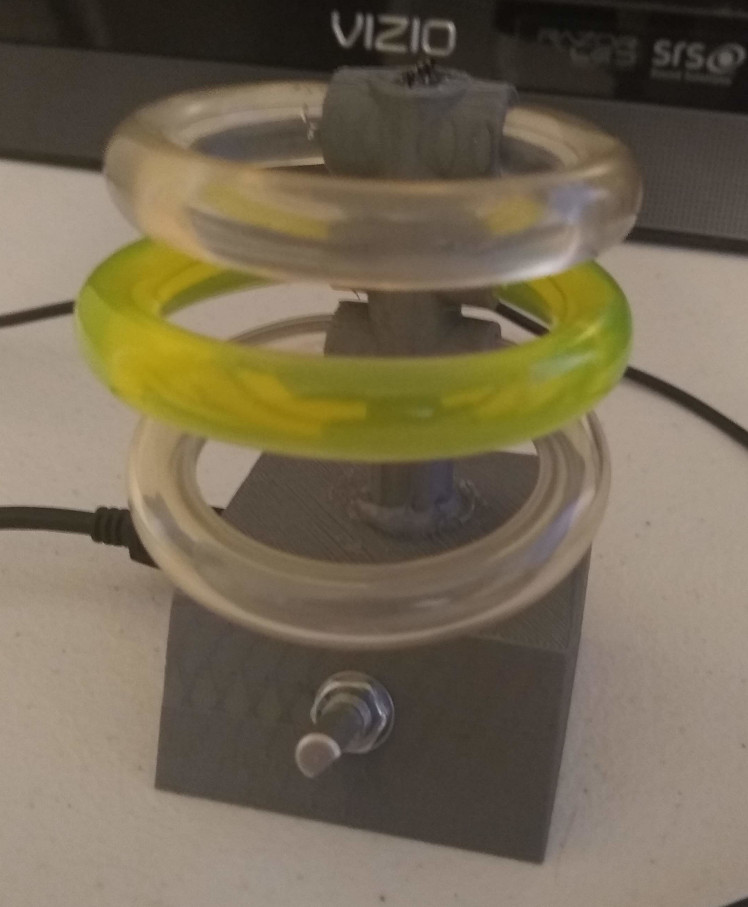
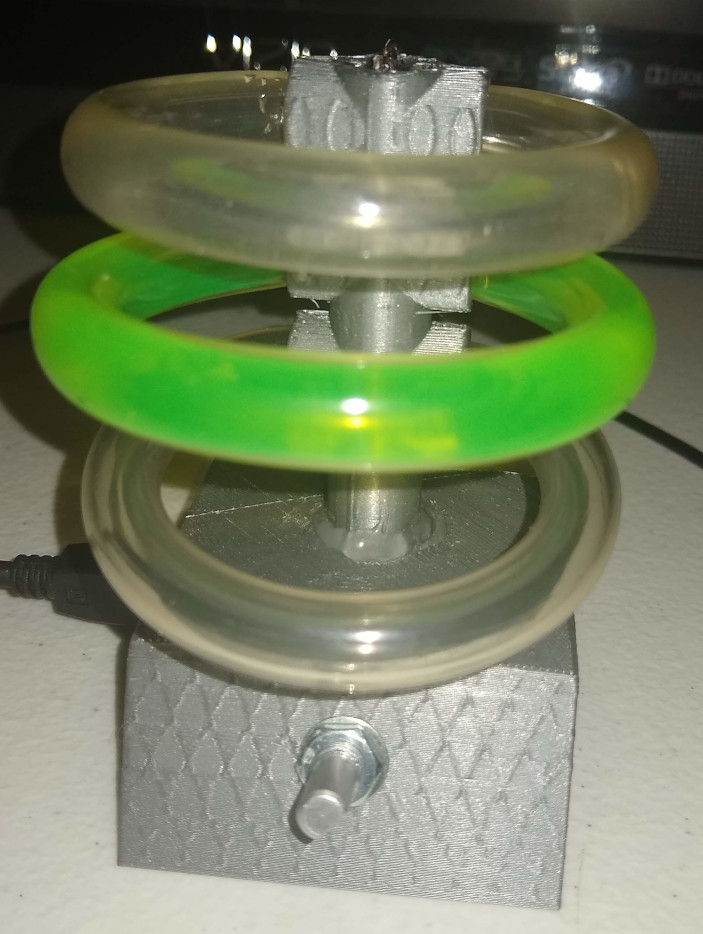
~Silicone: Just looking at the tubes it seems like silicone has the highest index of refraction. I think that’s a desirable characteristic for waveguides but I’m not sure to what extend it matters since I’m doing zero calculations and this is really just artistic diffusion and I’m not even sure if I’m using the term waveguide correctly in this context. Anyway it seems like silicone is the highest and that’s the best. Also it clearly just looks better in the rig to me. Only problem is now when I look at them I can’t stop thinking they’re shower curtain rings.
And since silicone is clearly the superior material I went ahead and cut down the rings from the first test and jammed them back in the LEDs. The rings are a little small now but I’ll remake it all later. But here’s a video of the rig with the cured silicone and slightly modified demo code including an actual warp coil effect for these actual warp coils.