I just had to 3d print something, so I did!

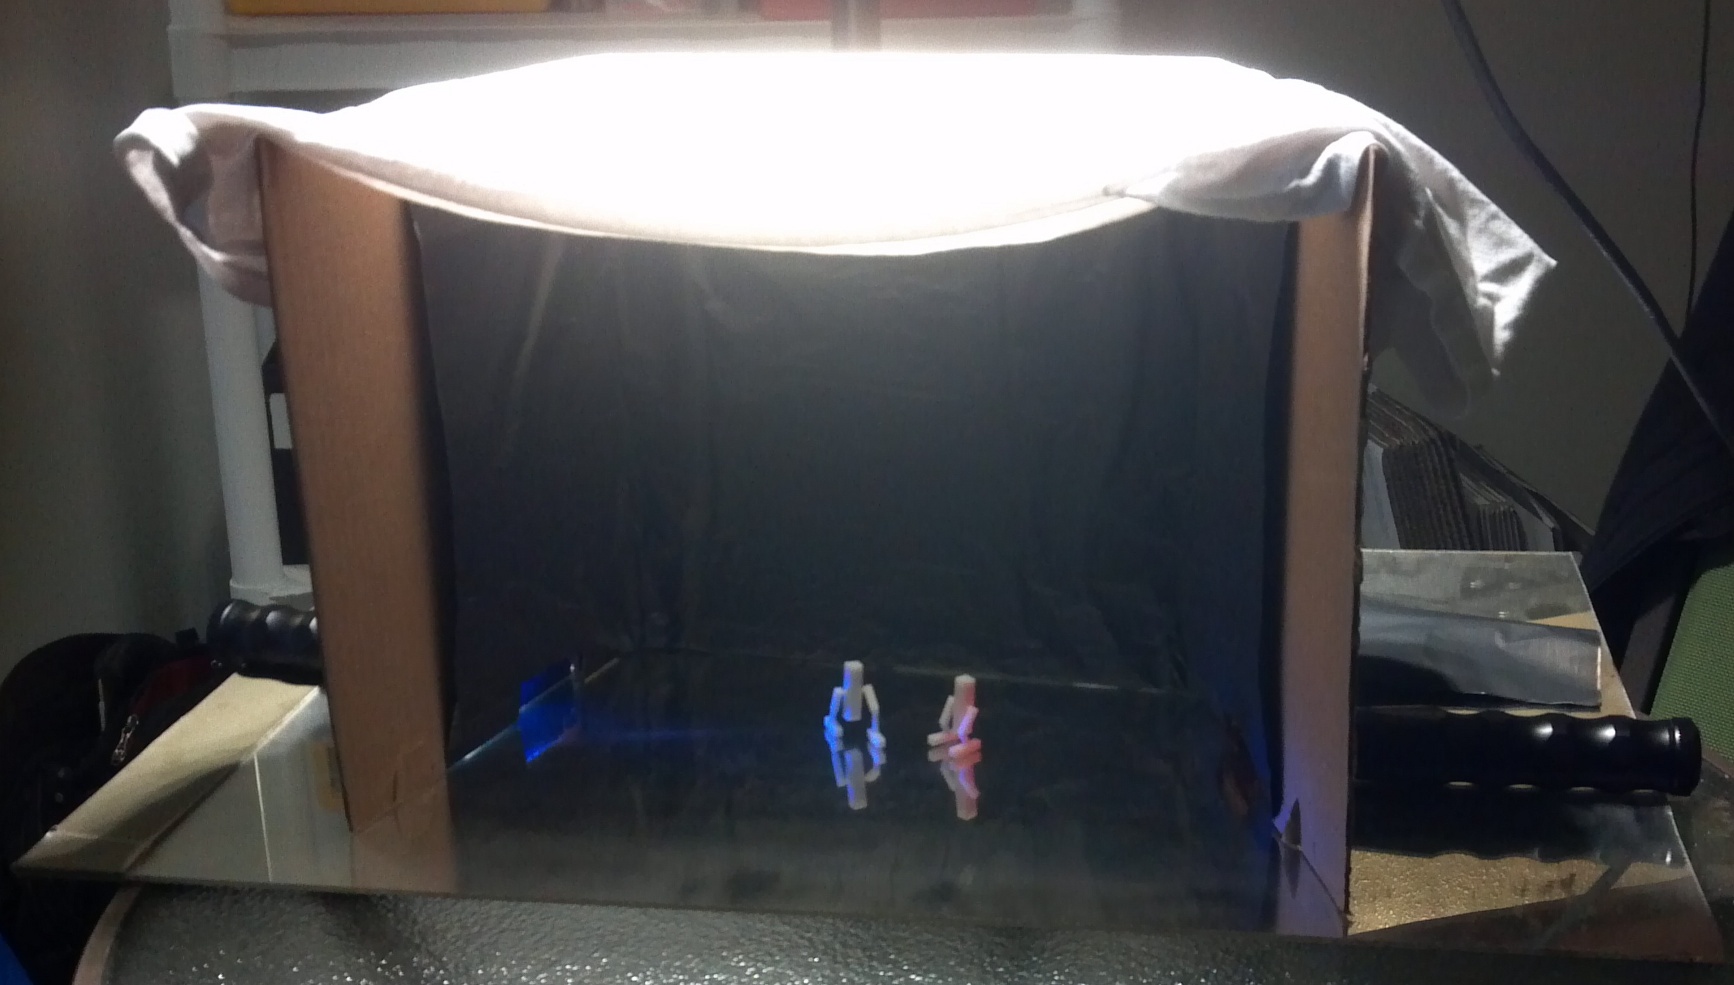
Actually their names are ‘Hedwig’ and ‘The Angry Blender Unit’.
They were ‘progranimals’ hopping around in the BGE. Now they are little figurines standing perfectly still in the real world. Fun!
I just had to 3d print something, so I did!
Actually their names are ‘Hedwig’ and ‘The Angry Blender Unit’.
They were ‘progranimals’ hopping around in the BGE. Now they are little figurines standing perfectly still in the real world. Fun!
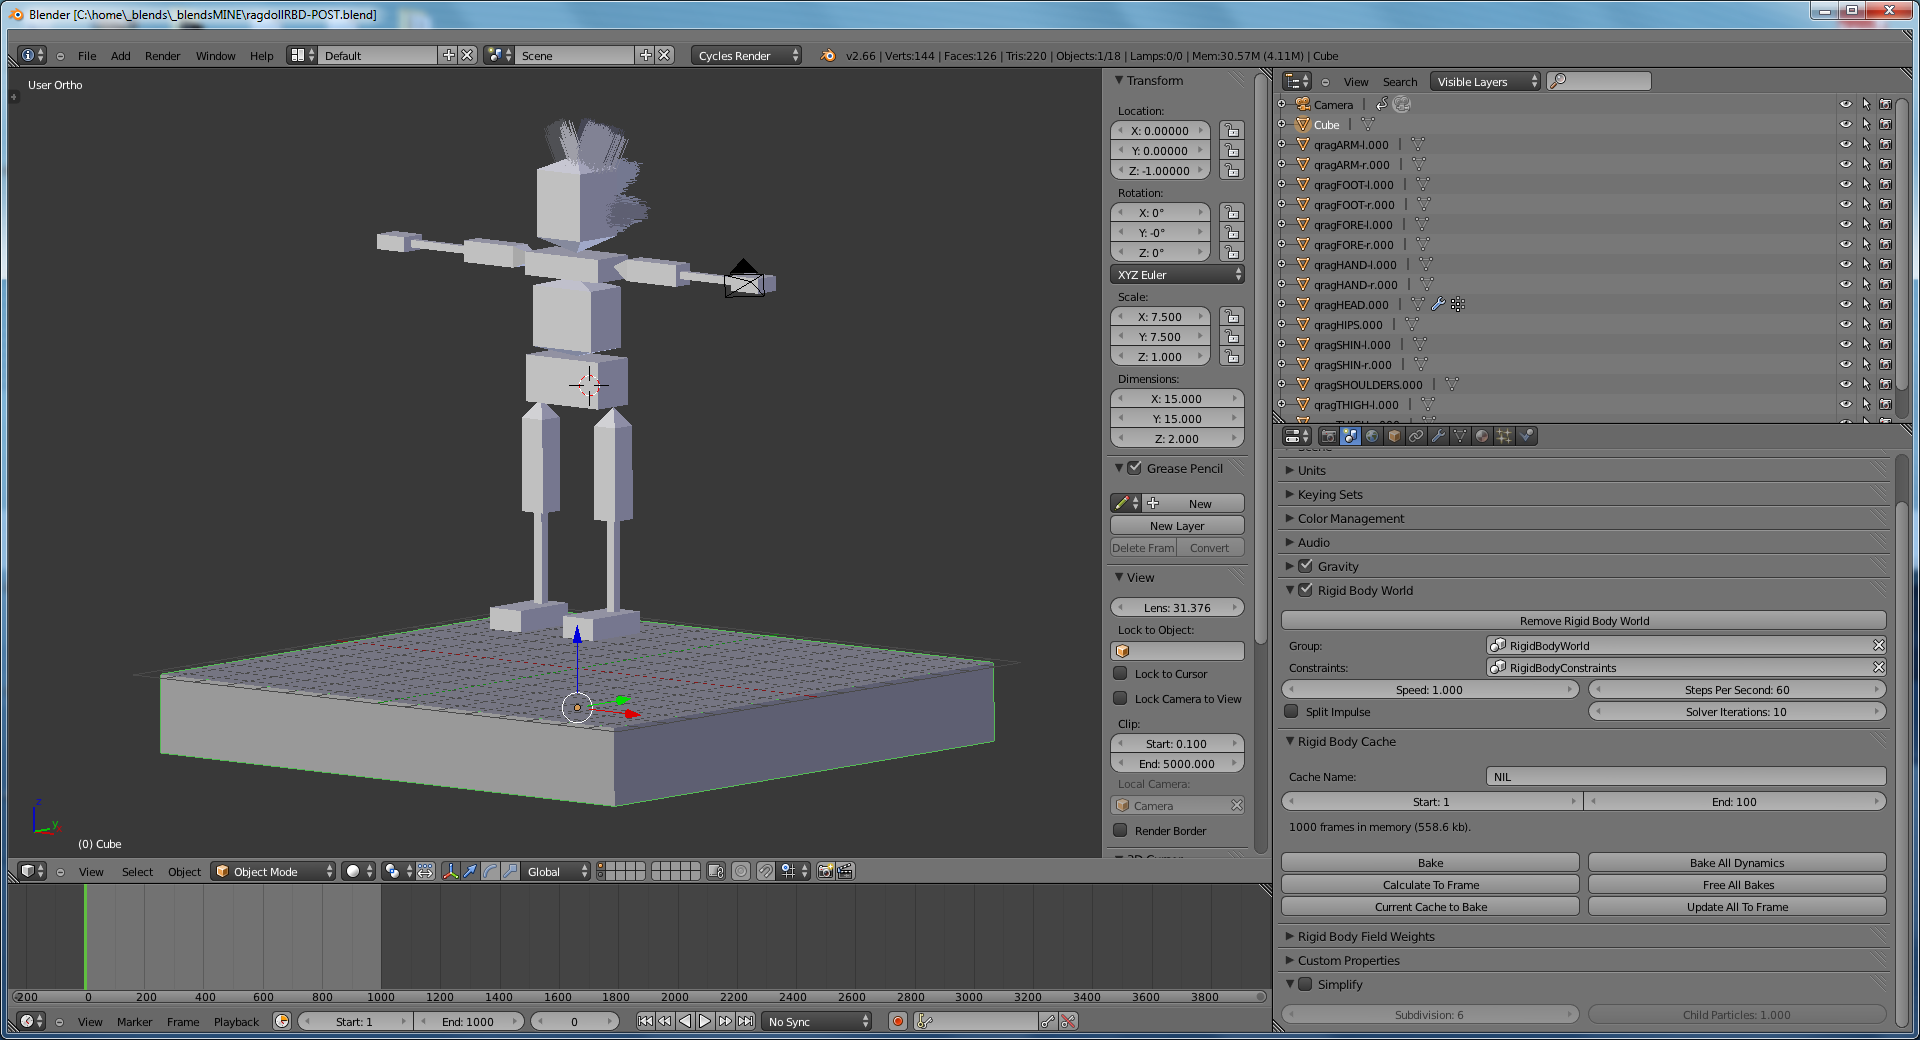
The folks at Blender have given me a couple of new tools with which to satisfy my desires to maim and mutilate ragdolls.
Rigid Body Dynamics in the animation system and Cycles Hair Rendering.
So in honor of that or whatever… here’s my first non-game-engine ragdoll (with hair) for your demented pleasure…
http://funkboxing.com/wordpress/wp-content/_postfiles/ragdollRBD-POST.blend
This is going to be a little note/link reference page for all the stuff I’ve done with Raspberry Pi’s. I had this stored in a gdoc but I figured it’s more useful here. This isn’t very well sorted or formatted yet. If you find this page and need some info that I haven’t finished posting, just message me and I’ll try to light a fire under it.
[SETUP FROM RASPIAN IMAGE]
***run rpi-config (automatically runs at first boot)
___ [SETTINGS:]
___ <EXPAND ROOT>
___ <START SSH ON BOOT>
___ <UPDATE RPI-CONFIG>
$ sudo apt-get update
$ sudo apt-get upgrade
***run rpi-update (https://github.com/Hexxeh/rpi-update)
***change uname/pword
[WIFI]
$ sudo apt-get install wicd wicd-curses
***add user pi to netdev if/when prompted
***configure network with wicd-curses (couldn’t get to work without encryption, WEP worked)
[X11VNC SERVER INSTALL AND AUTOSTART]
http://www.megaleecher.net/Raspberry_Pi_VNC_Setup
[MINI LCD SCREEN – INCREASE SHELL FONT SIZE]
http://www.raspberrypi-spy.co.uk/2012/11/cheap-miniature-lcd-screen/
***edit the SD cards boot.cfg, uncomment LEFT/RIGHT overscan
[IPAZZPORT BT KEYBOARD]
http://www.ctheroux.com/2012/08/a-step-by-step-guide-to-setup-a-bluetooth-keyboard-and-mouse-on-the-raspberry-pi/
[WEBCAM]
$ sudo apt-get install guvcview
***worked out-of-the-box with HP HD-2200 1280×720 webcam
[WEBCAM STREAMING (FAST ENCODING WITH MJPG STREAMER)]
http://www.justrobots.net/?p=97
$ ./mjpg_streamer -i “./input_uvc.so” -o “./output_http.so -w ./www”
$ mjpg_streamer -i “/usr/lib/input_uvc.so -d /dev/video0 -r 320×240 -f 10” -o “/usr/lib/output_http.so -p 8090 -w /var/www/mjpg_streamer”
***to display the image stream just add this line to a html-file.
<img src=”http://192.168.88.120:8090/?action=stream” width=”752″>
[ARDUINO IDE]
***this works from the Adafruit Ocidentalis image, might need java packages from basic raspian image
$ sudo apt-get install arduino
[RUN A PYTHON SCRIPT AT STARTUP]
http://www.stuffaboutcode.com/2012/06/raspberry-pi-run-program-at-start-up.html
$ sudo nano /etc/init.d/nokiaLCDboot.sh | (CREATE SCRIPT)
$ sudo chmod 755 /etc/init.d/nokiaLCDboot.sh | (MAKE EXECUTABLE)
$ sudo update-rc.d nokiaLCDboot.sh defaults | (REGISTER SCRIPT)
$ sudo update-rc.d -f nokiaLCDboot.sh remove | (UNREGISTER SCRIPT)
$ sudo /etc/init.d/nokiaLCDboot.sh start
*’&’ at the end of a command runs it as a background process, returning control to the terminal.
*running as daemon – http://www.raspberrypi.org/phpBB3/viewtopic.php?t=37901&p=314885
http://werxltd.com/wp/2012/01/05/simple-init-d-script-template/
[NOKIA 5110 LCD] – NEEDS EDITING
***link to post with image and pin assignments
***not sure if all of these packages are necessary. I did a lot of thrashing around to get this thing working so this isn’t very clean yet.
$ sudo apt-get install python-imaging python-imaging-tk
$ sudo apt-get install python-pip
$ sudo pip install wiringpi
$ sudo pip install spidev
***unblacklist SPI then REBOOT
$ sudo nano /etc/modprobe.d/raspi-blacklist.conf
***turn up CONTRAST 0xc4
[GPIO BUTTON SETUP] – NEEDS EDITING
???***VCC3V -> 10K RESISTOR -> BUTTON -> GPIO 17, 22, or 25 (PIN 11, 15, 22)
[FM TRANSMITTER] – NEEDS EDITING
http://www.icrobotics.co.uk/wiki/index.php/Turning_the_Raspberry_Pi_Into_an_FM_Transmitter
http://www.raspberrypi.org/phpBB3/viewtopic.php?f=37&t=25301&start=25
***CPU or DMA usage???
[TEXT TO SPEECH] – NEEDS EDITING
http://elinux.org/RPi_Text_to_Speech_(Speech_Synthesis)
installing pulseaudio – made it less crackly
use ESPEAK
http://www.gaggl.com/2013/01/raspberry-pi-text-to-speech/
***using this command seems to make it work
$ espeak “hello” –stdout | aplay (piping through aplay or something else seems to be critical)
[LIGHTWEIGHT WEBSERVER]
http://www.penguintutor.com/linux/light-webserver
[PHP SERIAL] – NEEDS EDITING
http://www.fritz-hut.com/php-serial-class/
USE HIS DEMO CODE… CHANGE DEVICE TO /TTYUSB0
AND BAUD RATE TO 9600
AND HAVE TO PUT THIS FILE IN /VAR/WWW/
https://code.google.com/p/php-serial/source/checkout
—PROBABLY NOTHING USEFUL PAST THIS POINT—
[TO EDIT]
•••••• OPEN CV
http://www.raspberrypi.org/archives/tag/opencv
https://github.com/andygrove/rasp_pi_camera_opencv
•••••• SDR W/ TV DONGLE AND/OR FUNCUBE DONGLE
DVB-T+DAB+FM
RTL2832U + R820T Mini DVB-T + DAB+ + FM USB Digital TV Dongle – Black
http://www.oz9aec.net/index.php/funcube-dongle/479-the-funcube-dongle-propro-on-the-raspberry-pi
http://g0orx.blogspot.com/
http://www.funcubedongle.com/?p=861
http://www.eham.net/ehamforum/smf/index.php?topic=84327.0
•••••• WSPR NODE
https://github.com/threeme3/WsprryPi
•••••• COMMAND TO MAKE BACKUP COPY OF SD IMAGE
dd if=/dev/sdx of=/path/to/image bs=1M
•••••• GET SYSTEM INFO
http://cagewebdev.com/index.php/raspberry-pi-showing-some-system-info-with-a-python-script/
•••••• GYRO/ACCELEROMETER SETUP – MPU-6050
http://playground.arduino.cc/Main/MPU-6050
http://arduino.cc/forum/index.php?topic=121825.0
http://arduino.cc/forum/index.php?topic=124153.0
http://www.botched.co.uk/pic-tutorials/mpu6050-setup-data-aquisition/
http://arduino.cc/forum/index.php?topic=103408.0
http://www.i2cdevlib.com/devices/mpu6050#help
•••••• R.O.S. INSTALL ON RASPIAN
—MORE UNSORTED / SOME NOT DIRECTLY RASPERRY PI RELATED—
• R2D2 with VOICE CONTROL AND FACE RECOGNITION…
http://www.wired.com/design/2013/01/raspberry-pi-r2d2/
• RPI ANDROID HTML5 CONTROL OF SERVOS
http://martinsant.net/?page_id=479
• WEB COMMANDS->PYTHON
http://askubuntu.com/questions/218496/sending-keyboard-commands-to-ubuntu-through-python-remote-for-my-blackberry
http://stackoverflow.com/questions/3289584/web-ifing-a-python-command-line-script
http://mail.python.org/pipermail/tutor/2005-November/043372.html
• WEB CONTROL OF GPIO
https://bitbucket.org/sbub/raspberry-pi-gpio-web-control/overview
http://www.instructables.com/id/Web-Control-of-Raspberry-Pi-GPIO/
http://elinux.org/RPi_Low-level_peripherals
• NON ROS ROBOT TELOP
http://raspberrypirobot.blogspot.com/
http://code.google.com/p/cmd-robot/
http://www.finventing.com/2013/01/06/robotic-light-painting-with-raspberry-pi/
• HTML FORM BUTTON
http://stackoverflow.com/questions/4120678/multiple-buttons-on-a-form
• OPENCV
http://www.betasix.net/opencv-2-2-python-examples/
http://blog.jozilla.net/2008/06/27/fun-with-python-opencv-and-face-detection/
• HTML CONTROL
http://www.raspberrypi.org/phpBB3/viewtopic.php?f=32&t=23897
• X11VNC MULTIMONITOR
http://en.gentoo-wiki.com/wiki/X.Org/Dual_Monitors (search ‘occasional dual monitors’)
• WIIMOTE
http://www.cl.cam.ac.uk/projects/raspberrypi/tutorials/robot/wiimote/
[EDIT] Please check out the newest version of the FX Code (v0.51) with Android Bluetooth Control App and Chrome Control Extension.
This code has been revised and I made a new post about it – please see updated post HERE
[EDIT] If you end up using this code for a project please send me a link/pics/video! I love seeing what people do with this! If you like I’ll post a link to your project on the FastSPI FX – User Coolness post. Also make sure to thank Daniel Garcia (the genius dev of the FastSPI library) on the G+ FastSPI Community.
[EDIT] If you have any requests for certain types of effects I’d be happy to look into it. Just let me know what you’re looking to do and I’ll take a swing.
If you find this code very useful please consider donating a little via paypal. I’m having some ‘financial instabilities’ right now and any little bit would help. And if you need a certain effect coded, a donation would certainly obligate me to get that working for you! Sorry for this, it sort of feels like panhandling and the real credit should go to the library creator, but we do what we have to… Thanks for understanding.
[paypal-donation reference=”FastSPI LED FX Code”]
I’m also grateful for bitcoin donations to: 1K5Yy77ejes2FZrHBG5fns3QAicnwZcduq
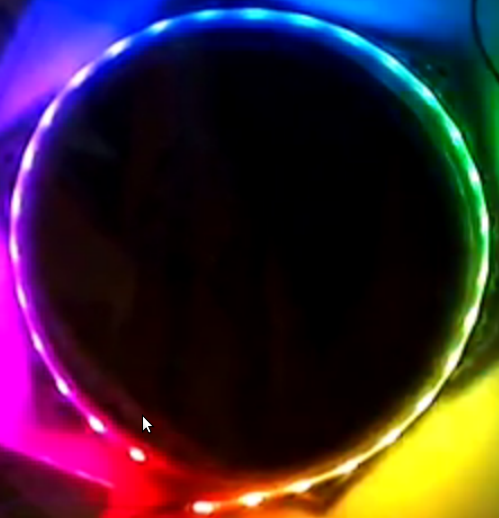
Some LED effects I’ve written for Arduino and FastSPI library.
Mostly written for a circle of LEDs but plenty useful for any configuration.
Code available here… the code
***Here is an update to the FastSPI_2_RC1 – the code
Used WS2811 strip, but have also tested with WS2801.
I’ve only tested this on the duemilanove and nano boards. It’s looking like this does not work on the UNO and I’m not sure about the Leonardo or the new Due.
Several people have indicated problems finding the SerialCommand library – so here’s the version I’m using SerialCommand
Here’s where I found it. Thanks to this guy for the library- Steven Cogswell
http://husks.wordpress.com/2011/05/23/a-minimal-arduino-library-for-processing-serial- commands/
http://youtu.be/Jcs1udKP4rs

This is UgBot: The ugliest electronic mess since Superman III.
UgBot technically isn’t a robot, just a remote controlled thing. It started as a test for my next robot project (to be called Dominar Rygel XVI)
I just had to work through a few simple ideas before I started on a more sophisticated platform and this is what I ended up with.
UgBot’s hardware is:
(1) Arduino Nano
(1) Bluetooth TTL Module
(2) Micro Servos (modified to continuous rotation)
(1) Breadboard (sawed in half)
(1) Battery Pack (4)AAA
Poweraide and Coke Caps for wheels
Lots of jumpers
and the software is:
-Arduino sketch with CmdMessenger, Servo, and SoftwareSerial libraries (software serial is so I don’t have to pull the TX/RX pins for debugging. It’s a big help)
-Android app which I basically stole from this guy Eirik Taylor’s project. I changed the UI and the serial commands but the rest is pretty much his code. I’m so lazy I didn’t even change the name so the app is still called BluCar from his project.
I absolve myself of the theft since he admits that he took most of the code from the BlueTooth Chat example in the Android SDK.
Here’s the Android and Arduino Code
Here’s updated android code (w/ multitouch enabled) Code

I guess I’ve been using Blender for so much for so long that I tend to look for ‘Blender-like’ controls in a/v projects. So inevitably when I started working with LED strips I immediately tried to weasel out of having to think through functions and loops in arduino code to create effects I could do intuitively in Blender.
So after a few bad UI attempts I thought – hey, wish I could just design a light sequence in Blender and run it with ALT-A. So that’s what I did.
On the arduino side it’s using the FastSPI and CmdMessenger libraries for LED and serial communications.
The Blender script just reads the diffuse color in r-g-b from each LED objects material and spits it out to the USB port. Getting the pyserial library hooked up in Blender wasn’t a breeze but the “sys.path.append” line should help anyone having the same issues I did.
Here’s the arduino code and Blender file
(Using Arduino Duemilanove 328 and LED strip with WS2801 chips)
EDIT:
Blendernation article (Thanks Bart!)
I forgot to mention I’m using Ubuntu so the sys.path.append thing wont work for windows, you’ll have to find the pyserial library solution elsewhere (there’s plenty of reference out there)
Also – the script runs on each frame change. Here’s how that works (WARNING: kinda hacky) http://funkboxing.com/wordpress/?p=236
QUESTION: For any API guru’s out there – currently this script opens and closes the serial port on each framechange. I know this is radically inefficient. Any ideas on how to keep the serial port open persistently but to close it when blender closes?
Here’s an Arduino LED backlighted sign I made.
Electronics are:
(1) Arduino Nano – $16
(1) Bluetooth TTL- $10
(23) Addressable LED Strip (SMD5050/WS2801) – $20
Then some foamcore, paint, and hot glue.
I’m using a android bluetooth terminal program to send serial commands to the arduino. Right now the program just calls ‘Modes’, which are different effects I hacked together in the arduino IDE. Later I’ll write a more versatile program so you can more directly control the LED’s with an Android app or something.
FYI – The Q is for Quixote Studios.
In honor of the SpaceX Dragon’s historic flight to the ISS- here is a render, and a .blend file of the SpaceX Dragon!
http://funkboxing.com/wordpress/wp-content/blendfiles/SpaceXDragonCapsule.blend

Take this! Mr. hasn’t-posted-in-months.
Just playing around with Blender and Cycles.


This is an attempt to merge Blenders Dynamic Paint feature with cellular automata. It started as a python script but then became even more of an educational experience when I realized python wasn’t going to be fast enough to run conway’s life on a 64x grid, let alone a 4Kx one, which was my initial goal. These ended up being 512x grids. I could have gone bigger but I’m using a little netbook for all this so I didn’t go nuts.
After figuring out that python wasn’t going to be fast enough I set out to make a c++ version, not in Blender, just in c++. Long story short it’s an atrocity of loops inside a main function. I didn’t even bother to pass any arguments, just recompiled every time I changed paths. Anyway it ended up being lots faster than the py scripts and I finally had an excuse to write a function I knew very well in a language I’ve been intimidated by for some time (and still very much am).
The c++ code uses the ImageMagick++ library, which made things much easier, but you’ll have to get this lib if you want to compile and use this. Hopefully this whole process has prepared me to get on porting the lighting generator to c++, which really needs to happen if if it’s ever going to be more than a gimmick.
So anyway, here’s the c++ code and here’s the Blender python script that I abandoned in favor of doing it in c++. For the record- this is bad, bad code. Very bad. Also here’s the command line to compile with g++ and imageMagick++, since that took awhile to get past.
user@pc:~$ g++ `Magick++-config –cxxflags –cppflags` conway.cpp -o conway `Magick++-config –ldflags –libs`
Here’s the process for using this to dynamic paint with conways life.
1) dynamically paint a canvas with a brush. This will paint ‘live’ cells onto the canvas
Turn on ‘dissolve’ and set to dissolve in 1-3 frames. Otherwise these become ‘immortal’ cells, which makes for a weird simulation.
I used red channel only for these demos.
2) compile and run the c++ code.
This will run the simulation on the dynamic paint cache images. It runs the simulation from the initial frame, but always includes the red cells from the next dynamic paint frame so they will be used in the next simulation step.
3) use this simulation output as a map in place of the dynamic paint output.
Sounds easy, and it kind of is, and kind of isn’t.
So if you want to do this yourself- if you know c++ it should be easy. If you don’t it will be very hard. If you’re just learning c++ it may be worthwile to try.
Not sure where I’m going with all this, as usual it was just something to do. Hope you dig it.