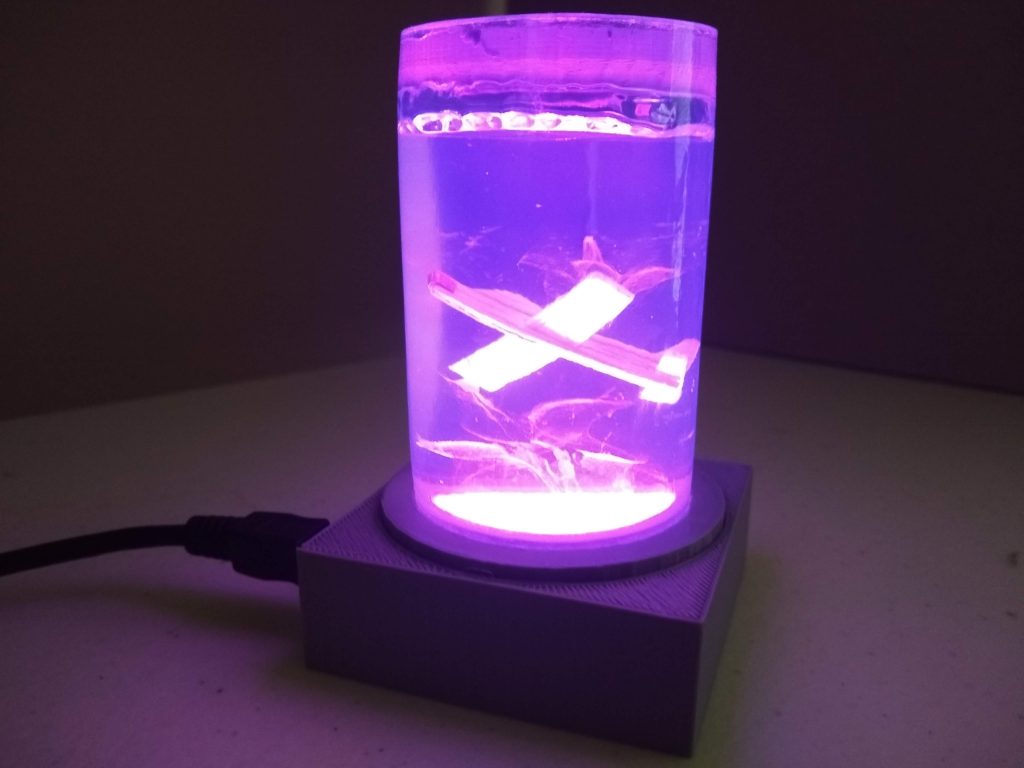
Cubic portals are cool, but we all know tubes are the future so of course the next step in inter-dimensional balsa travel should be tubular.
I’m slowly learning some tricks to working with silicone but it’s a slow process partly because I’m slow and partly because silicone is a truly insane material to work with. There’s a gap in the top that formed slowly as it’s been curing over a month or so but now I’m leaving holes in both sides for curing so I can control the shrink better. That’s the thing with this stuff- you can’t really build the light until the silicone has settled and sometimes you have to keep adding silicone every few days so it meets where the LEDs will be. It’s kind of a nit picky process after you’ve laid in the silicone, you just pick at it once a week or so until it settles in to whatever it’s going to be.
The smokey trails are just baby powder dabbed in with a q-tip while the silicone is wet, that was a surprising success, it adds a lot.
This build is lit with an 8-LED RGB ring and an addressable UV LED I got from Adafruit. The UV is WS2812 but the RGB channels are all UV chips, pretty cool.
I spritzed the plane with highlighter fluid but I don’t think I used enough because it’s not really popping. The FX loop is just cycling colors and brightness on the RGB and fading between the UV chips to give the UV some movement. Unfortunately the UV\fluorescent didn’t really add much on this one, but I’m learning. I’ve got a few other plane tube type trials curing so I’ll try a different configuration next time.
I need to figure out how to get better pictures of these things because these look a lot cooler in person, but it is what it is for now.
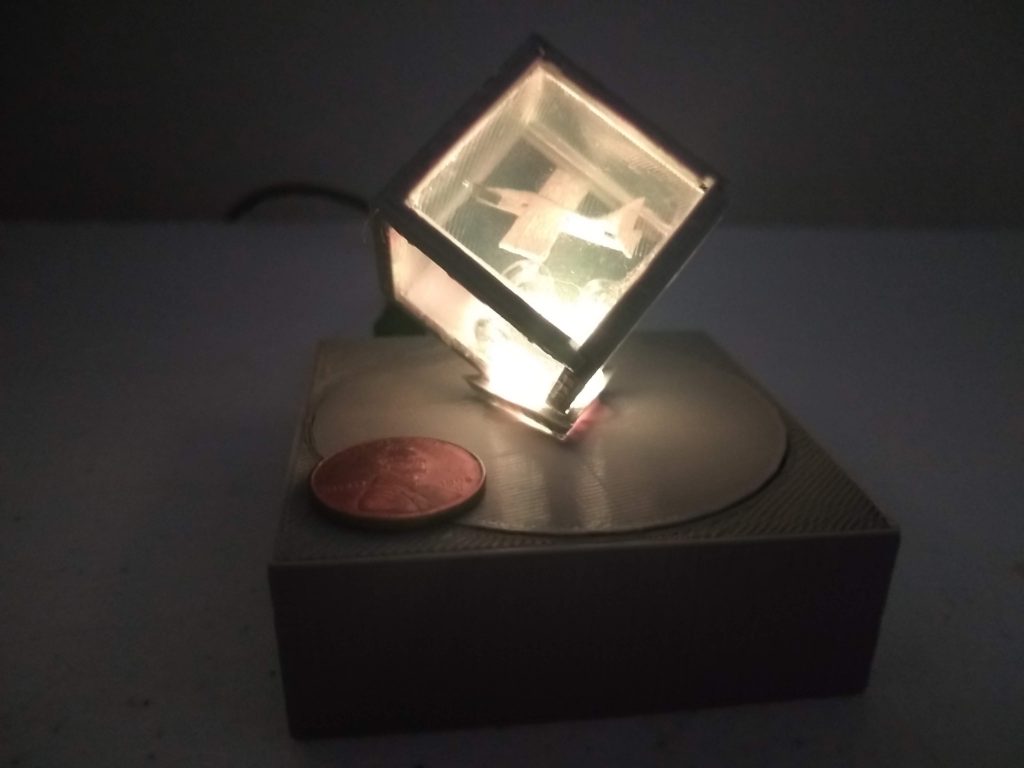
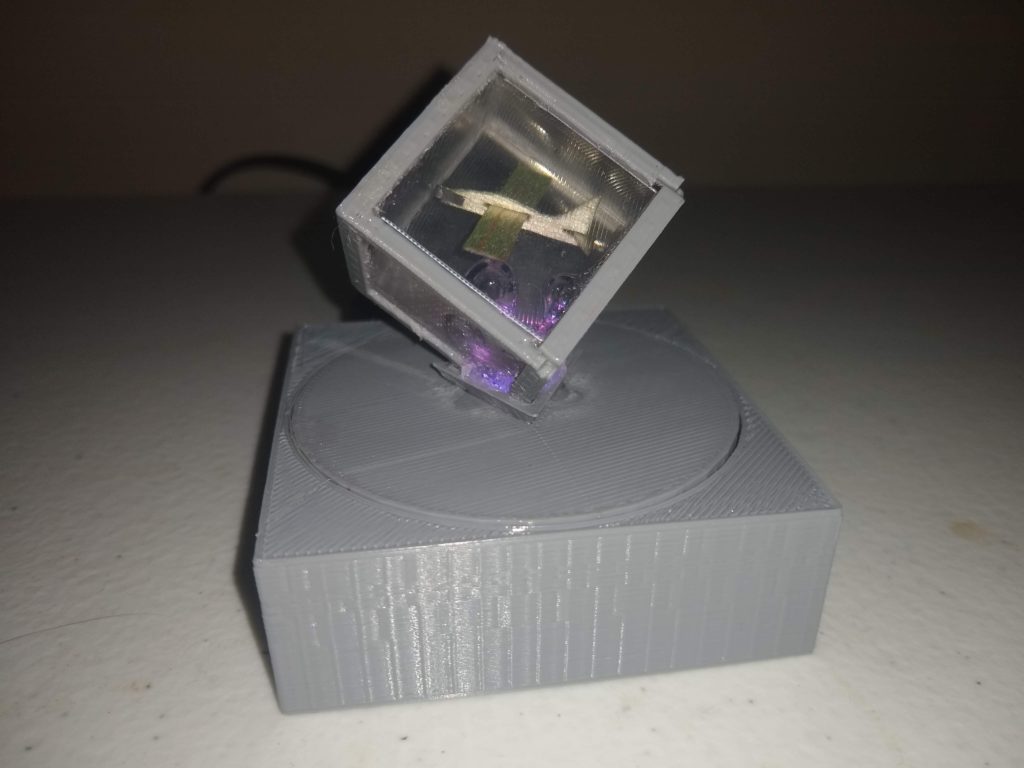
This is an artifactually intelligenting quantumish singularitinity combining cartoon shnano-toob structures with nob-libnear crystalfinity waveforms.
Also it’s a 3d printed cube with fresnel plastic windows filled with clear silicone. And there’s a balsa plane too.
I screwed up in the process and let a big bubble form that blocks a good bit of the LED, but it was a fairly successful little test and I’m going to make another one with what I learned making this one.
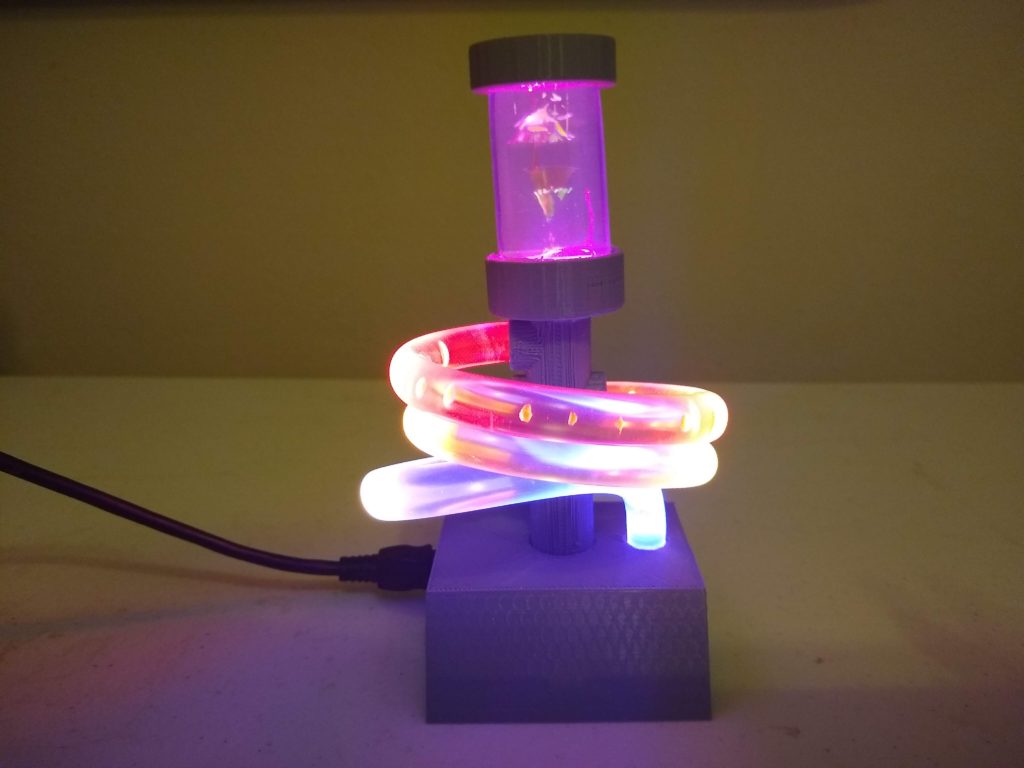
This is the shotlight prototype I ‘fixed’ by replacing the dome top with a vinyl tub. I still haven’t made the version with the shotglass or last tube section yet, but this was one of my first fluorescent fluid tests and the lighting effect is coming along so I thought I post it here. There’s also some fluorescent drops in the smaller tubes- that was a strange test where I injected the fluid while I was pumping the silicone into the tube. I had to pump the caulk gun with my feet so I could handle the tube and syringe, it was nuts. Injecting it wet like that the fluid beads up into a perfect droplet from the pressure as the silicone flows down the tube. However if you look in the picture the droplets are distorted- after I cut a 10″ section and it cured a few days I found you could squish the tube really hard and the droplets would spread out in the mashed silicone. Interesting effect but I don’t think it’s cool enough for all the trouble.
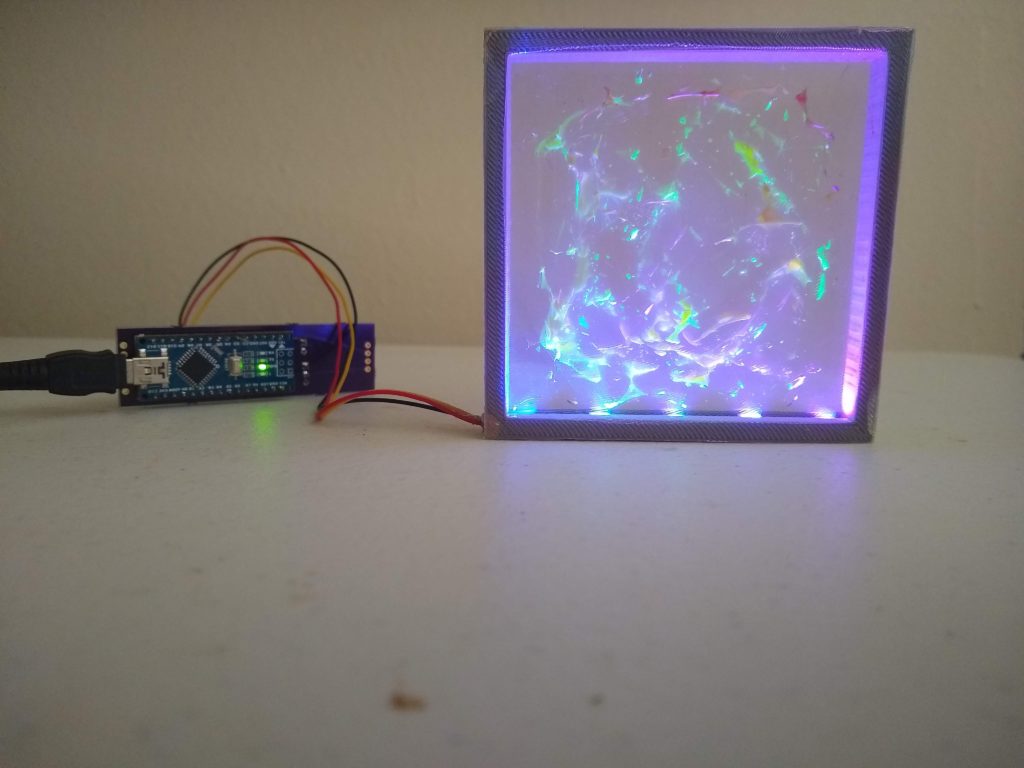
FRESNEL FRAME
Frame with LEDs filled with silicone and spastically squirted with fluorescent fluid and squished together with fresnel sheets. No pattern or anything, but even so it came out kind of interesting.
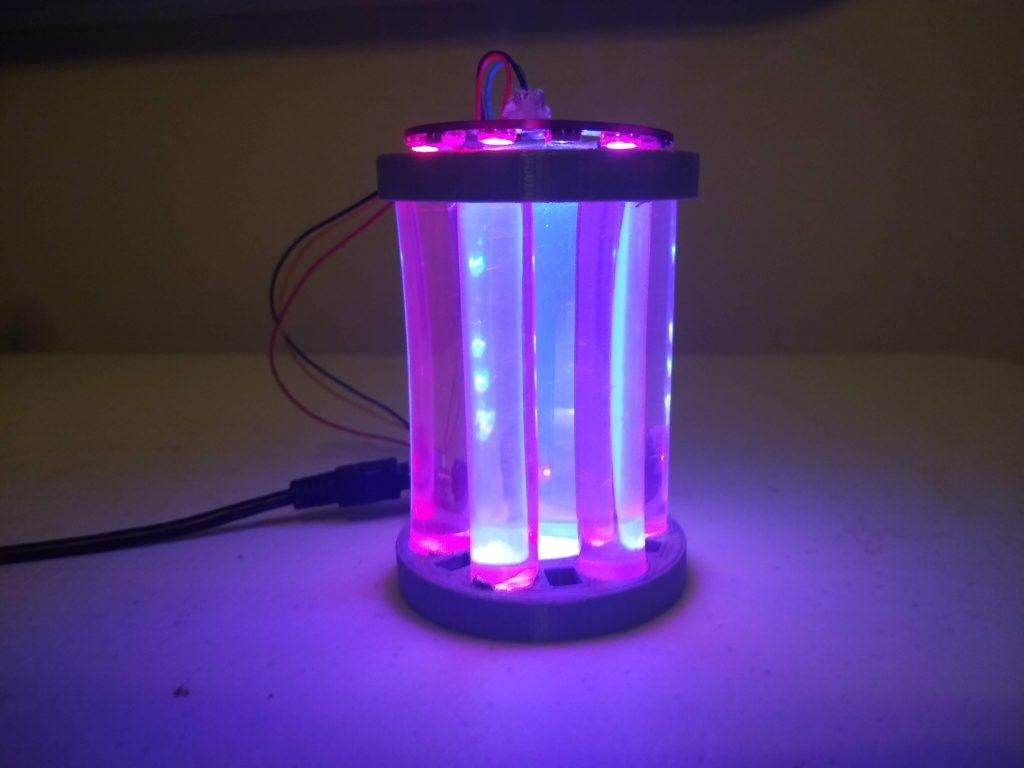
HEX TUBES
Just another iteration of the ring\tube light I posted before. This one uses slightly larger tubes on the perimeter and added an larger tube in the center.
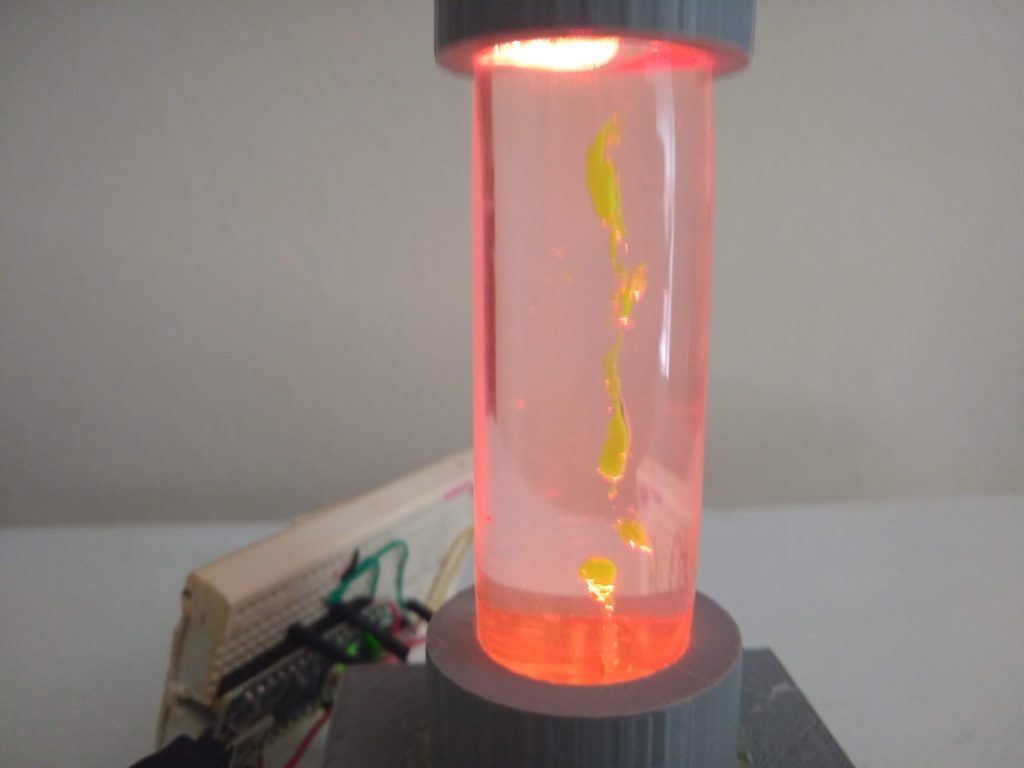
FLUORESCENT FLAME
One of the first tests of getting fluorescent fluid into the silicone, lots of fun potential there. Just made a stand because things need stands.
The tube to LED tube effect mastery tubes through many strange tubes. Some tubes are interesting concepts that become poorly thought out attempts, some tubes suffer from a lack of resources or patience in fabrication, some just don’t make any sense at all in retrospect but I have to assume they did at some point.
Here we have a few failed, but still educational, tubular journeys I’ve made recently.
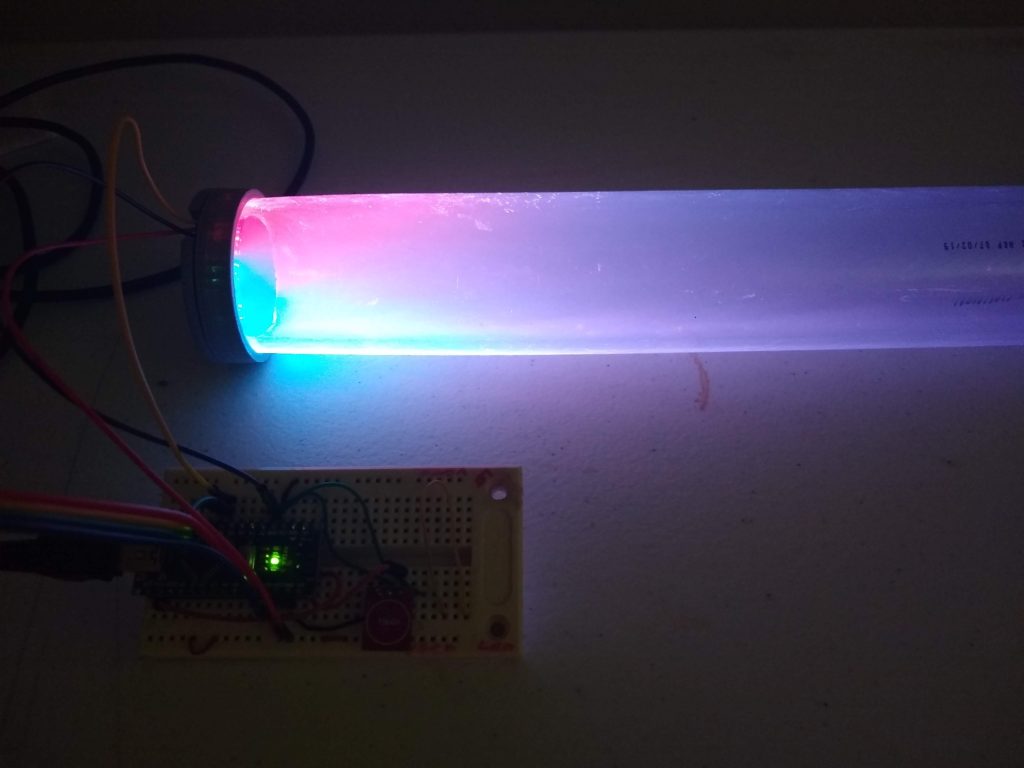
BIG HONKING EDGELIT TUBE
At 100% brightness with half red and half blue so you can see the blending issue.
While I was at the hardware store looking at tubes I couldn’t help but notice the largest diameter tube in stock was about right to try edge lighting with an LED ring instead of through the center. They’re 1-7/8″OD and a 12-LED ring lines up right the LEDs packages. It took a little thought to get a secureish connections with a 3d printed holder. Unfortunately the results were very underwhelming. The light mixes completely in the first two inches so you lose any color differentiation between the LEDs pretty fast. And it dims out after about eight inches. Worse the look of the light coming from the tube wall instead of inside the tube doesn’t look very cool to me. Just looks like a giant, crappy fluorescent tube with a color temperature that’s just wrong. The tube was about $10 and I wasted a lot of time getting the holder right, but my time is worthless and I can reuse the LED ring for other projects. So not a huge loss and I might try using the tube for something else later.
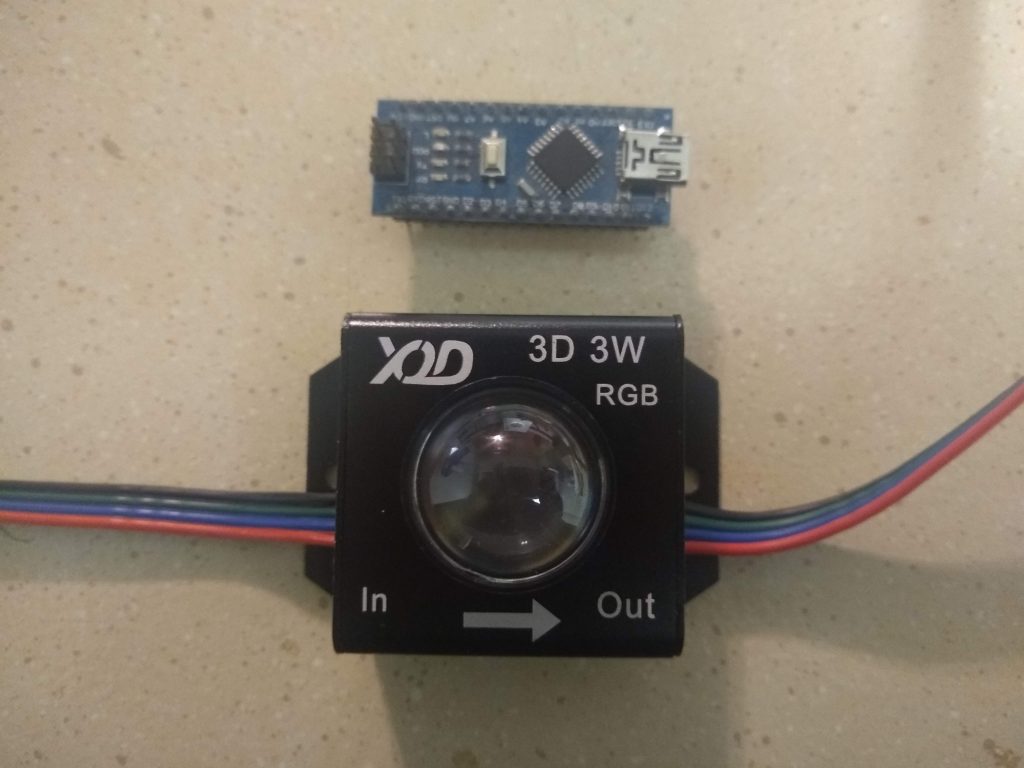
GOTTA DO SOMETHING WITH THESE FREAKISH 3W LED PROJECTORS
These modules are ridiculous, but I’m semi-committed to figuring out something to do with a lens with such an insanely tight beam that the RGB channels don’t even overlap. After giving up on bouncing the light off anything since literally any other LED is a better option- I decided to see if I could capitalize on the insanity of the module’s design by projecting the beam into a tube. That makes it sound like I really thought outside the box to find a use, but I think it’s pretty clear why my first thought was tubes.
The lens turned out to fit a 1″OD|3/4″ID tube perfectly so I just printed a little collar and pumped in a bead of silicone to make a watertight so it could hold water. I didn’t go with silicone fill in the tube because it’s just a lot of silicone for a test. The results are interesting, it lights up the tube and blends pretty well. I think two of these on opposite ends could light up a tube at least 2-3′. I’m not sure that’s worth buying any more of these but I might have found a way to at least put them in a one-off giant-tube build. Not sure why I’m calling this a failure because it kind of worked out, but these freaky little projector LEDs are pretty much a mistake to begin with. I’d like to ask whoever designed them what purpose they had in mind.
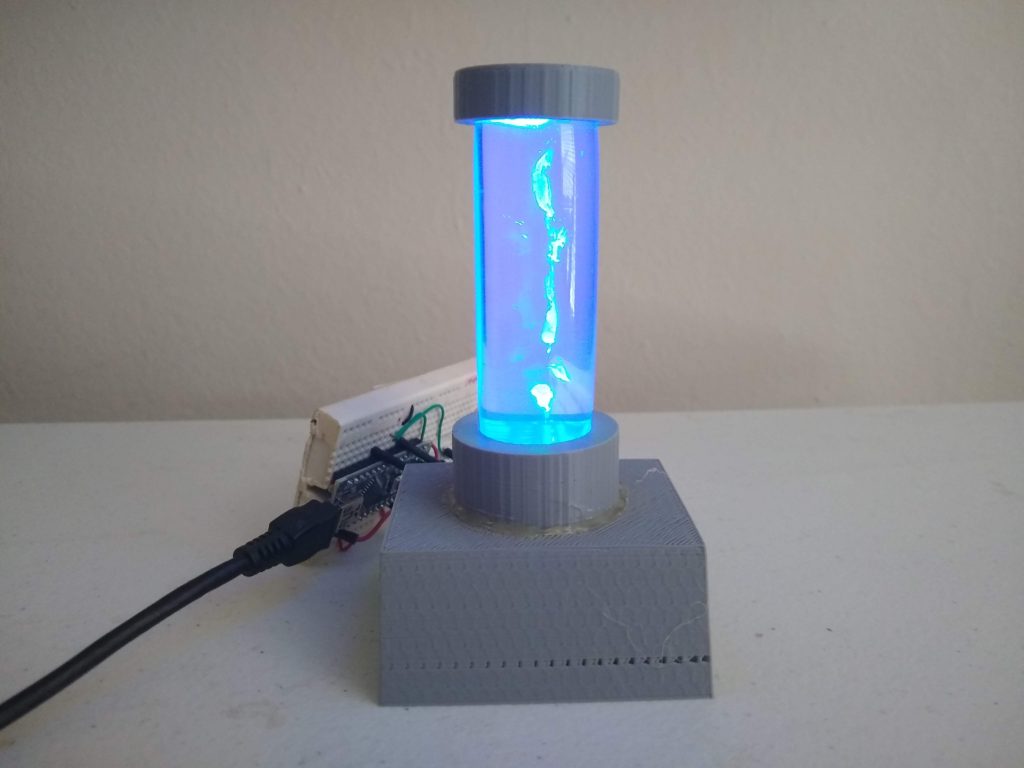
PHALLIC TUBES
This is supposed to be an effect light with tubes that ‘fill’ a little bottle or shotglass at the top with light. After I had the basic build worked out I was somewhat shocked to discover I do not presently own a shotglass. I had the acrylic case from an hexbug toy so I chopped it down and filled it with silicone just to top off the prototype build. Once you put the silicone on its kind of a done deal, you can kind of unmess it after it cures on PLA, but it’s not worth it.
It took me a bit to see it, but I am no longer comfortable with the overall aesthetic of this build. I should have waited until I got a shotglass. But I’m going to add another section of tubing to complete the loop back to the base. so this prototype build just is what it is, which is a light that doesn’t not remind people of a dong enough to not be a considered failure.
THE ONLY TRUE FAILURE IS THE FAILURE TO OBSESS OVER FAILURE UNTIL YOU THINK OF ANOTHER INTERESTING WAY TO FAIL.
These tests actually gave me some other ideas that I’ve had some success with, but I’m going to save those for a post that isn’t about fun mistakes. So stay tuned, there might be a post about mistakes involving fresnel lenses and\or highlighter fluid to look forward to, and definitely more tubes.
I was searching for a high power addressable LED module and this was one of the few I found in a price range I could play with, and being 5V instead of 12V is convenient for me. They were $15 for 5 unit plus shipping.
Only found them on Ray Wu’s AliExpress store, can’t find them anywhere else. It took a few weeks for delivery but it was reasonable for international shipping.
They’re basically what I expected, they worked right out of the box with FastLED test code (WS2811\GRB). I’ve been using 2812’s for so long I was briefly confused by the 4th wire and was worried they were just common anode RGB. But they’re WS2811’s for sure.
I opened one up and should have taken a picture but forgot. The only things worth mentioning are that the lens is glued to the PCB and protrudes from the housing so you cannot remove the board from the aluminum block without breaking off the lens somehow, which is likely to damage the PCB. Also it’s notable to me that the aluminum housing won’t help cool the PCB at all, it’s held in a channel in the middle but doesn’t have any thermal connection to the aluminum. That seems like a missed opportunity.
As far as the light goes- they’re very, very bright. Incomparable to a standard LED strip LED, it’s a bitty freaking light cannon. I can see them being used for architectural displays that would be visible even with lots of ambient light. The video is with my apartment lights on and the FastLED brightness at 128, about 1/2 power.
The thing that I didn’t expect was the projection effect. It’s kind of bizarre and probably why these things aren’t as popular as they could be. If you watch the video you’ll see what I’m talking about.
It projects an almost perfect image of the LED chip and you can clearly see the different positions of the red\green\blue LEDs. It makes it pretty much unusable for direct illumination of anything, at least from close up. You have to bounce this off of something or it’ll be unbearable to look at. It might help to test 20-30ft away, but my apartment isn’t that big and my neighbors already think I’m nuts so I’m not doing outdoor testing right now.
Unfortunately that kind of defeats the purpose of a tight beam for me. Might as well just get a better diffused light if I have to bounce it anyway.
So I’m not sure where to go from here with there. Since I’m already going crazy with tubes I might see if I can use these for a giant silicone tube light or something. We’ll see what happens, but I was pretty excited to get them in and test them so I thought I’d share.
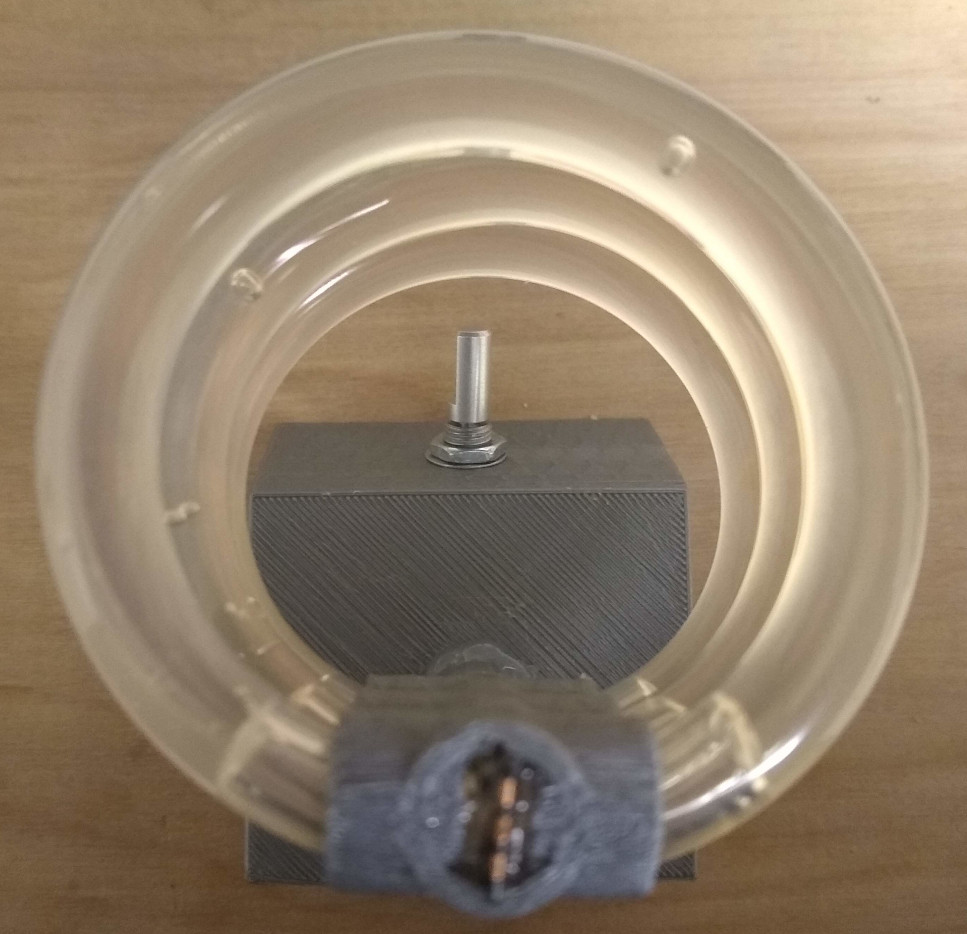
Heinlein, Musk, Groening… true human visionaries understand that what the world needs now is tubes, sweet tubes. So for the sake of humanity- here are more tubes.
I’m ending up with some odd lengths of scrap tube from my warp coil fetish and I thought they might look cool arranged vertically around a 12 LED ring. I could have done 12 tubes, but I went with 6 tubes using every other LED and the middle ones are a ‘base’ light. So you can have the translucent tube color accented against the reflected light off the center column.
It kind of works, but I need to add a little reflector\diffuser material to better point the ‘base’ light at the column, right now it kind of spills out everywhere and doesn’t evenly light the column. Still reasonably pleased with how it worked out so thought I’d post it.
They’re warp coils now, not just tubes filled with stuff to create a lighting effect that kind of reminds me of warp coils- they’re actual warp coils.
There was a disappointing development with the test rig. A few days after I made it the silicon curing in the tubes shrunk up inside it and left a big air gap that screws up the light transmission around the tube. It stil looks okay but you see a lot of light blasting out the back that wasn’t there before.
I thought about trying again but filling up the printed holder with silicone too when it shrinks up it pulls in more silicone, but I’m not sure that would work or would be worth it, and it’s messy enough as it is.
The more obvious solution is just fill the tubes and let them cure, then cut the tubes down where the silicon shrinks to and jam that into the LED. It’s not as ideal as letting the whole thing cure in one clear continuous mold, but I’ve noticed the interface between the LED and tube filling isn’t as critical as I thought. A perfect seal with the silicone seems only about 10% better than just jamming the silicone in after its cured. Obviously that’s just me ballparking it based on observation so who knows. I think if there is something to be gained in a perfect interface between LED and waveguide then it’s so unattainable it’s not worth the effort past just making sure they’re pretty well crammed in there with no big bubbles or gaps. But since I had the silicone out I figured I’d try to get creative and tried a few things:
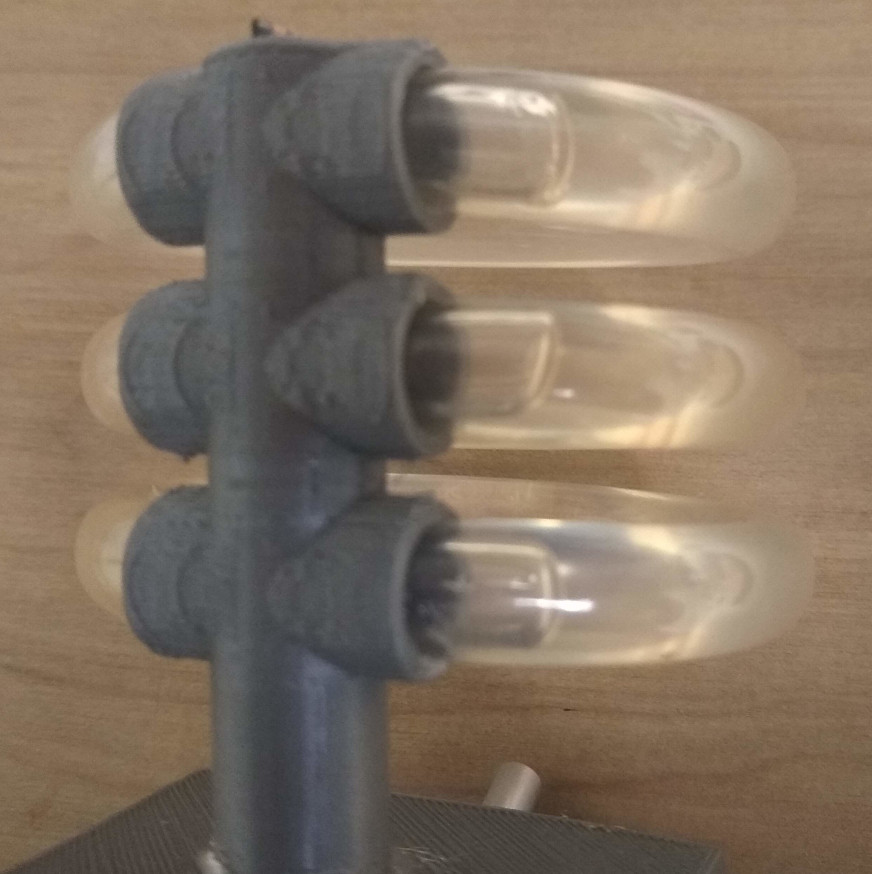
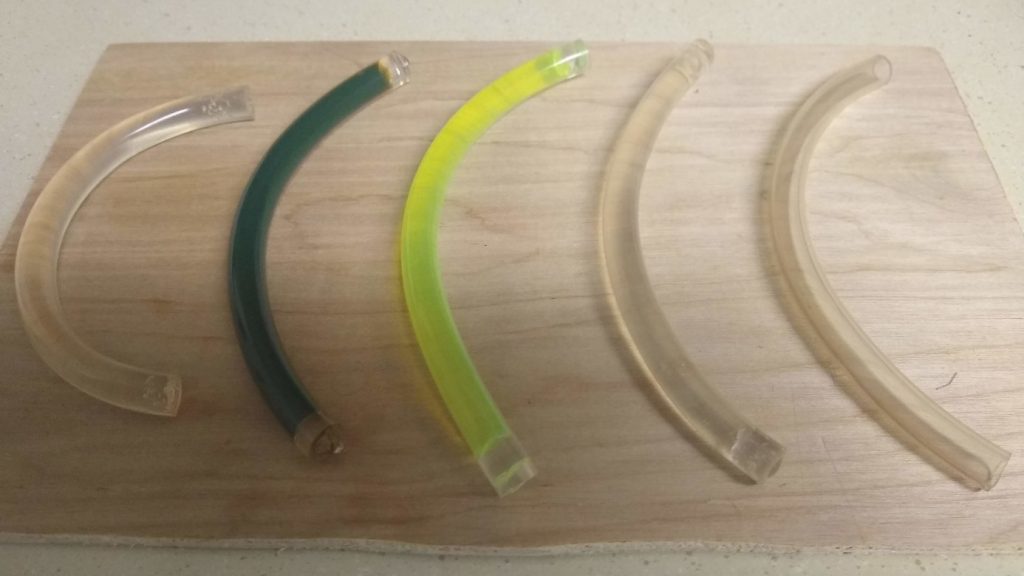
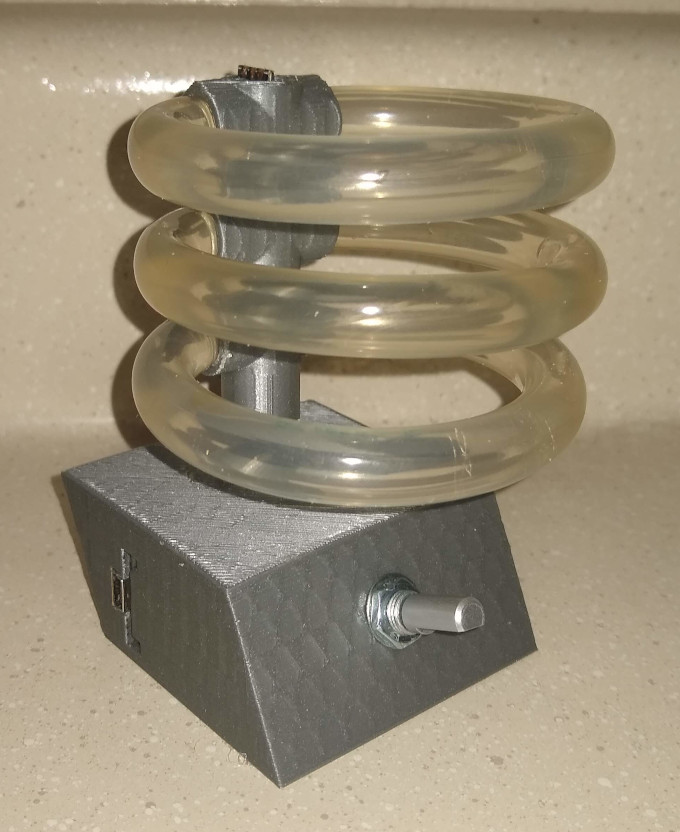
~Air: Probably should have started with this but for some reason I never tried it. The fact that it doesn’t work doesn’t excuse the fact that I should have tried earlier. ~Water: Sealed water in the tube with silicone. ~Fluorescent Water: Soaked a yellow highlighter in hot water and sealed that in the tube with silicone. ~Water So Fluorescent it’s Opaque: Soaked 5 colors of highlighter in hot water… more is not always better. ~Silicone: Clear silicone again. This time cured and cut before installing.
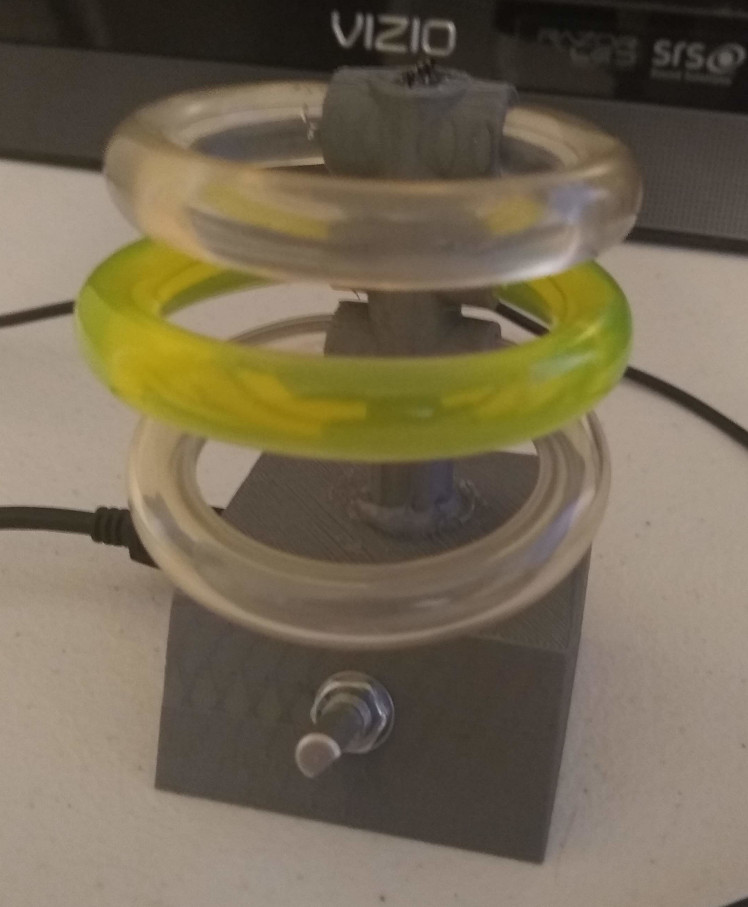
In the ring tower from bottom to top it’s air, yellow fluorescent water, and silicone.
The water tube leaked a bit when bent into a circle so I put it on the older tube tester. The fluorescent cocktail is just kind of gross. Maybe a lighter solution might work better, but I think I’m just going to count that as a total fail and pretend I never did that.
~Air: Apparently air is worthless, it obvious doesn’t refract light enough. There’s no value to air whatsoever, never use air for anything.
~Water: Water doesn’t seem to work as well as silicone, but it’s not a fair test because I’m guessing how it would look with both ends lit. I don’t think water has any advantages for the warp coil effect. It’s an equivalent or greater messiness and pain-in-the-neck factor with silicone and doesn’t work quite as well. Working with water adds the possibility of a spill killing the board, but silicone actually waterproofs everything. Also the interface between LED->Silicone->Water is probably why it doesn’t work, and it feels like it kind of defeats the whole purpose. The only thing I can think to use is that it’s a liquid so could be used for snow-globe particle effects stuff. If I could keep the bubbles small it might be interesting, but any air forms one bubble and does this action here. Kind of cool how it creates the swimming pool lighting effect when it reaches the LED, but idk how to use that right now.
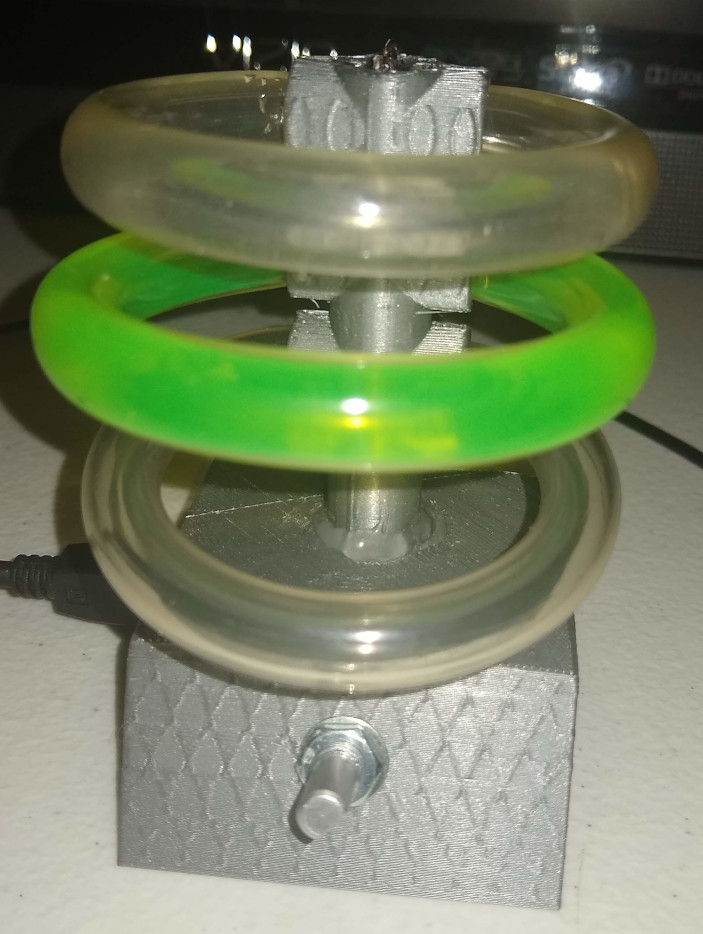
~Fluorescent Water: The yellow is an interesting effect. I think I’m seeing a bit of a luminance spike in the yellow\red range but I’m not sure how much of that is really UV being converted to visible light or how much is just the tint of the dye. In any case I don’t think it’s really worth the effort for this, but something to think about for special applications. The effect is only really dramatic when you compare under reflected light like these photos with the camera flash on and off:
Flash OFFFlash ON
~Silicone: Just looking at the tubes it seems like silicone has the highest index of refraction. I think that’s a desirable characteristic for waveguides but I’m not sure to what extend it matters since I’m doing zero calculations and this is really just artistic diffusion and I’m not even sure if I’m using the term waveguide correctly in this context. Anyway it seems like silicone is the highest and that’s the best. Also it clearly just looks better in the rig to me. Only problem is now when I look at them I can’t stop thinking they’re shower curtain rings.
And since silicone is clearly the superior material I went ahead and cut down the rings from the first test and jammed them back in the LEDs. The rings are a little small now but I’ll remake it all later. But here’s a video of the rig with the cured silicone and slightly modified demo code including an actual warp coil effect for these actual warp coils.
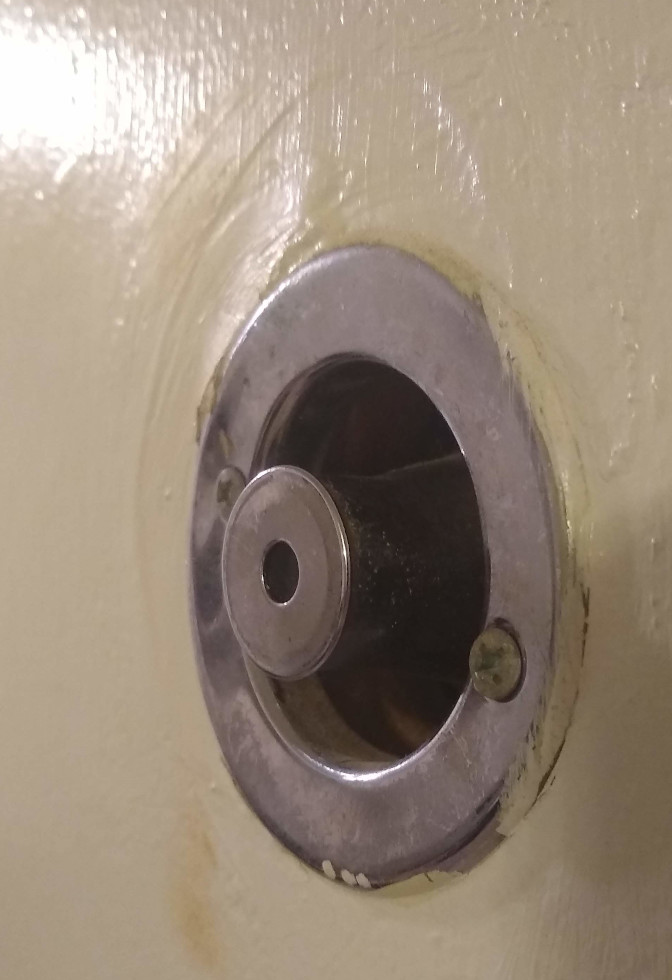
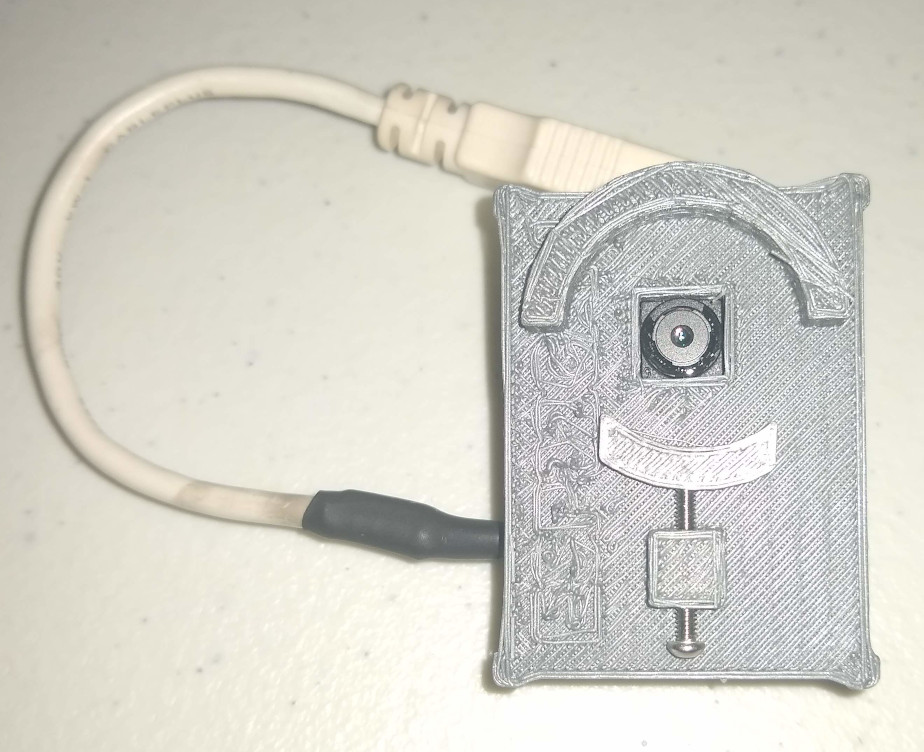
My door has a crazy turret peephole thing. It belongs in an arctic research submarine. It’s huge and it rotates. Pretty sure it was designed by Carl Norden.
The Norden Door Sight
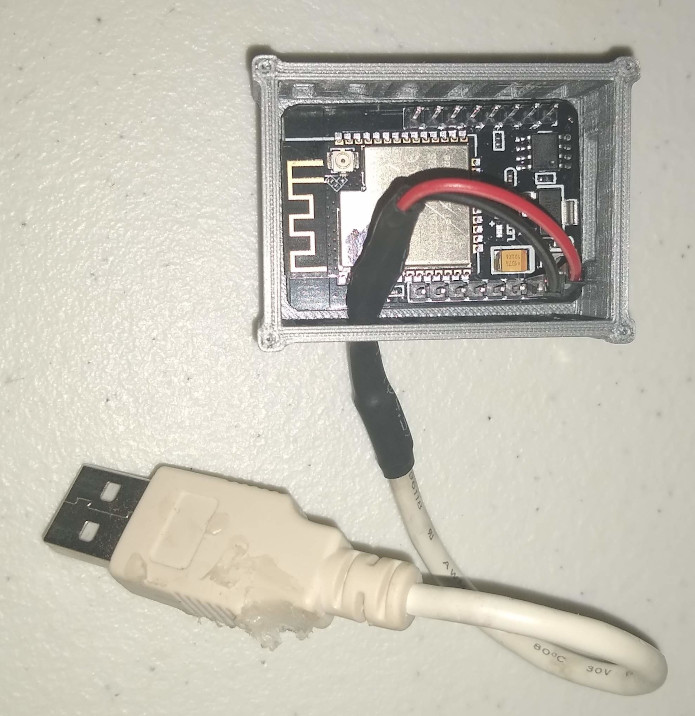
So I wanted to make a little peephole camera for it because it’s 2020 and I own a 3d printer and play with cheap microcontrollers with built in camera’s so why the hell haven’t I done this already?
I didn’t have a good answer for that question so I did this:
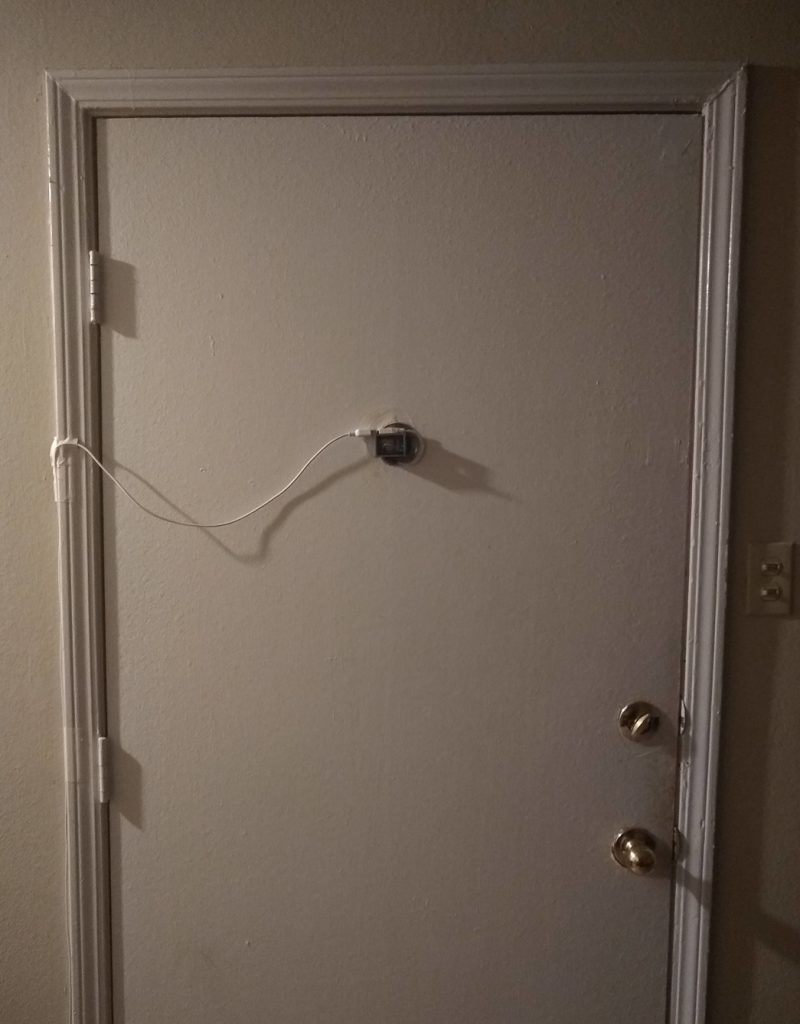
And I put it here:
And now I can see this:
And FYI this ESP32-CAM is running the esphome firmware and integrated into Home Assistant, which are two of the most awesome things I’ve encountered lately.
I won’t bother posting the 3D files or esphome yaml unless someone asks. The 3d files are just a crappy case I stole off thingiverse and modified to secure it to the end of a cylinder, and the yaml is straight from esphome examples. I’ll post some of the yaml I’ve made for servo controls with ESP32-CAM\Lolin32 boards a bit later, still working on making servo movements a little smoother. I’m having to relearn simple stuff like incrementing values in loops in yaml. Sadly literally none of my arduino code is remotely portable for any of this.
So here’s a little test of a ‘waveguide’ effect for LEDs.
This uses 5/8″ tube filled with clear silicone and I think it worked out pretty well. The video doesn’t capture the effect perfectly, it’s a little blown out, but you can get the idea that the light is being carried around the ring and looks a bit like it’s fluorescing from the liquid.
I started thinking about this awhile ago and finally got around to putting it all together. I initially started by trying to do tests with little sections of tubing attached to LEDs. Tried a few kinds of caulk and silicone but the only thing that really popped was the super clear silicone.
There’s a few tricks to the process. You have to fill the tube without any bubbles, which takes a bit of practice, patience, and elbow grease with a caulk gun. Then you have to smash the tube over the LED with enough excess to displace air and not allow any bubbles to form in between the LED and the tube, which blocks the light and dims the tube a lot. And you have to secure the tube to the LED to allow it to cure.
The simplest way to do all this was to just design and print the connector I had in my head for if the lighting effect worked. I made one section of tube and it looked pretty good, so I made this one with three sections.
The back ‘spine’ is hollow with a WS2812 strip doubled over so there’s an LED pointing left and right into each section of tube. The ‘waveguide’ carries light a few inches, enough for several configurations, but it can’t really replace EL wire or anything.
I didn’t include any STL’s or code because the silicone and acrylic is the trick, everything else is pretty simple to reproduce if you do this kind of thing, and if you don’t you should do that first before you start getting covered in silicone while playing with electronics.
Not sure why the video isn’t embedding but here it is.
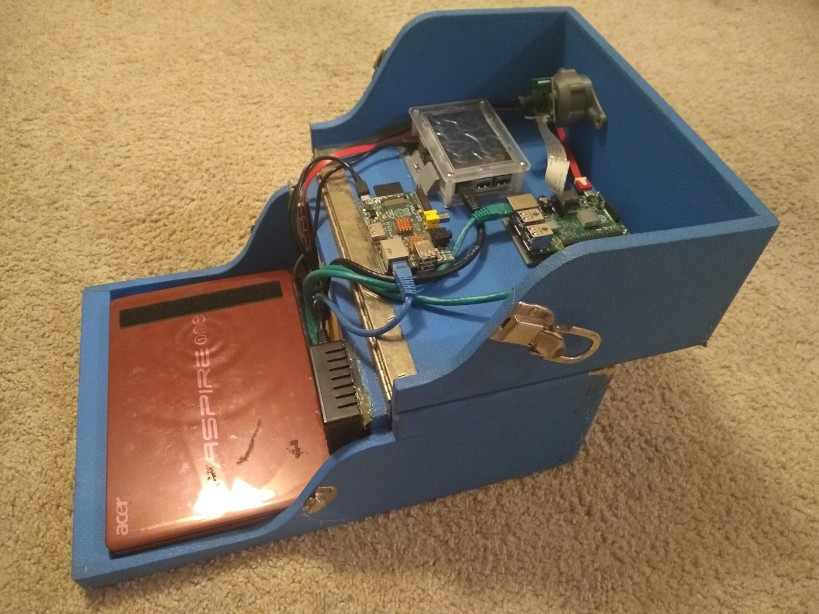
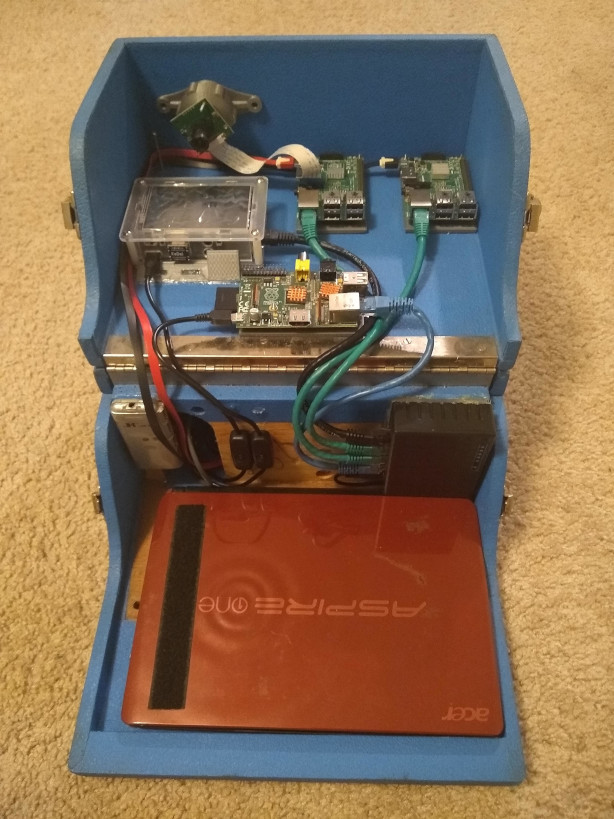
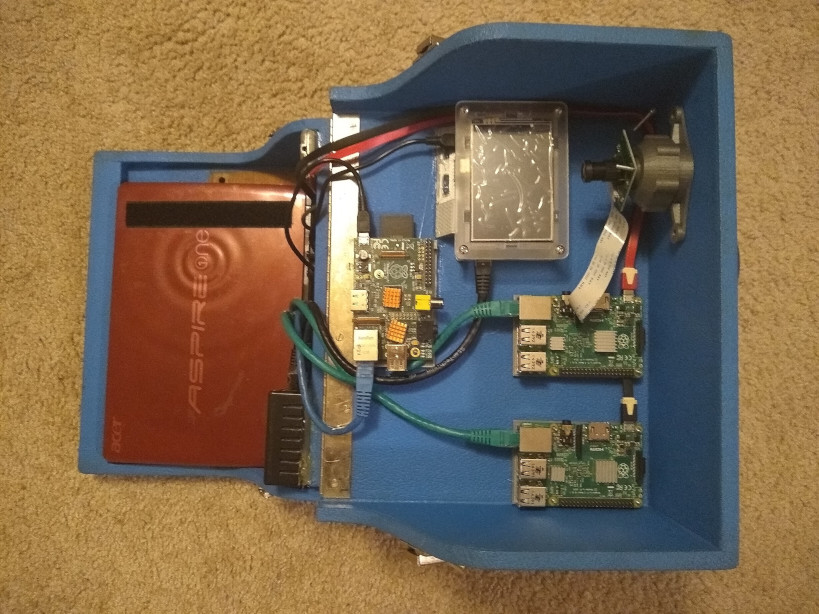
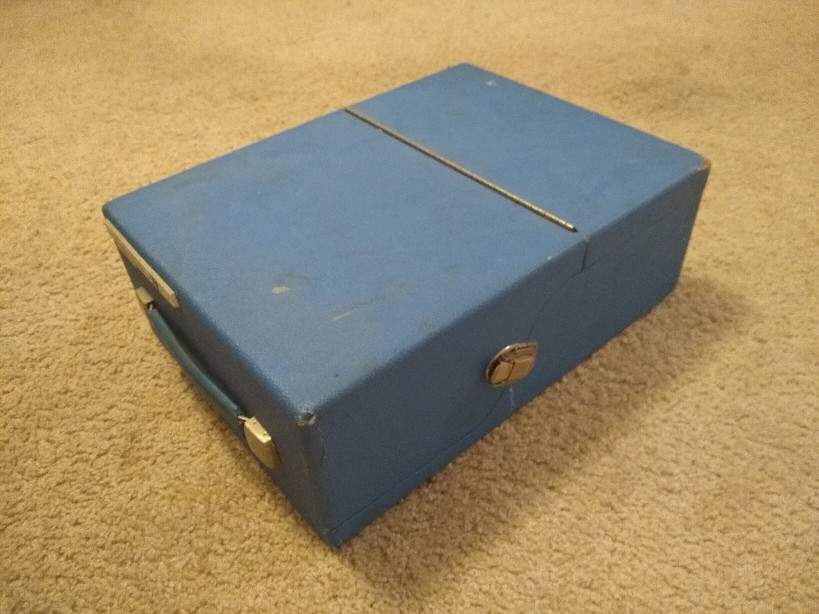
This is an old ‘hearing test’ box that I gutted and used for various projects. This time it’s filled with older raspberry pi’s. I mainly use zero’s now, but wanted to make a sort of functional retirement home for my pi’s. This rig has: (1) Raspberry Pi B (Original 256Mb RAM) WiFi Bridge to LAN (3) Raspberry Pi 2B+ ~WebCam ~LCD ~RTL-SDR (1) Acer Netbook running Raspian x86 ~Interface (1) 5-Port Ethernet Switch
I don’t turn it on much, but it’s a nice little package whenever I need to haul it out for something. Figured it deserved a post so here’s that.